How to Paint a Watercolor Disco Ball

I’m a self-taught artist who loves sharing tips and tutorials for painting with watercolor and gouache, and using the Procreate app on the iPad.
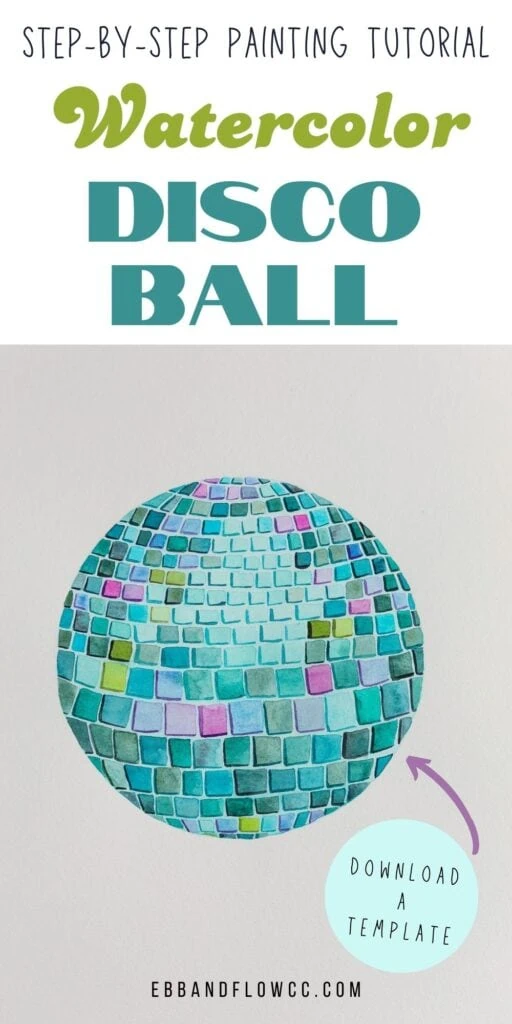
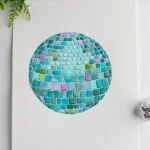
Learn how to paint a watercolor disco ball. This fun painting looks difficult, but it’s actually easier than you think. This step-by-step tutorial breaks it down into simple steps so that you can paint your own disco ball painting.
If you’re new to watercolors, be sure to check out these other watercolor posts.

This post contains affiliate links. By purchasing an item through an affiliate link, I earn a small commission at no extra cost to you. As an Amazon Associate I earn from qualifying purchases.
After seeing a million disco balls painted with acrylics, I decided to paint one in watercolor and share my process.
It looks intimidating because there are so many details, but it’s pretty easy. I find the process really relaxing and addicting. I’ve painted four so far!
Painting a disco ball can take several hours. So put on a podcast or audiobook and enjoy yourself.
A Few Words of Encouragement
If you’re new to watercolors, it’s easy to feel discouraged. Remember that the beauty in watercolor is the imperfections. Just take your time and enjoy the process. You can do this!
Disco Ball Basics
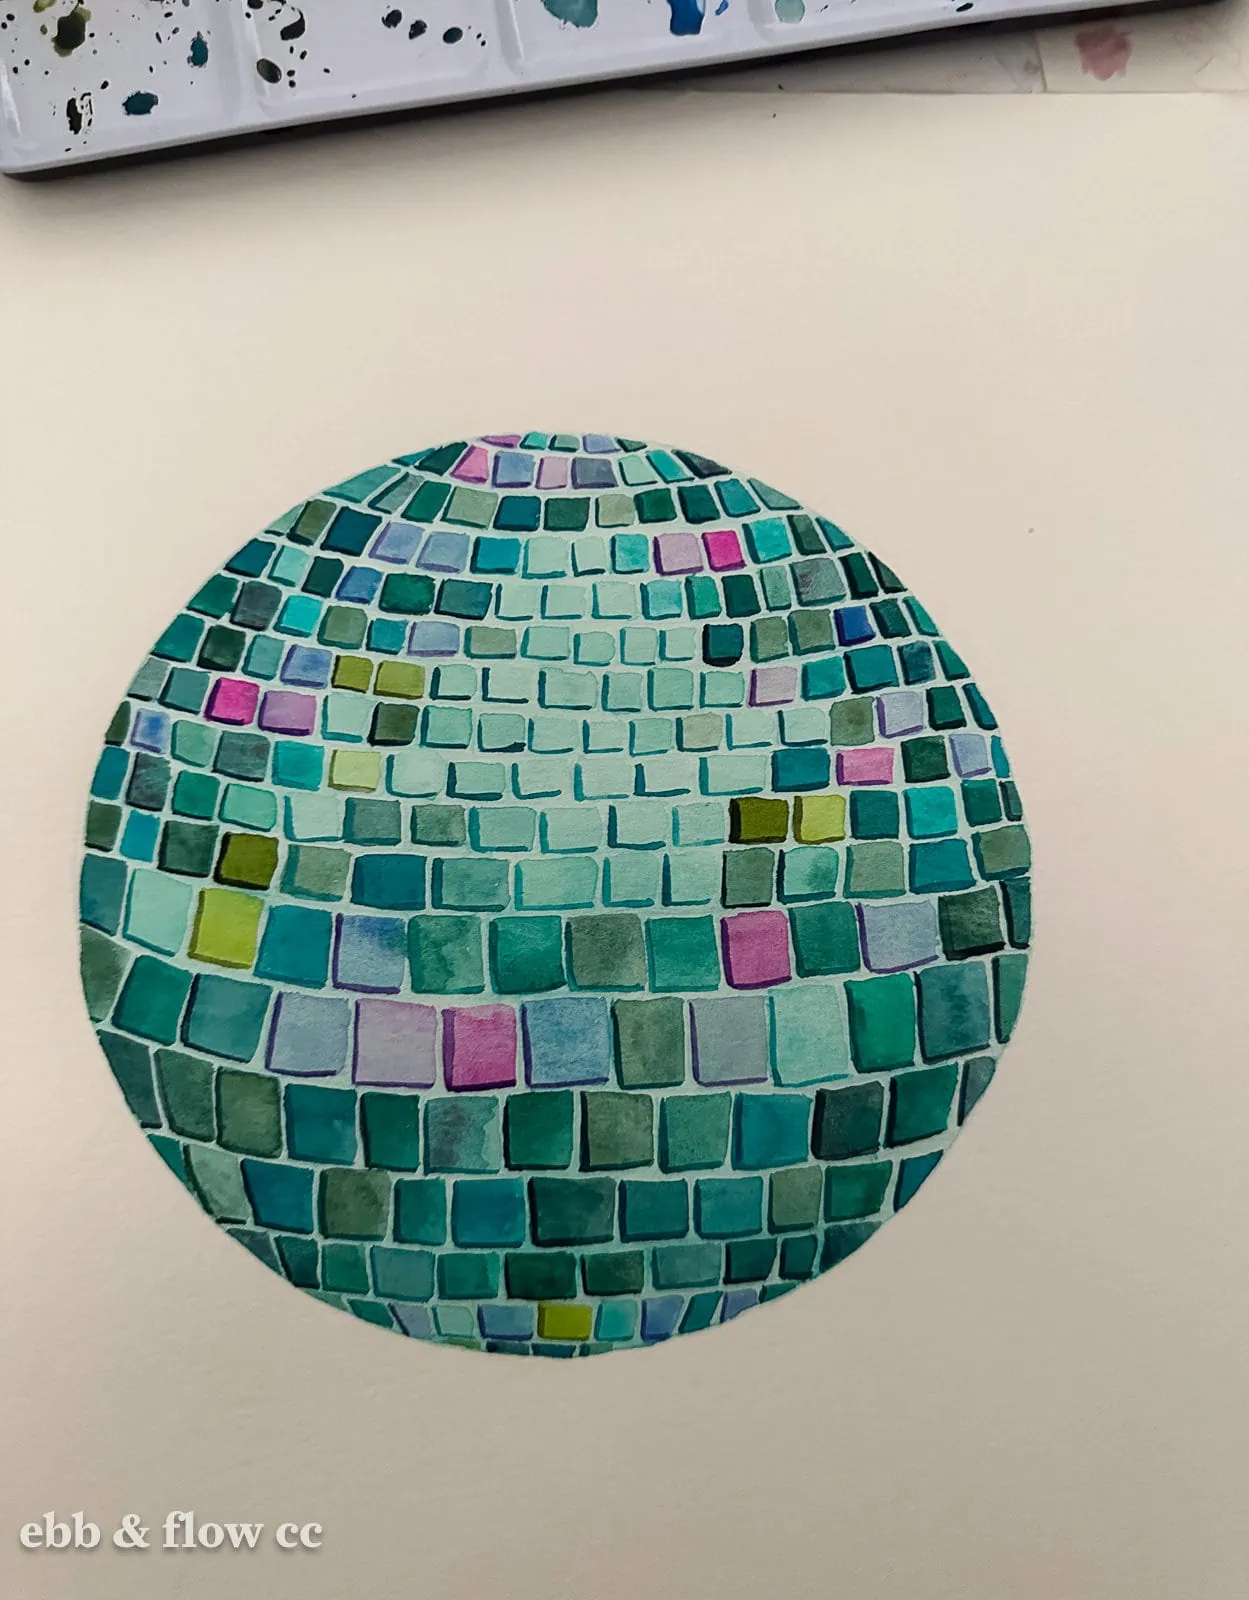
I love taking complex subjects and simplifying them. And a disco ball is pretty complex. Except, it’s really easy to simplify. It’s a shiny ball filled with a grid of squares.
The light parts are where the light is shining. All of the other areas are dark. The parts where those areas meet are mid-tones.
For the sake of simplicity, we’re using this basic shape as our guide. We don’t want it too perfect, though. Have some random spots for the best results.

Download the template at the end of this post.
Color Choices
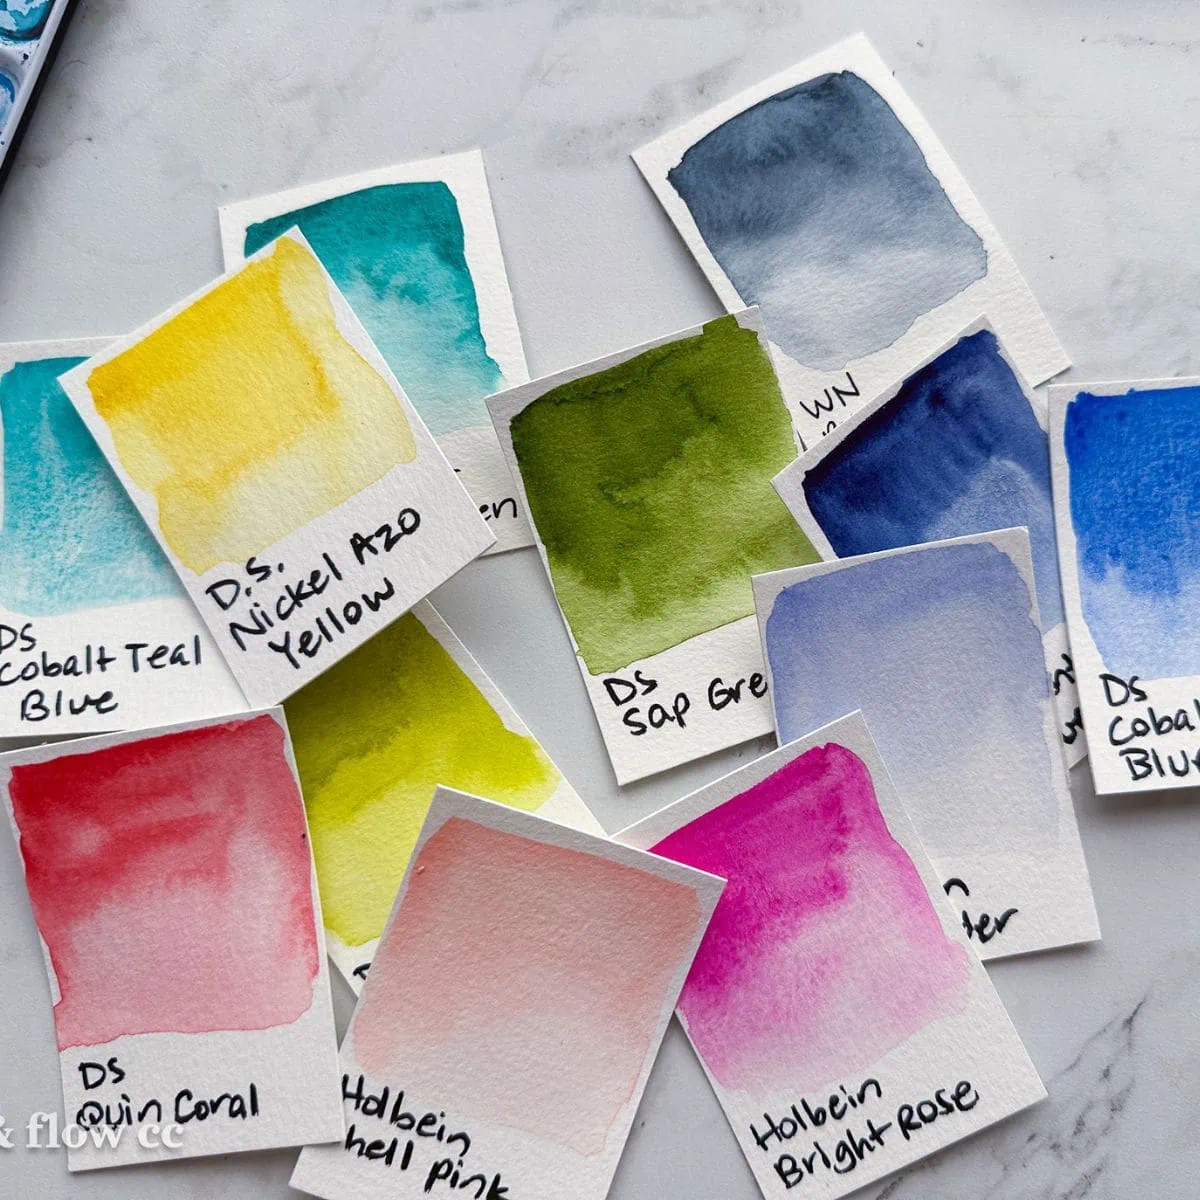
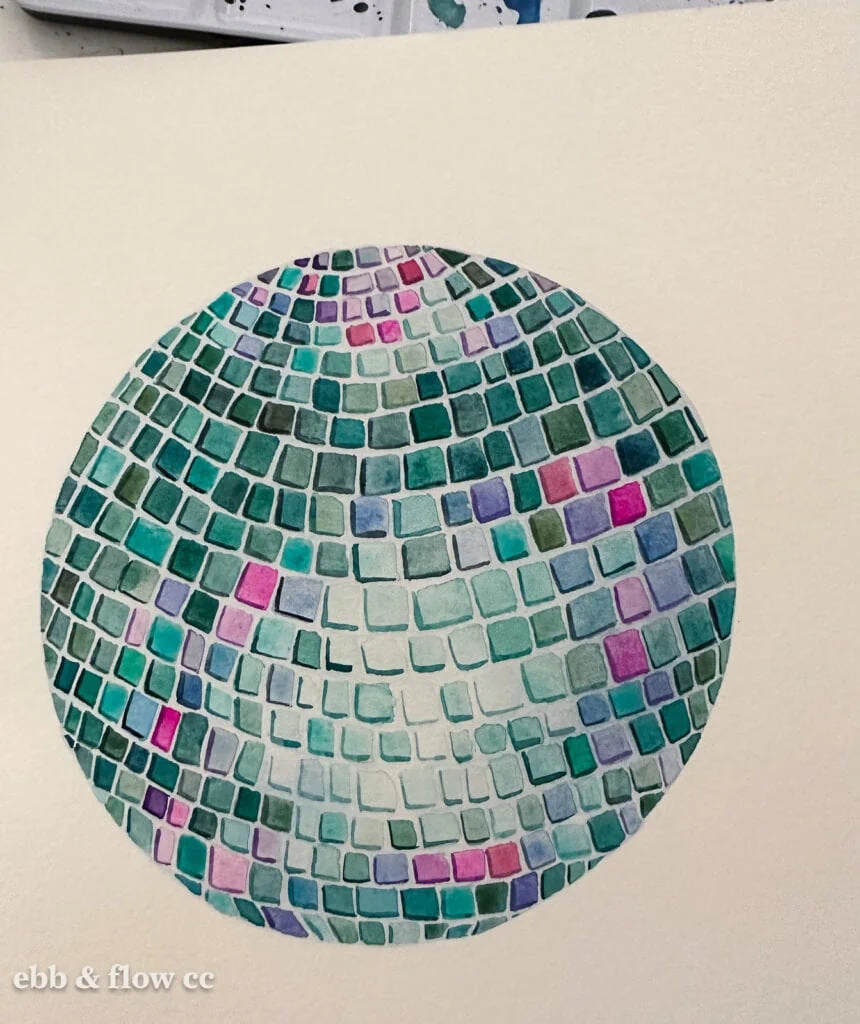
It’s best to choose a main color and a few accent colors. I chose teal as the main color for my disco ball and used pink and lime green as accent colors. The accent colors represent random stuff that is being reflected.
I also used a few blue and lavender colors to bridge the gap between the teal and the pink.
Once you choose your main color, ensure you can mix various colors in that shade. You need darks, light, and midtones.

The more colors, the better. This is where a large paint stash comes in handy. Mix your colors if you don’t have a large paint stash. If you have colors that granulate, these colors make really beautiful mixes.
How to Paint a Watercolor Disco Ball
Supplies Needed:
- Watercolor Paper
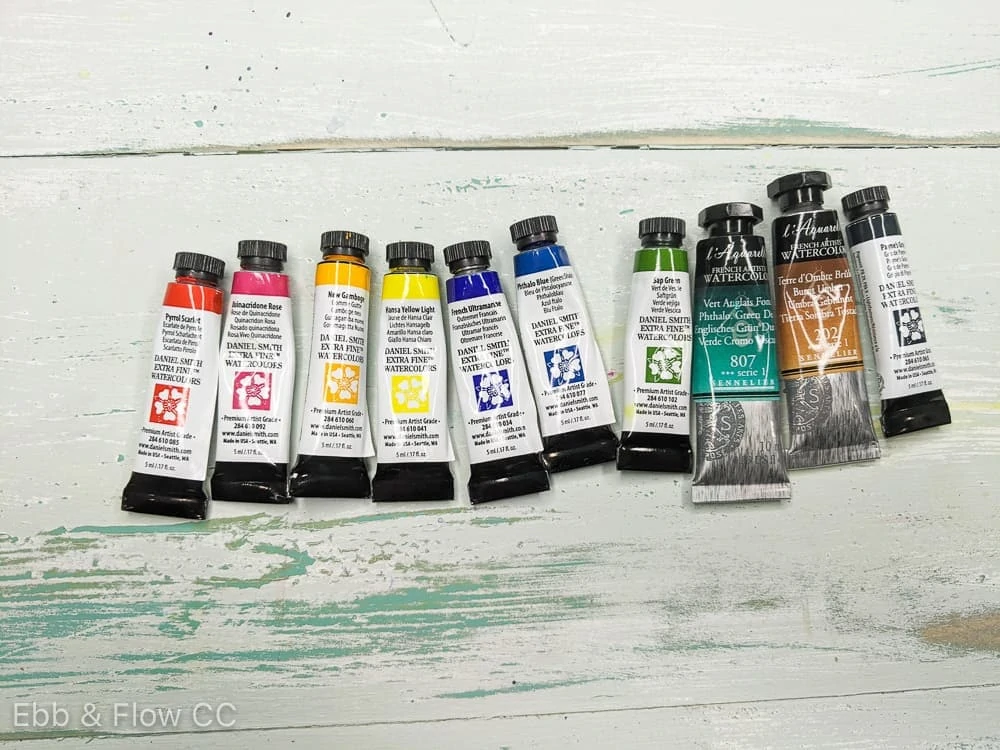
- Watercolor Paints in the colors described above
- Pencil ( I like these pencils because it blends in and doesn’t smudge)
- Kneaded Eraser – This eraser won’t damage the paper or paint
- A bowl to trace (or a compass)
- Watercolor round brushes (I used a size 6 for the base coat, a size 2 for filling in the squares, and a size 00 for the details)
- Mixing Palettes (I like to use these dishes to mix large amounts of paint)
Normally, I’m a big fan of using what you have, but I recommend using a tiny brush for the details. Larger brushes look sloppy, and you won’t be as happy with the details. Trust me, use the 00 or even the 000 brush!
Getting Started
My photos show two different paintings in progress. The process is the same and so is the outcome. But the base color is different in each one.
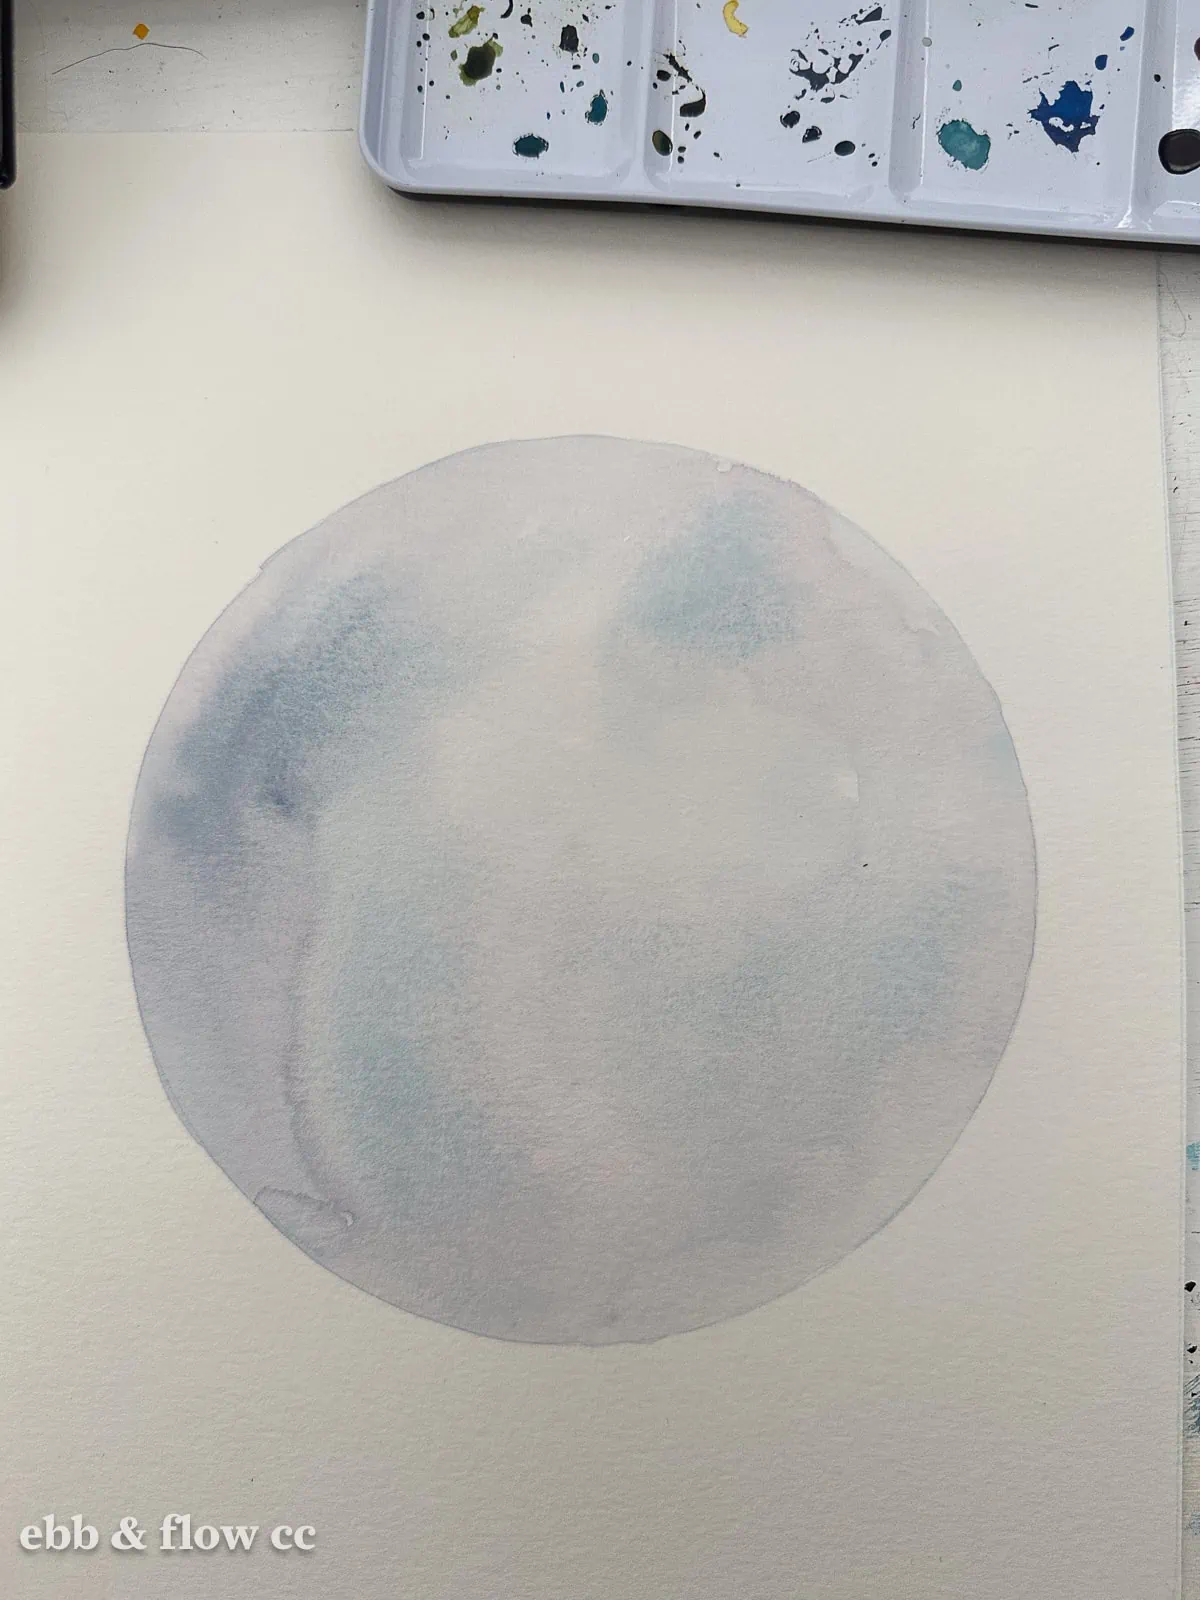
- Use your pencil to trace a circle in the center of the paper. I used a bowl. Use a color that blends with the background color. Draw lightly so that a harsh pencil line isn’t visible.
- Mix up a large amount of the diluted color you chose for your main color. This base layer needs to be very pale.

- Paint the circle and let it dry completely.
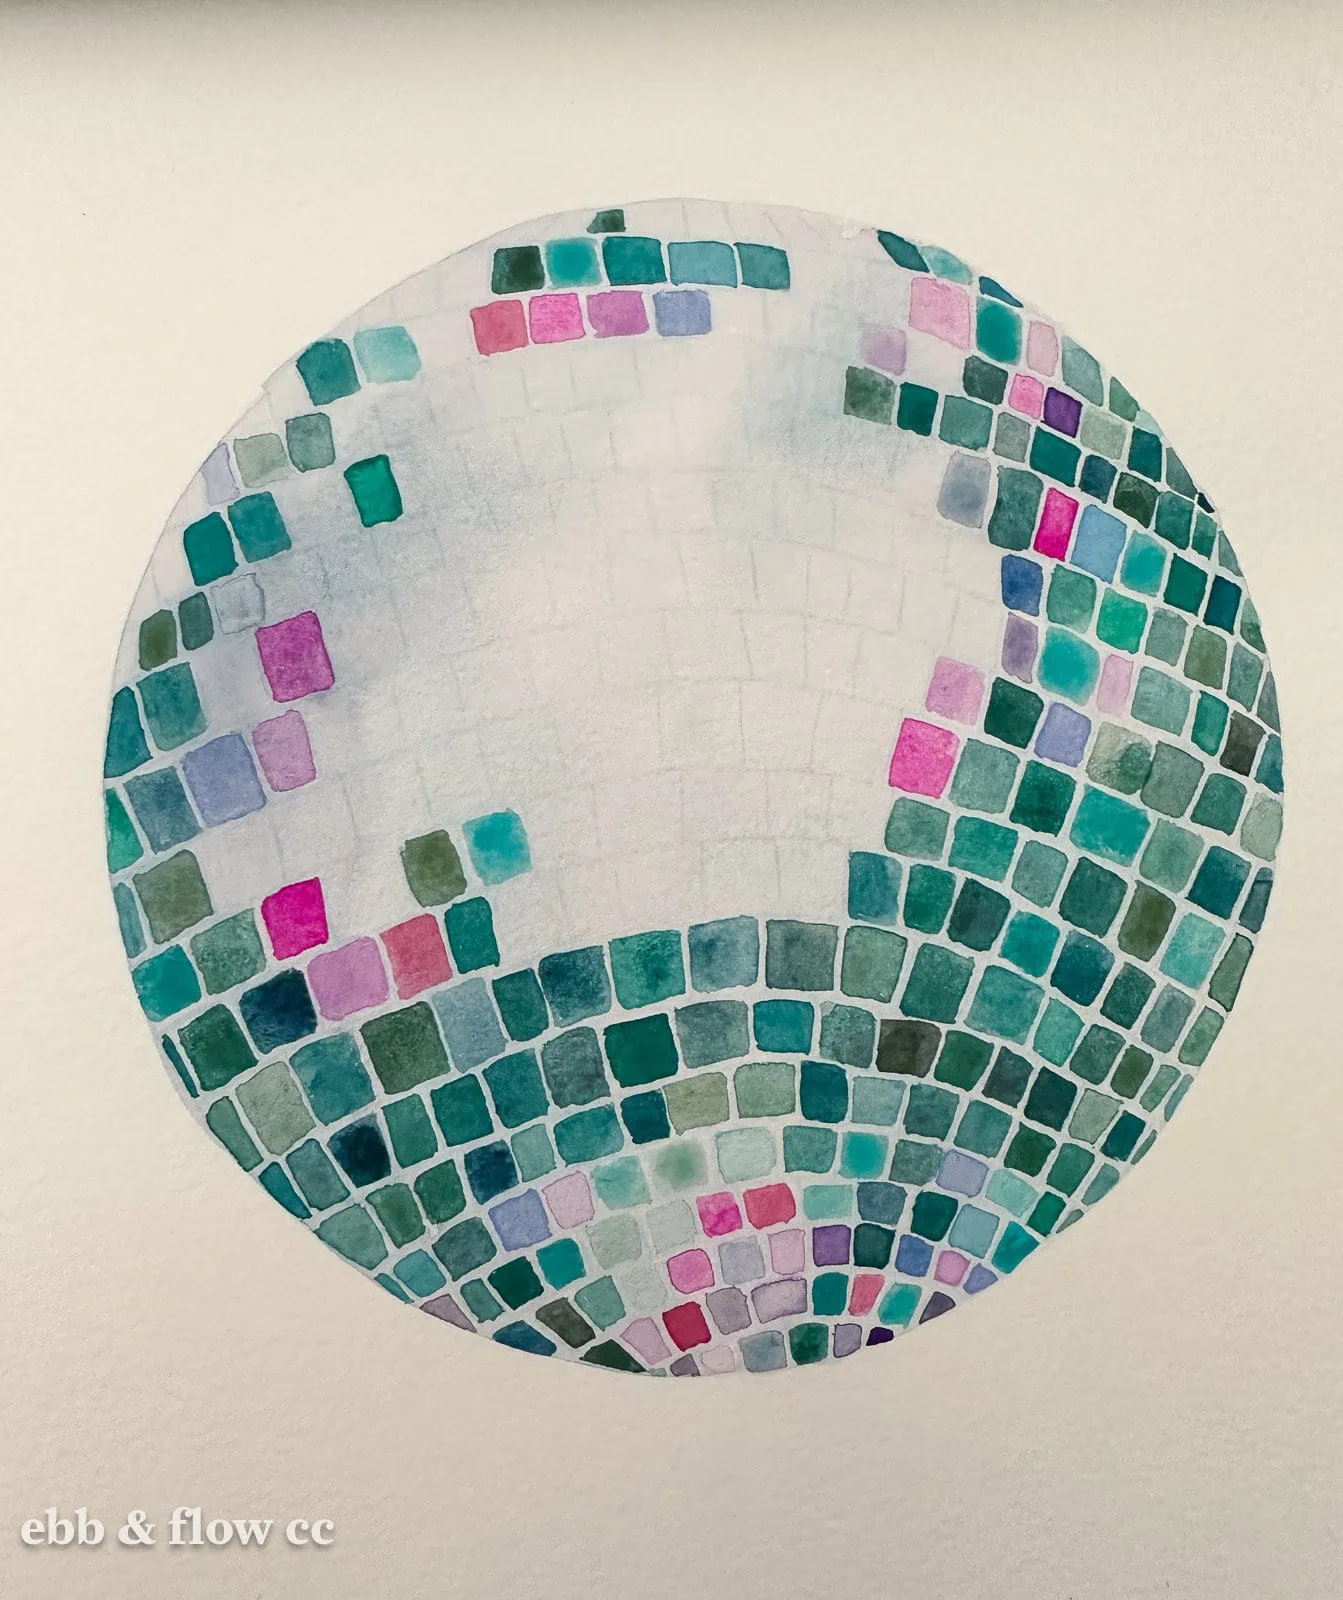
- When the paint is completely dry, draw gentle arcs on the circle using the pencil. The rows in the center should be a bit thicker and get smaller as they get close to the top and bottom.
- Add the vertical lines to create the squares. Try to stagger the squares as you go. This looks more interesting.
- It’s okay if they are slightly different sizes.
- The edges should be very small and angled.


Painting the Mirror Squares
- Start painting the darker colors.
- Paint one square at a time, skipping around.
- Try to spread your colors around in the dark areas. The colors should be dark but still have a nice amount of water mixed in. We’re not going for opaque.
- Continue filling in the dark areas, staggering the edges a bit.

- Leave a few spots unpainted.
- I like the edges to be painted in both dark and medium colors.
- When you have most of the dark area painted, add your accent color to the unpainted areas and a few others. These are accents, so don’t go overboard. I wouldn’t add more than 5 or 6.

- Paint a few spots with a color that bridges the two. For my disco ball, I used blues and lavenders.
- Paint some squares with a midtone of your main color.
- Use the diluted paint that you used for the background to paint the lightest area. (You will probably need to add more water at this point.)
- Try to vary the tone a bit.
- Finish painting any unpainted squares.


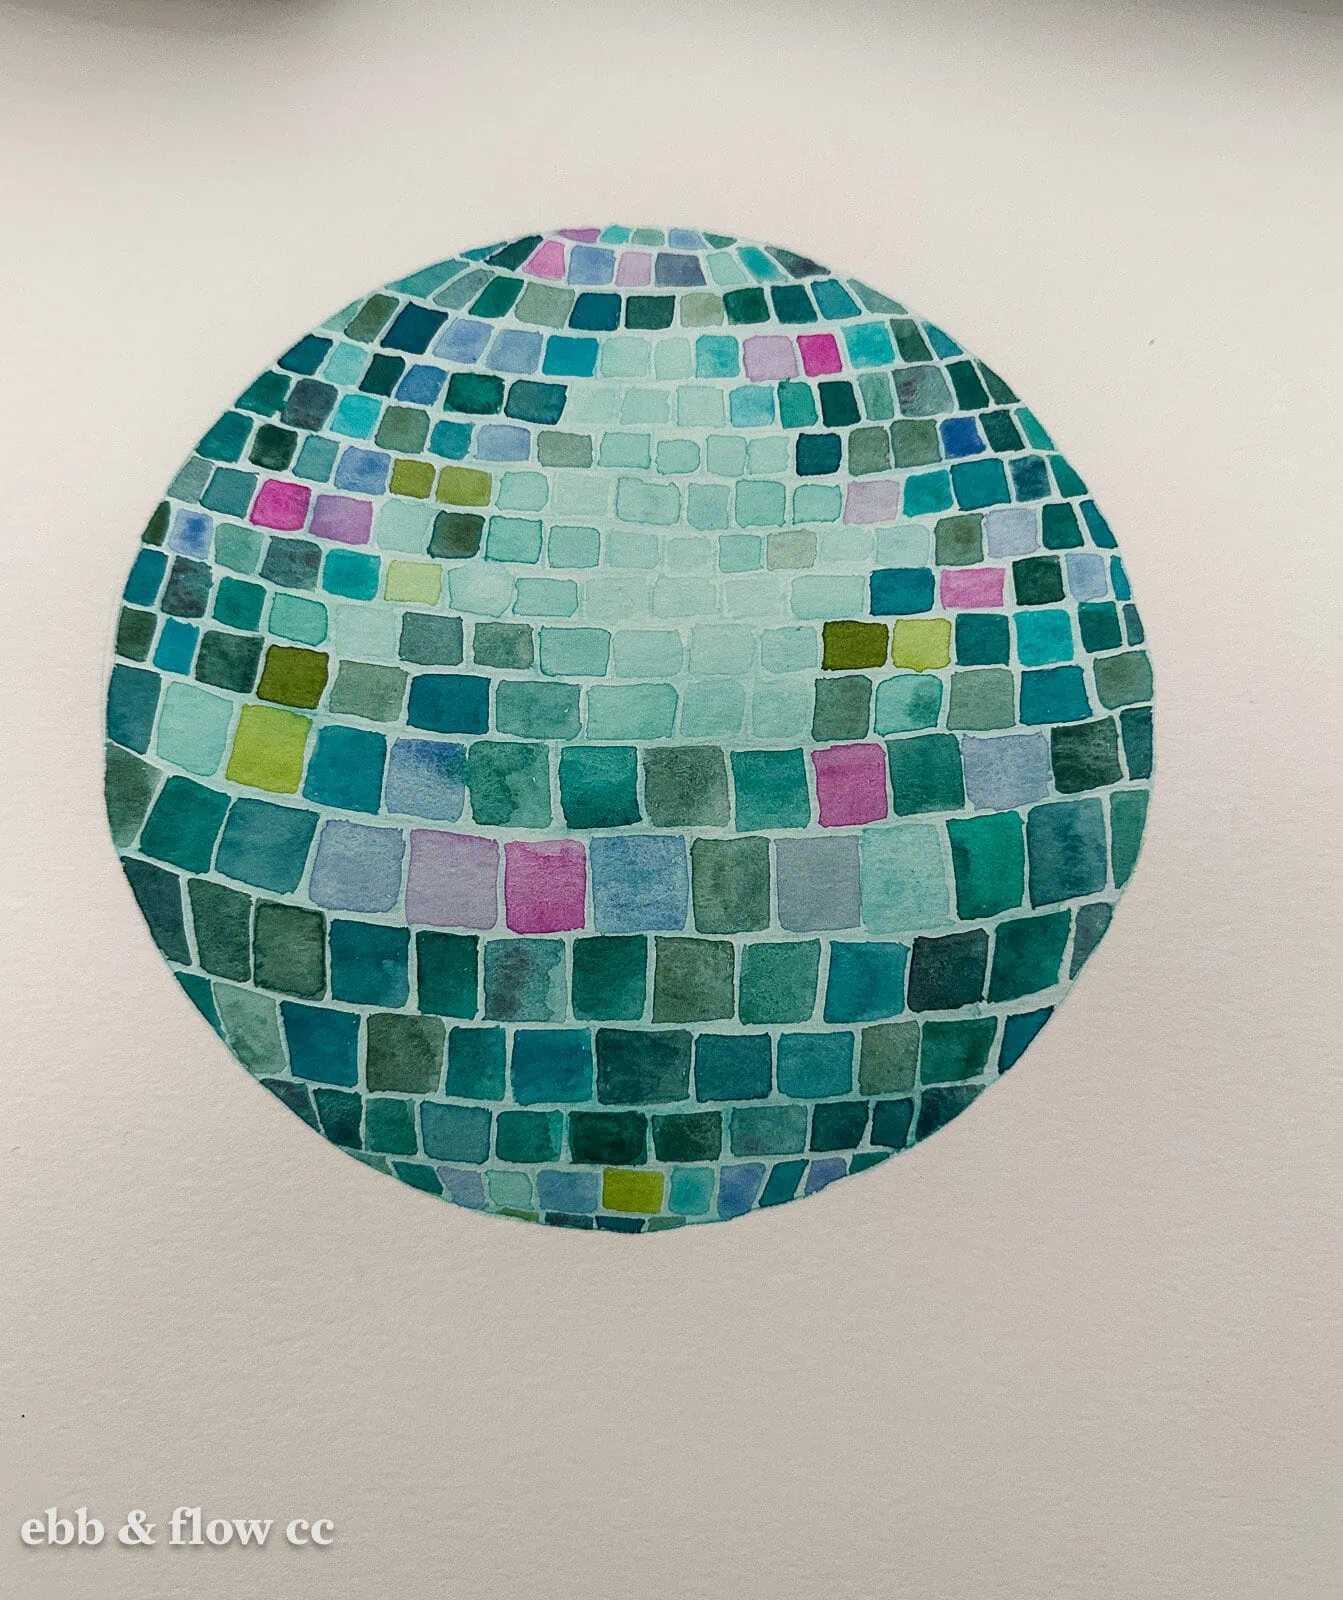
Painting the Final Details
- Let the paint dry completely.
- Make sure that your painting is facing the right way. (I painted one with upside-down shadows, and I was very upset.)
- Choose your shadow color. I chose to use a darker version of the colors I used, so I used a dark teal and a purple (for the pinks and lavenders.)
- Use the tiny paintbrush and start painting lines on the bottom and one side of your painting. If you followed my guide, the shadows should be on the left side.
- Work on one side at a time. You can move your paper as needed to get better access to areas. Just be careful not to touch wet paint.

- When it’s done, you can leave it as is, or you can add a background.
- If you add a background, tape the edges. The areas near the disco ball are painted lighter with darker edges to make the disco ball look like it’s glowing.
- Use a kneaded eraser to erase any stray pencil marks.


Download a Disco Ball Template
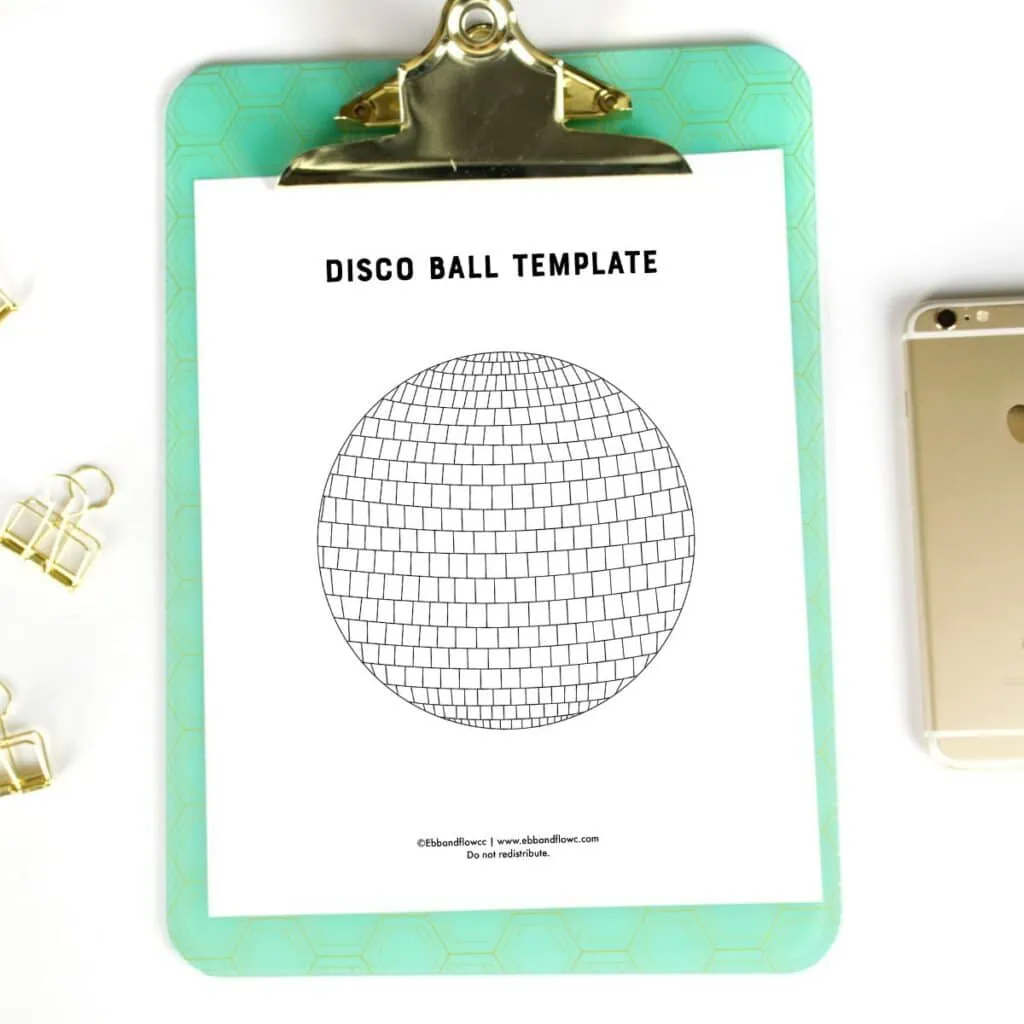
Black and white version
These downloads are for personal use only. Please do not redistribute or sell.
Dear teachers and students: this download will not work if you try to access it when logged into your school email account. Try a personal email account instead.
Other Watercolor Painting Tutorials
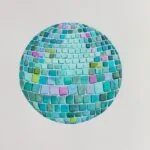
Pin for Later!