How to Resize Photos for Etsy

I’m a self-taught artist who loves sharing tips and tutorials for painting with watercolor and gouache, and using the Procreate app on the iPad.
Learn how to resize photos for Etsy. This simple tutorial shares how to easily make your photos smaller for uploading to Etsy.
You might also be interested in these other Etsy shop tips.

This post contains affiliate links. By purchasing an item through an affiliate link, I earn a small commission at no extra cost to you. As an Amazon Associate I earn from qualifying purchases.
Don’t you hate when you spend hours getting your photos ready and edited for Etsy and they won’t upload because they’re still too big?
This happens to me a lot when I create mockups for digital products with Adobe Illustrator. I save my images at a high resolution, which triples the size of the jpegs. (There’s probably an easier way to fix this, but for now, this is how I do it.)
Screenshots and photos from my phone are other culprits.
Luckily, there are really easy ways to edit your photos.
How to Resize Photos for Etsy
There are a million ways to resize your photos, but I’m going to share the ones that I use the most.
Please note: these options are for desktop/computers as opposed to phones. I don’t use my phone for this kind of work because I prefer to work on my desktop. I’m sure there are really great apps for phones as well.
By the way, here’s a link to the current size recommendations for Etsy photos.
Your Computer Photo Editing Software: The Free Way
Did you know that you probably have software on your computer that easily resizes photos?
This tip has saved me so much time. I never use this basic software for editing photos, but when I need to resize a photo, this works so quickly!
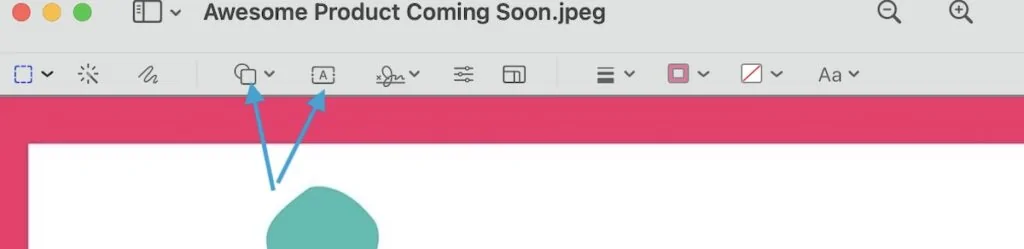
Mac Users
Here are the directions for Mac users.
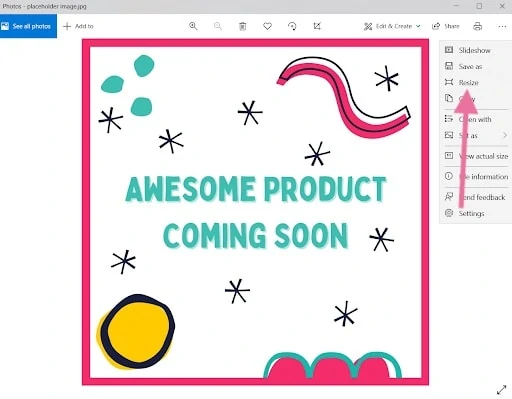
- Double-click the photo to open the photo in the Preview window.
- Select the Tools menu and choose “adjust size”.

- Type in the size. Make sure that the box by “scale proportionately” is checked so that you don’t skew your photo.


You can also add simple text or simple shapes and arrows using the options. (This is how I make these screenshots smaller.)
PC Users
If you’re on a PC, there is also an easy way to resize photos.
- Open the photo and click on the 3 dots in the right top corner.

- Choose resize image from the menu.

- Select custom dimensions and type in your dimensions.


Canva or PicMonkey: The Cheap Way
Canva and PicMonkey are cheap options for online photo editing.
Canva is free, but there is a paid option with more features, including resizing photos with a button. It’s $9.99 a month. PicMonkey is currently $7.99 a month.
Canva is my preferred software because it makes more sense to me. I have the Pro version, which allows me to add my own fonts and branding info. I also use Canva to make long images for Pinterest.
If you use it a lot, it’s totally worth the $9.99 a month.
The paid version allows you to easily resize the image with a button, although there’s probably a workaround to resize photos for free. It will just take a bit longer.
- Under create a design, select edit photo.

- Select the photo to edit.
- A preview of the image will pop up. Choose Edit photo.

- The image will open in a new tab.
- Select the resize tab in the top left corner.
- Type the desired dimensions into the box.

- If you click the lock button, it locks the proportion ration to avoid the image from getting skewed. Then you can just type in one of the dimensions. This works well because Etsy tells you to use 2000px for the horizontal edge.


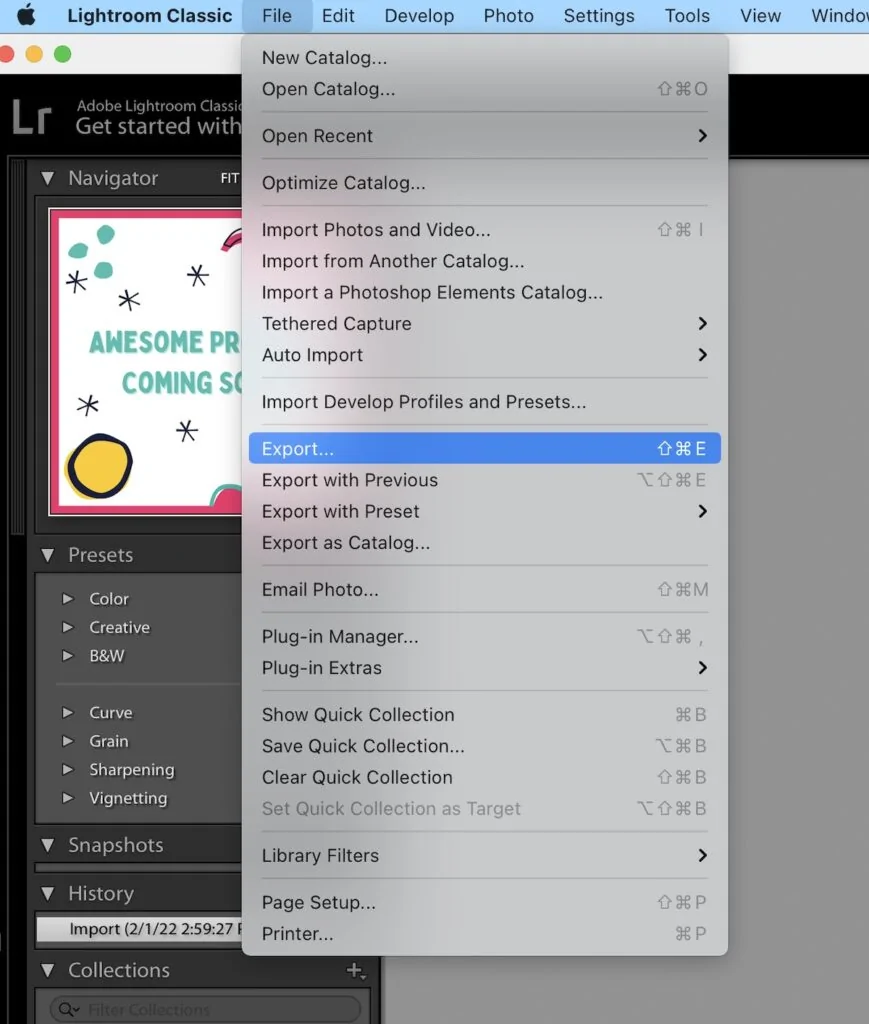
Adobe Lightroom: The Premium Way
I already pay for the Adobe Creative Cloud, but even if I didn’t, I would pay for Lightroom. It saves me so much time because you can batch edit photos in seconds.
This is NOT a lightroom tutorial because that would take forever to explain the important options.
However, resizing is easy.
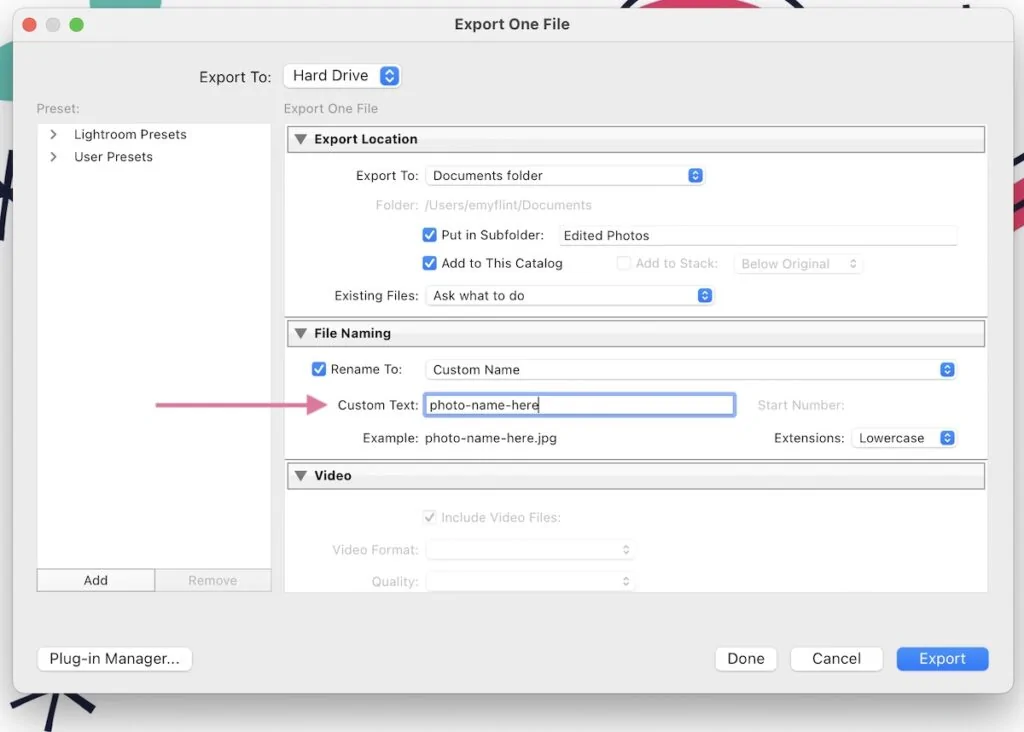
After you edit your photo, select export. You have a lot of options in the export menu.
Scroll down to image sizing and choose the size for the longest side. You can also just enter the dimensions.
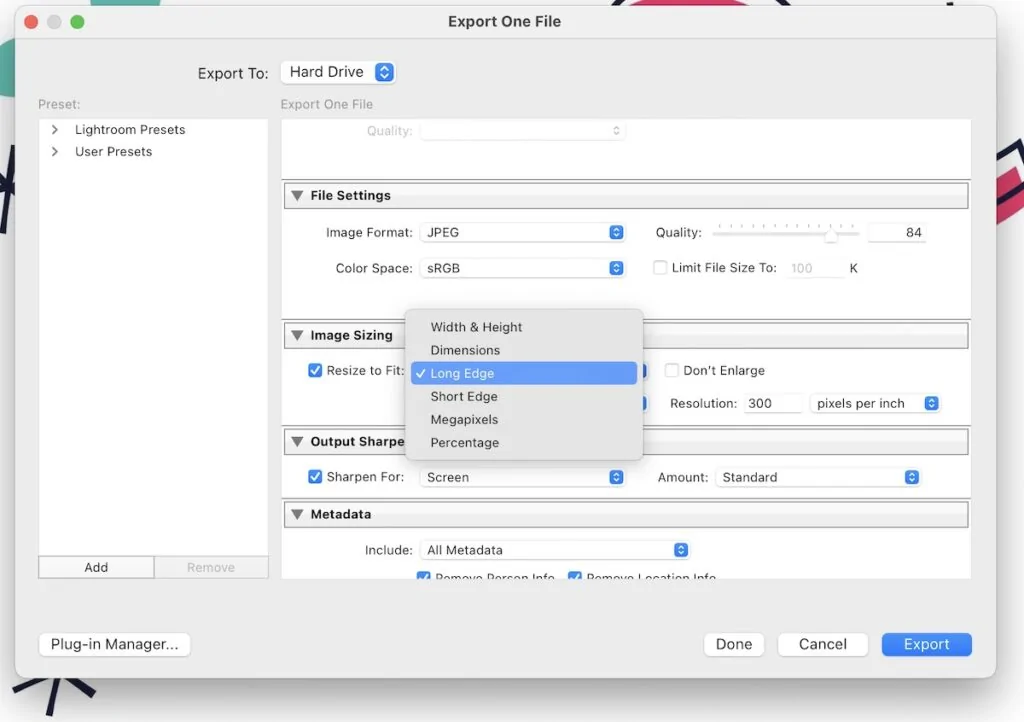
Lightroom also allows you to easily name all of the photos, which can be helpful for SEO. It’s closer to the top.
You can also add a watermark, which I find really helpful.
When you’re finished, click export.
You might also like:
Pin for Later!