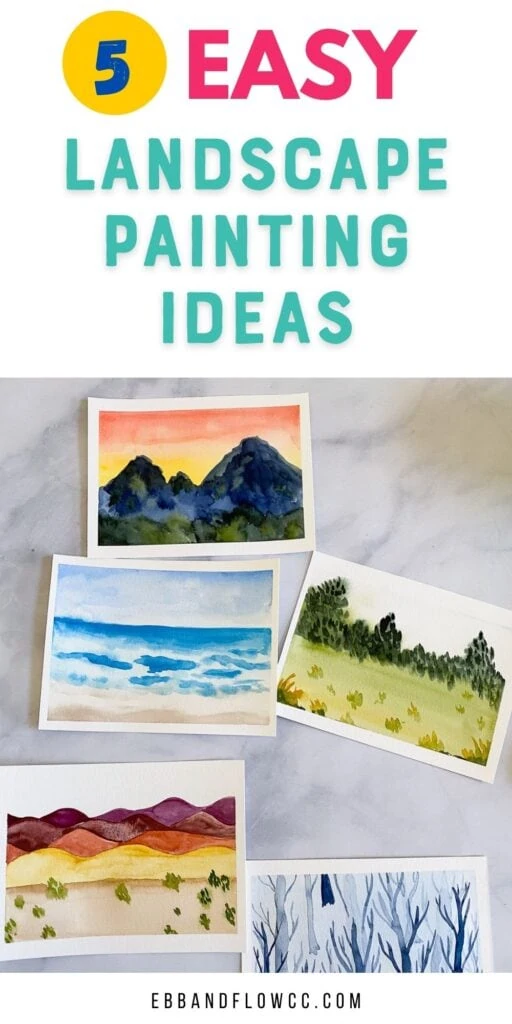
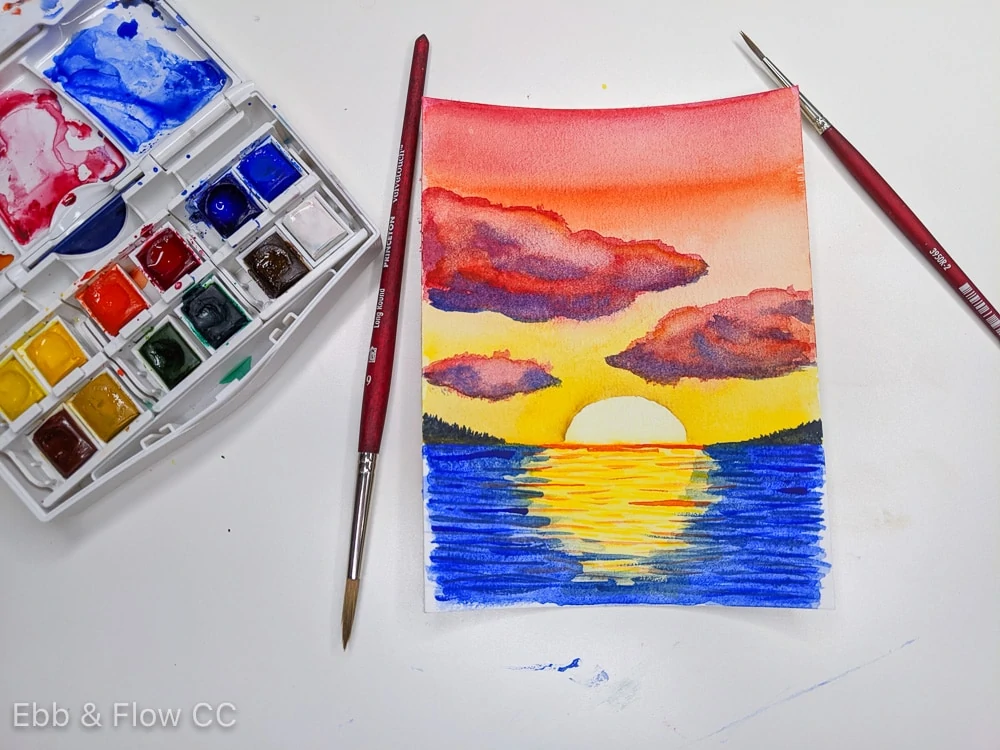
5 Easy Watercolor Landscape Painting Ideas

I’m a self-taught artist who loves sharing tips and tutorials for painting with watercolor and gouache, and using the Procreate app on the iPad.
These easy watercolor landscape painting ideas are perfect for beginners. They feature simple, abstract landscape features that anyone can paint.
You might also like these other watercolor tutorials.

This post contains affiliate links. By purchasing an item through an affiliate link, I earn a small commission at no extra cost to you. As an Amazon Associate I earn from qualifying purchases.
This is not a tutorial for realistic landscapes.
I kept these landscapes a bit abstract and simple because I think there is beauty in simplicity.
I also love exploring how watercolor works and flows into other colors.
And I want to make watercolor painting accessible to everyone, not just those who can replicate an image perfectly.
I hope you enjoy these easy watercolor landscape ideas for beginners. These were so much fun to make.
5 Easy Watercolor Landscape Painting Ideas
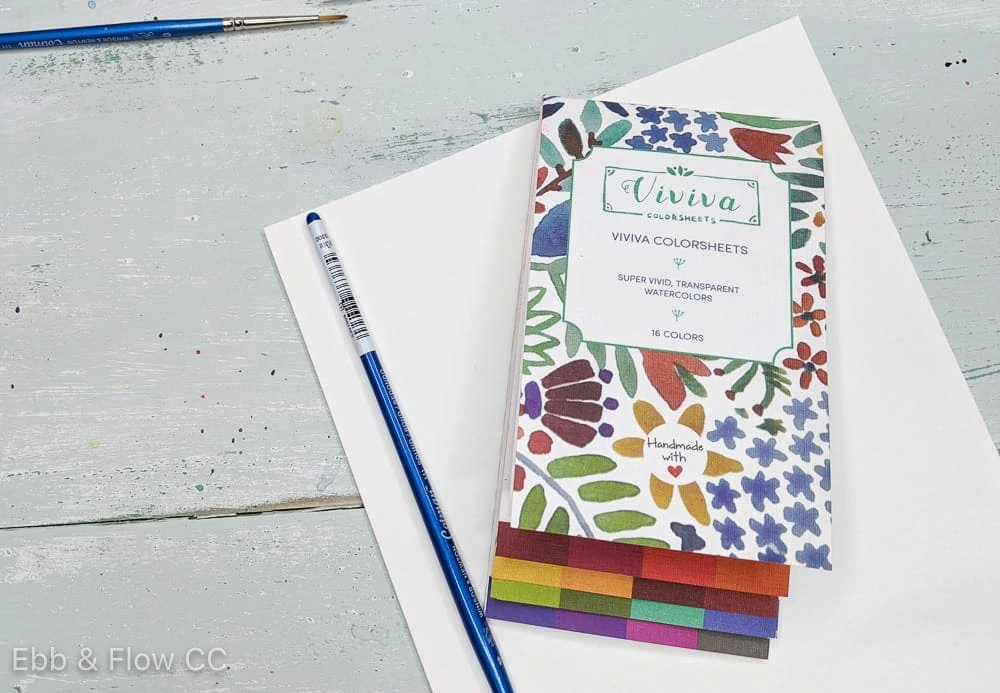
Supplies Needed:
- Watercolor paint
- Watercolor brushes
- Watercolor paper or watercolor sketchbook
- Washi tape
You can use any watercolor paint that you want. If you want to learn more about my favorite paint for beginners, read this.
I used flat brushes and round brushes for these tutorials. The flat brushes are used for the washes and the round brushes are used for details.
Watercolor paper is required because these techniques use a ton of water. The paper I recommend is cheap though.
Variations for these Watercolor Landscape Paintings
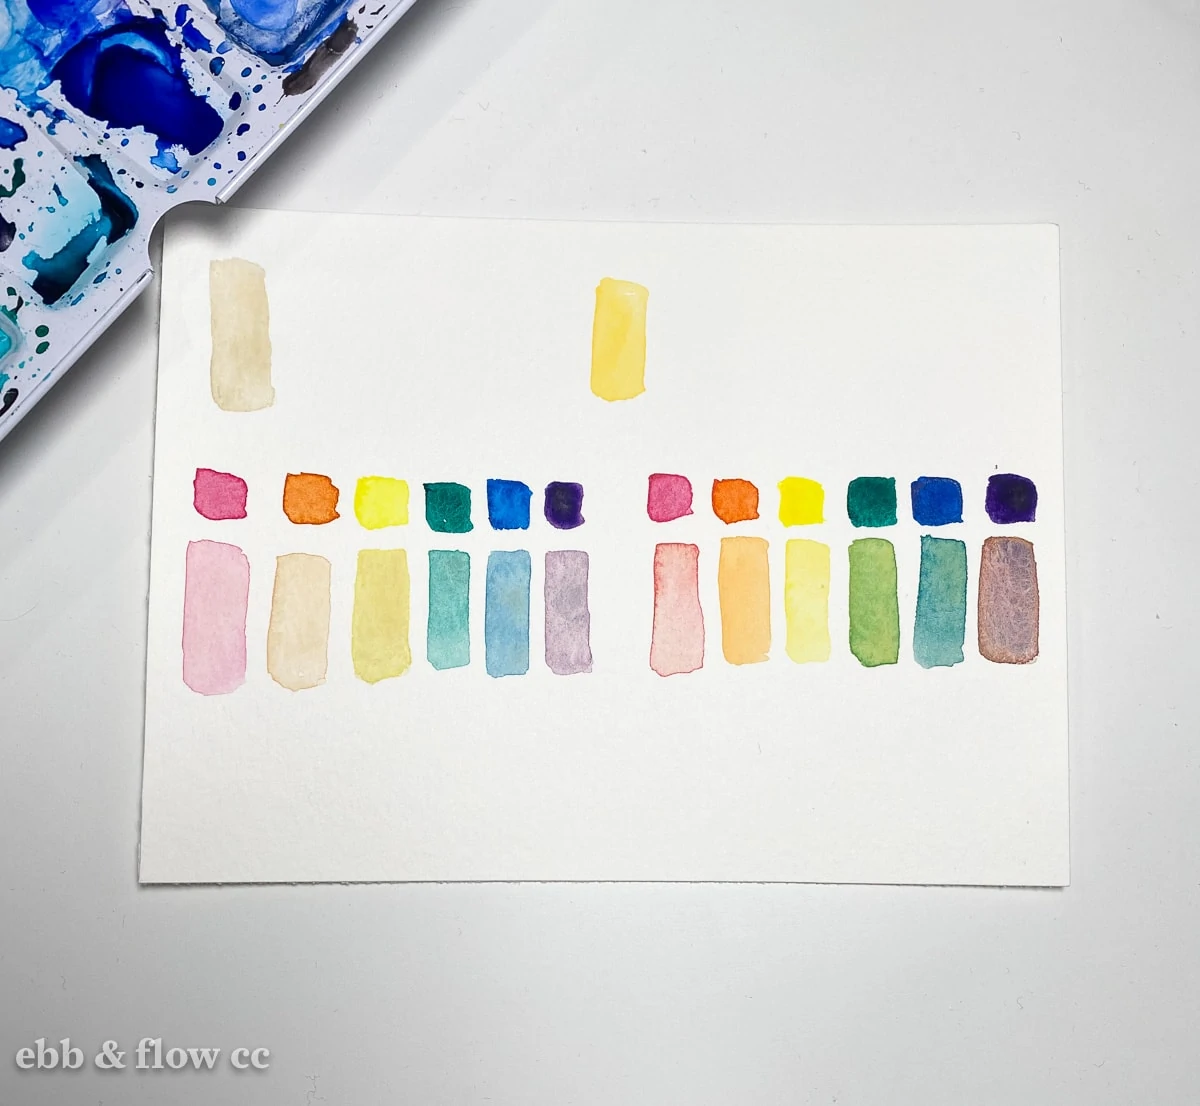
- Changing up the color schemes can change the entire feel of the painting. Warm colors make you think of the desert. Greens make you think of fields or forests.
- Try using colors not found in nature to create completely abstract landscapes.
- Make everything darker to look like night.
- Play with different levels of allowing the paint to bleed. Wet-on-wet effects can cause some really fun textures.
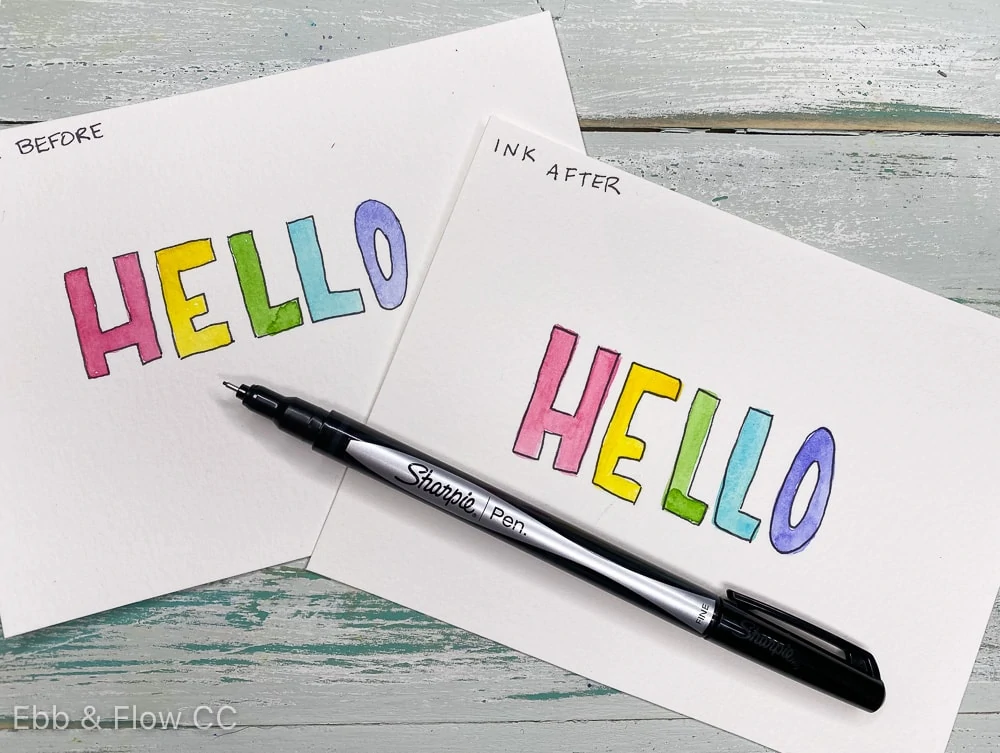
- Add other media, like ink, colored pencil, or gouache to add details on these paintings.
- Try adding paint splatter.
- Add as many details as you want. Or keep them simple.
Quick tip: Landscapes look the best when they are divided into thirds. It’s more pleasing to the eye than if you cut the page in half.
Watercolor paint is dry when it no longer has a sheen to it. Look at it from the side if needed.
You can paint these on large sheets of paper or just fill a sketchbook spread.

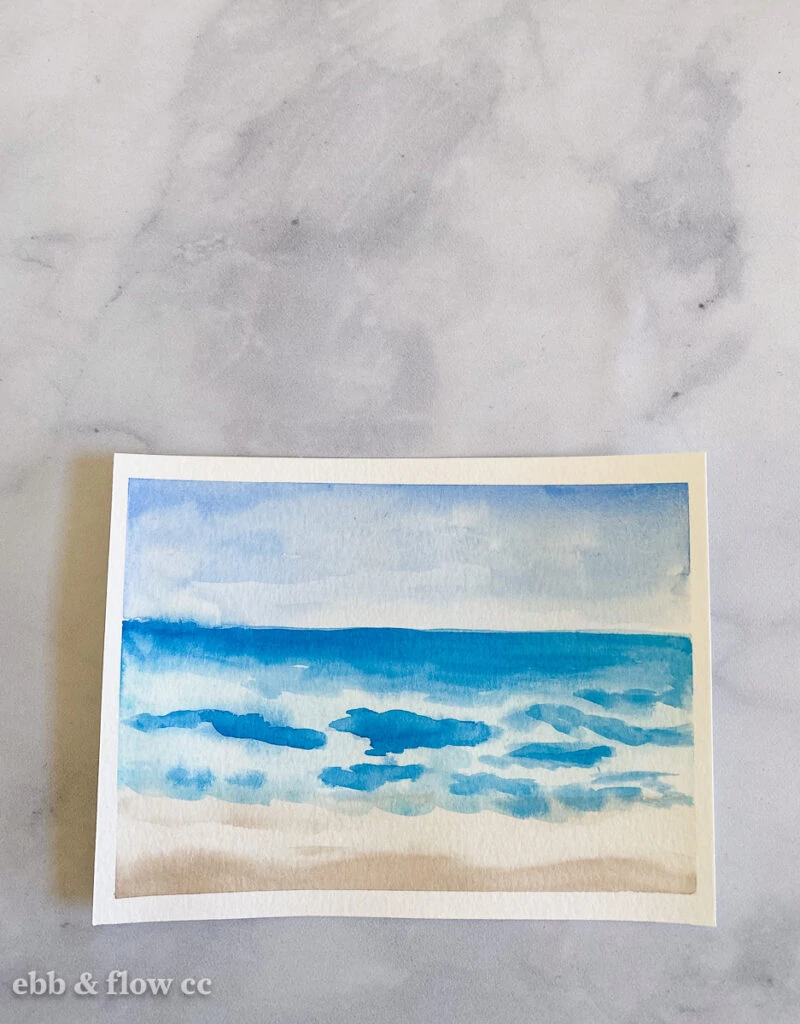
Ocean
Feel free to change the color of the sky or water or even the sand.
I used cerulean for the sky (any diluted blue would work though), cobalt teal, and phthalo turquoise for the water (you can mix phthalo green and phthalo blue together if needed), and a diluted mixture of burnt umber and yellow ochre for the sand.
- Use washi tape to tape your paper down to a flat surface.

- Dilute the cerulean paint and use a flat brush to add paint to the top third of the painting. If you have pools of paint, move them to the top and side edges.

- Use a mixture of diluted burnt umber and yellow ochre to add paint to the bottom of the painting for the sand.

- Let all of the paint dry.
- Add a diluted mix of cobalt teal to the middle area for the water. It can overlap the sand part, but try to keep the part where it reached the sky really straight. (It’s okay if it flows into slightly wet paint. It add interest.)
- Add phthalo turquoise to the top line of the water and blend it into the lighter blue. This is done by adding the paint and then using an almost dry brush to smooth the edges.
- Add lines of the phthalo turquoise to the water to resemble waves. Smooth them out if needed.
- Add a bit of darker brown to the bottom of the sand and a bit near the water to make it look like wet sand.
- Add a bit more cerulean to the sky and soften the lines with a dry brush.
- Darken the waves and horizon line with phthalo turquoise.


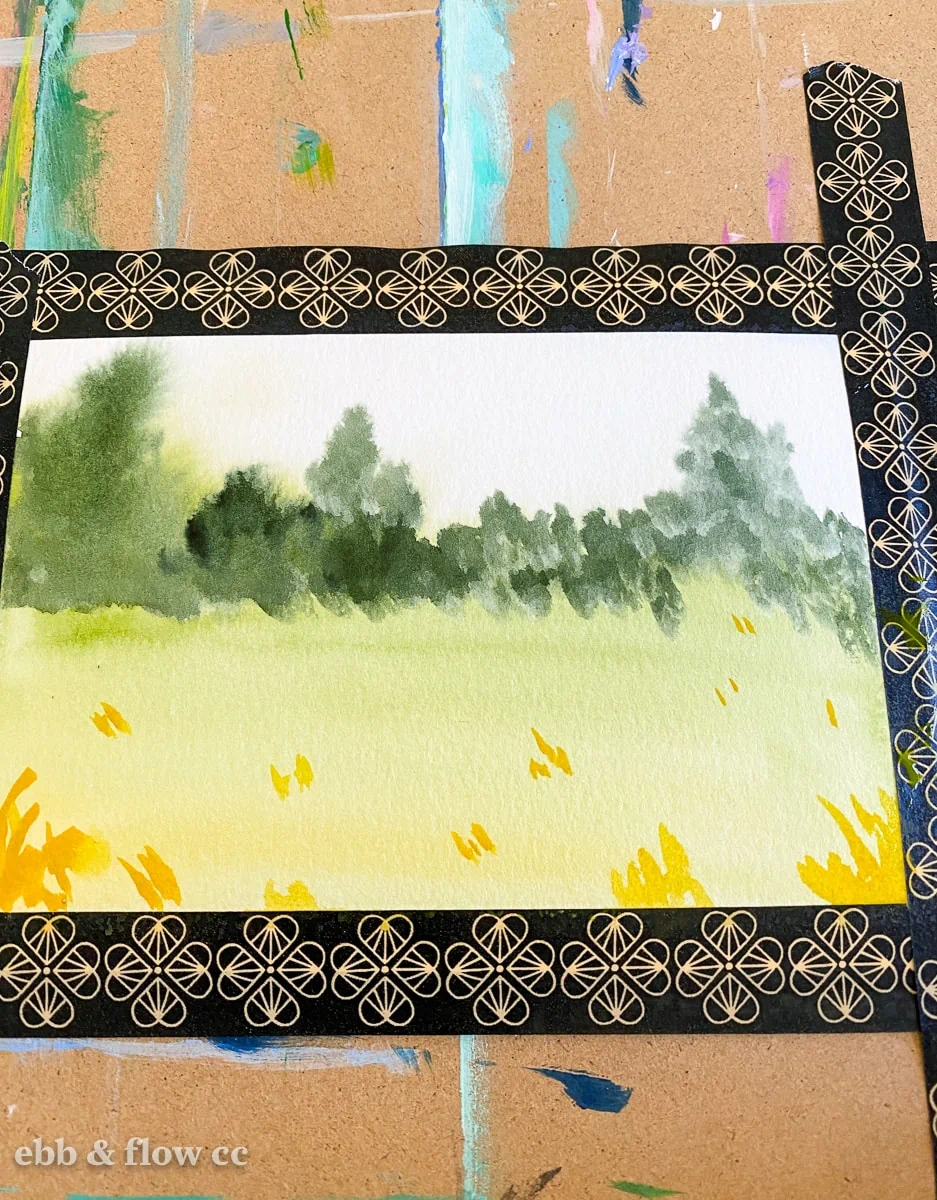
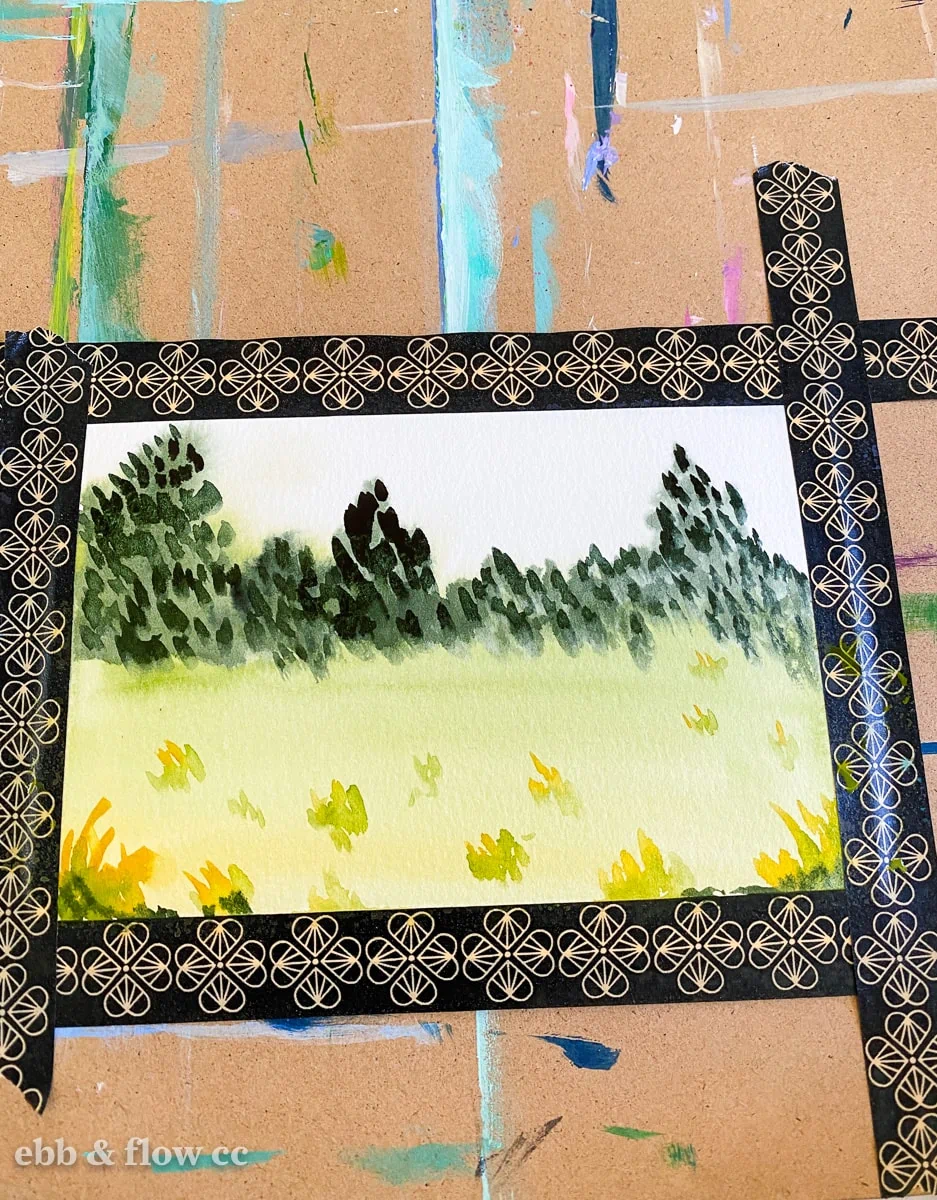
Grassy Field
Feel free to add color to the sky if you want. I love the effect with water. (My water must have been slightly blue because the edges have the prettiest blue tint.
I used green oxide (you can use sap green and add brown to mute it down), olive green (add more brown to the sap green), perylene green (add black to sap green), and yellow ochre.
- Tape the paper down.
- Use a flat brush to add water to the top third of the paper.
- Paint the bottom of the paper with green oxide, letting the color flow up into the water. (This is how you create the trees.)
- Add diluted yellow ochre to the bottom of the paper.
- With the paint still wet, add perylene green to the tree parts, making organic shapes. You don’t want a perfectly symetrical tree line.
- Let the paint dry completely.
- Use yellow ochre paint to add in line for grass at the bottom of the painting. The very bottom grass should be larger because it’s closer to you. As it goes higher up, they should get smaller. Try not to line them up.
- While the paint is still wet on the grass, drop in bits of green to the grass.
- Use perylene green to add blobs to the trees. A round brush has the perfect shape for this.
- Contine adding as many details as you want.


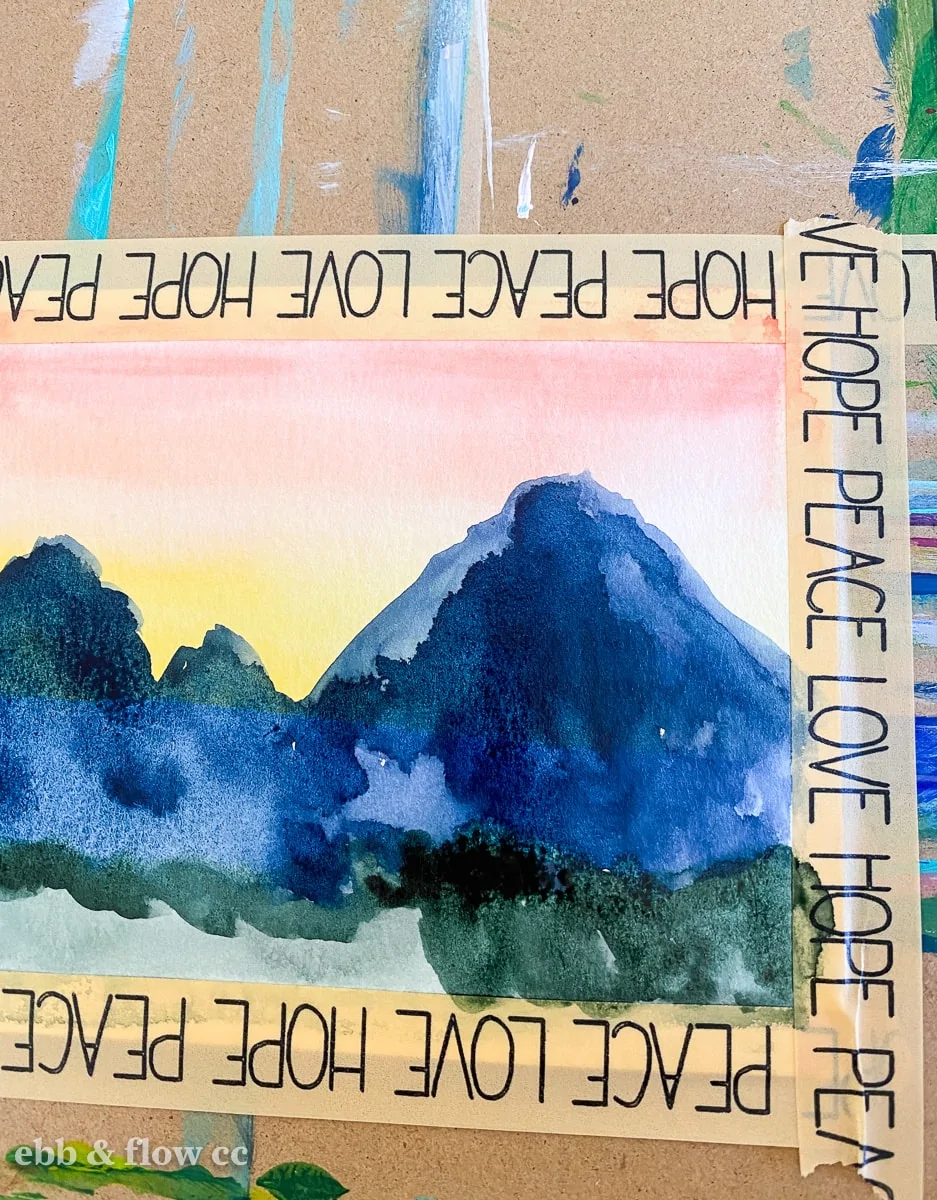
Mountains
I used cadmium red, transparent orange, and a warm yellow for the sky. The grass was painted with perylene green (mix sap green with black) and olive green (mix sap green with brown.)
The mountains are painted with indigo (mix ultramarine blue with black) with a bit of olive green thrown in.
- Tape the paper down.
- Add a line of diluted cadmium red to the top of the painting.
- Paint a line of diluted orange, blending with the red as you go.
- Add a line of warm yellow, blending as you go.
- At the bottom of the paper, paint a line of perylene green with a ragged top line so that it’s not too straight.
- Let the paint dry completely.
- Use indigo to paint in mountains, overlapping the sky and grass. Make sure to vary the sizes of the peaks and mountains. (It’s okay if you can still see the yellow through the mountain. This is the first layer.)
- If desired, make the sky a bit darker with another layer of red, softening the edges with a dry brush as you go.
- Let the mountains dry.
- Add another layer of perylene green to the grass area.
- Add another layer of indigo on the mountains varying the amound of paint and letting some areas stay lighter.
- While the paint is wet, drop in bits of olive green into the indigo paint.


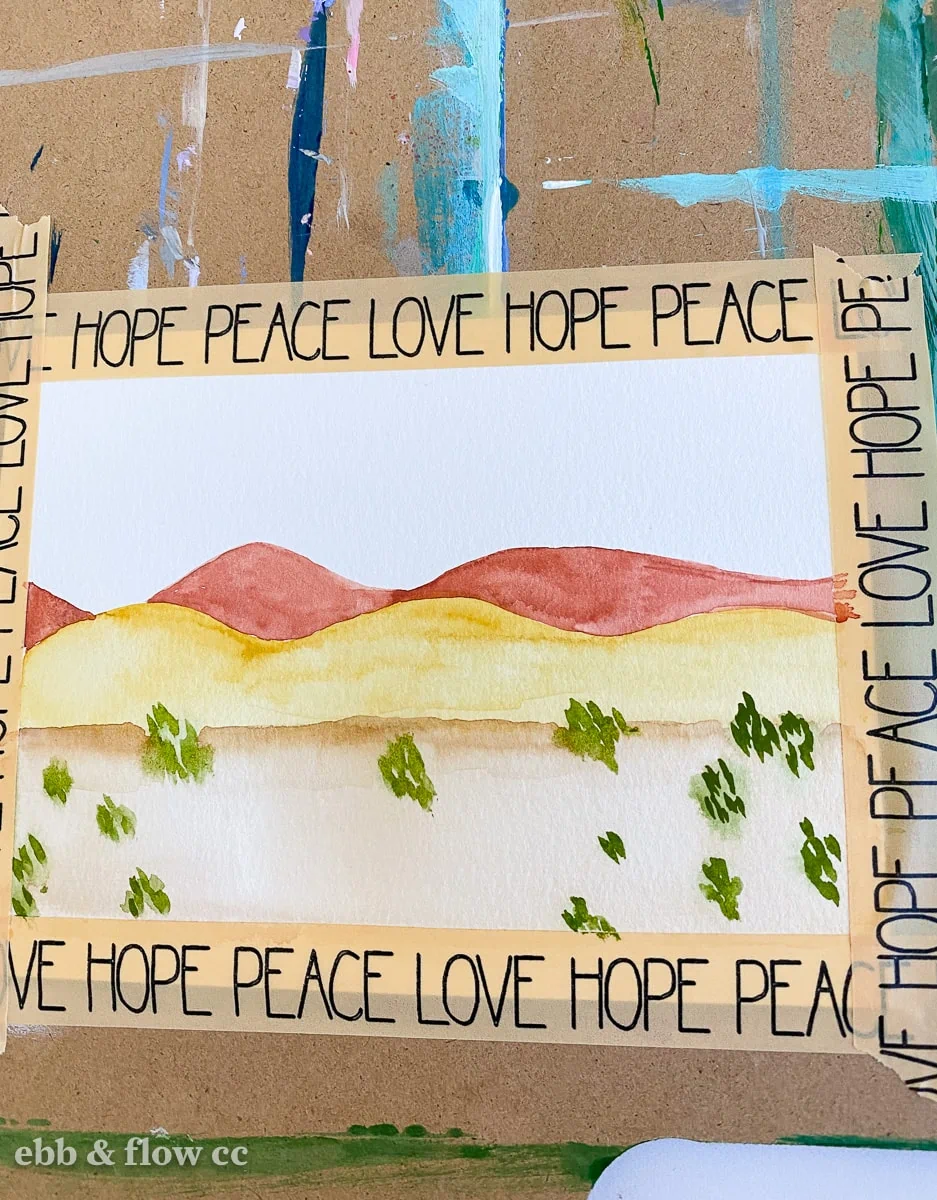
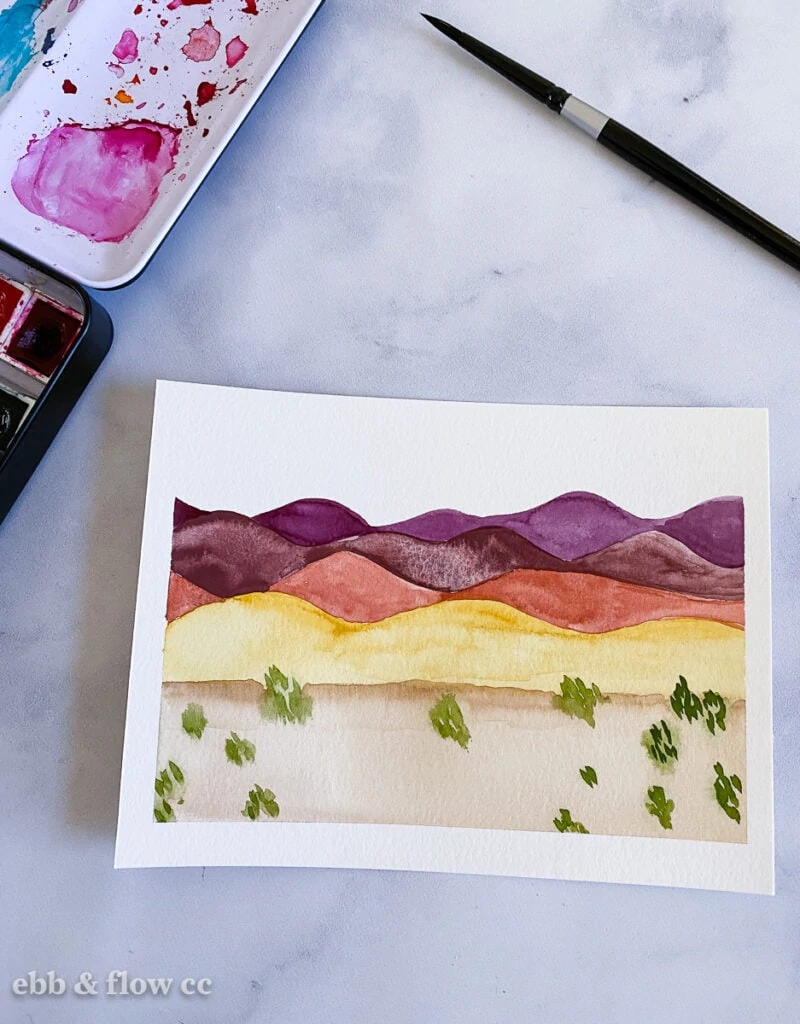
Desert
I love how this one turned out. It’s very modern and really shows the beautiful granulation of the paint colors.
Once again, add a sky color if you want. I love the white sky though.
I used a mixture of burnt umber and yellow ochre for the sand, yellow ochre for the first layer, Venetian red (mix brown and cadmium red), Indian red, and a mixture of Indian red and violet. The grassy bits are painted with olive green paint.
- Tape the paper down.
- Paint a diluted mixture of burnt umber and yellow ochre for the sand.
- Add a line of rolling hills in yellow ochre.
- Add it bits of olive green to the sand area.
- Let it dry completely.
- Add a line of rolling hills in Venetian red.
- Add a bit more of the burnt umber and yellow ochre mixture to the line where the sand meets the hills. Use a dry brush to blend it out.
- Use the tip of a round brush to add details to the grass.
- Let it dry completely.
- Add in the line of rolling hills in Indian red.
- Let it dry completely.
- Add the last row with a mixture of Indian red and violet.


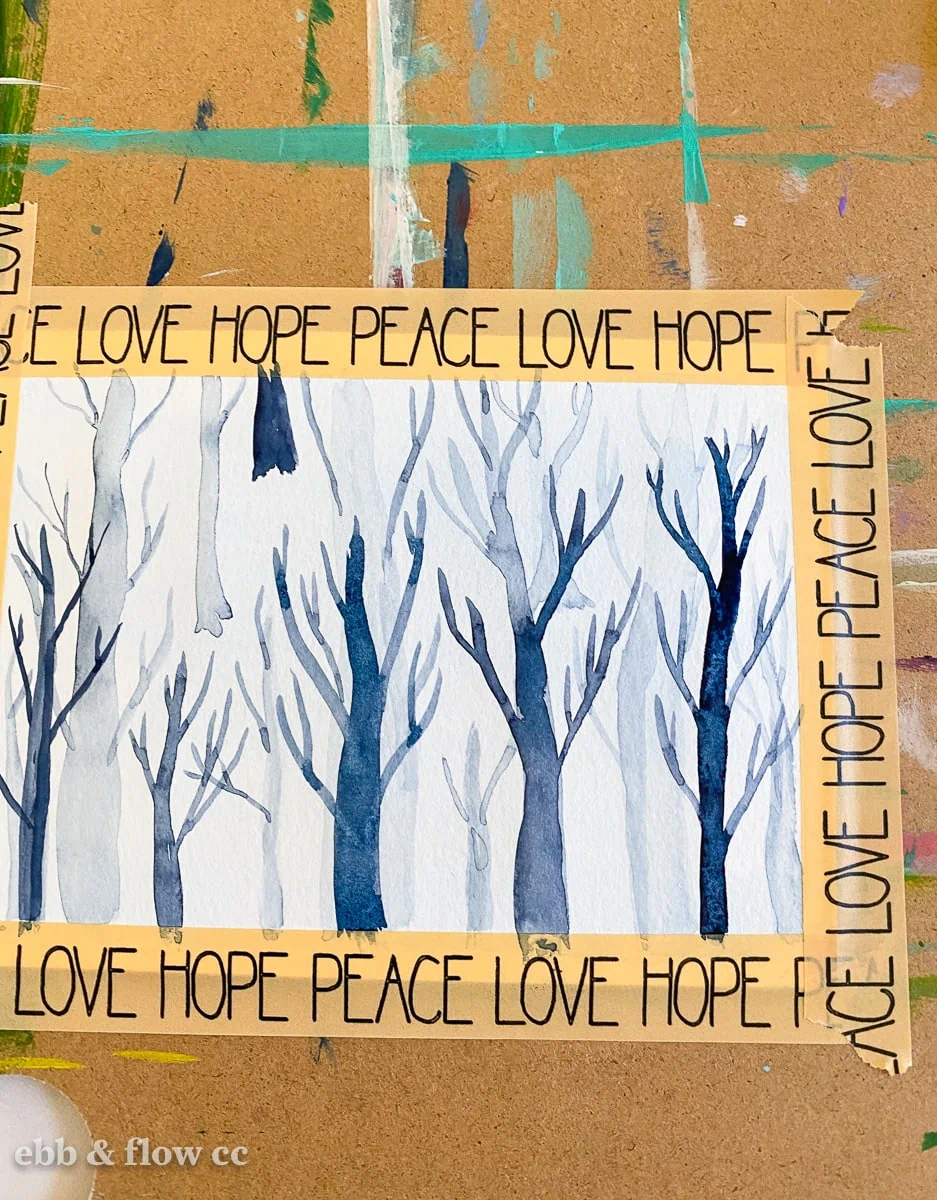
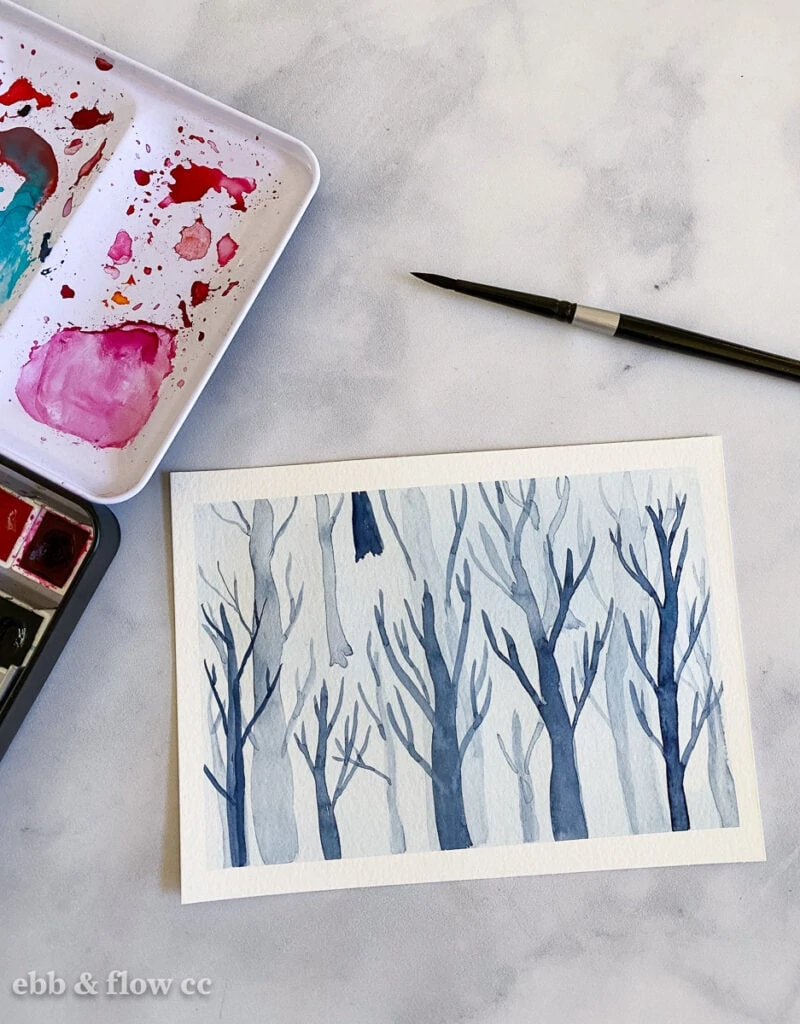
Trees
This is a fun tone-on-tone effect that is not an original idea. I’ve seen it a million times, but it’s always fun to paint. And really perfect for beginners.
It reminds me of my last house which was surrounded by woods. Some mornings were foggy and the trees looked a lot like this.
I used very diluted cerulean paint for the background and varying dilution amounts of indigo paint for this. You can also use greens or turquoise.
- Tape the paper down.
- Add a diluted wash of cerulean to the entire page.
- Let it dry completely.
- Use a diluted mixture of indigo paint to add in light lines for the trunks of the trees. Vary the sizes, and where they begin and end.
- Add in branches to the trees. The areas where it touches the trunks may end up darker, but I love the effect. If you hate this effect, add branches to the trees as you go.
- Keep this first layer pretty simple so that you can more layers.
- Let the paint dry.
- Use a darker mixture of paint to add in another layer of trees and branches. This creates the effect that the light trees are in the background and the dark ones are closer to you.
- If you have space, you can let it dry and add a 3rd layer.


You Might Also Like:
- Easy Abstract Painting Ideas
- Watercolor Galaxy Painting
- How to Paint Roses
- Watercolor Painting Warm-Ups
Pin for Later!