
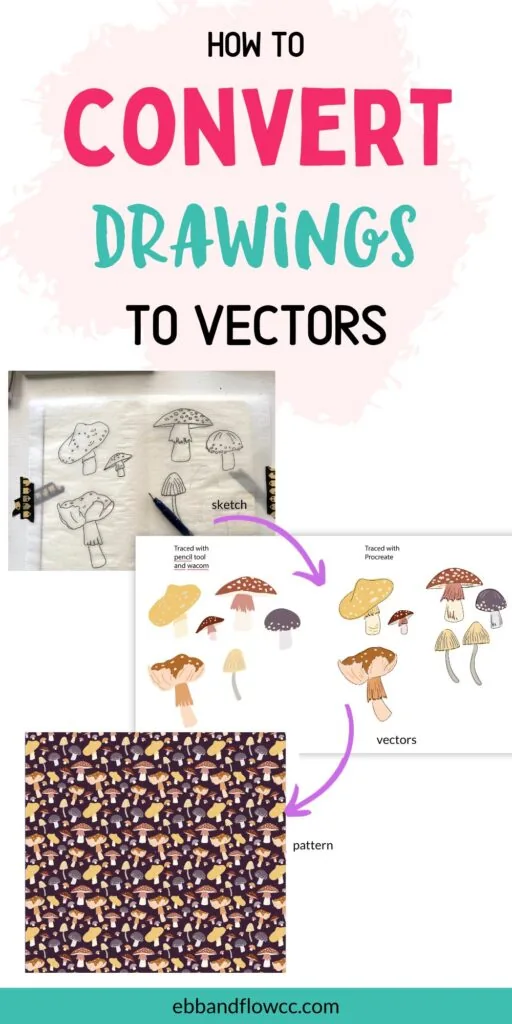
How to Convert Drawings to Vectors

I’m a self-taught artist who loves sharing tips and tutorials for painting with watercolor and gouache, and using the Procreate app on the iPad.
Learn easy methods to convert drawings to vectors. This in-depth tutorial goes over a few different ways to digitize your artwork into vectors for Adobe Illustrator.
You may also be interested in learning how to vectorize Procreate drawings.
This post contains affiliate links. By purchasing an item through an affiliate link, I earn a small commission at no extra cost to you. As an Amazon Associate I earn from qualifying purchases.
How to Convert Drawings to Vectors
It’s really easy to vectorize drawings.
Vector files allow you to resize your drawing infinitely. They’re often used in surface design and pattern making, as well as logos.
There are a few ways to do this. The method you choose will be determined by your skill level, the art you want to achieve, and what equipment you own and are comfortable using.
It’s fun to experiment with all of these ways to see which results you like the best. Once you figure out the method for you, it can increase your workflow.
I have a personal favorite because it gives me the look that I want, it’s the quickest for me, and I’m super comfortable with it.
Most of the art I create is used for surface design and pattern-making, so that’s how I’m explaining my workflow.
Also, I use Adobe Illustrator to vectorize my artwork. It’s not the most affordable program ever, but it’s the program that I’m the most comfortable with.
While there are other cheaper or free options for vector-based programs, I’m not sure that they have an option that’s similar to Image Trace.
My Workflow
This is how I create art to digitize, but you may prefer a different approach. For instance, you might skip sketching on paper and go straight to the computer to sketch.
- Sketch motifs in a sketchbook.
- Take a photo of the art.
- Trace everything in Procreate
- Upload as a PSD file to my computer.
- Open in Adobe Illustrator and use Image Trace to vectorize.
It took a lot of experimentation to find a method that created the look that I wanted. I highly recommend trying all the methods to see which one you prefer.
Creating the Art
I normally start in a sketchbook after creating a list of motifs that fit my theme.
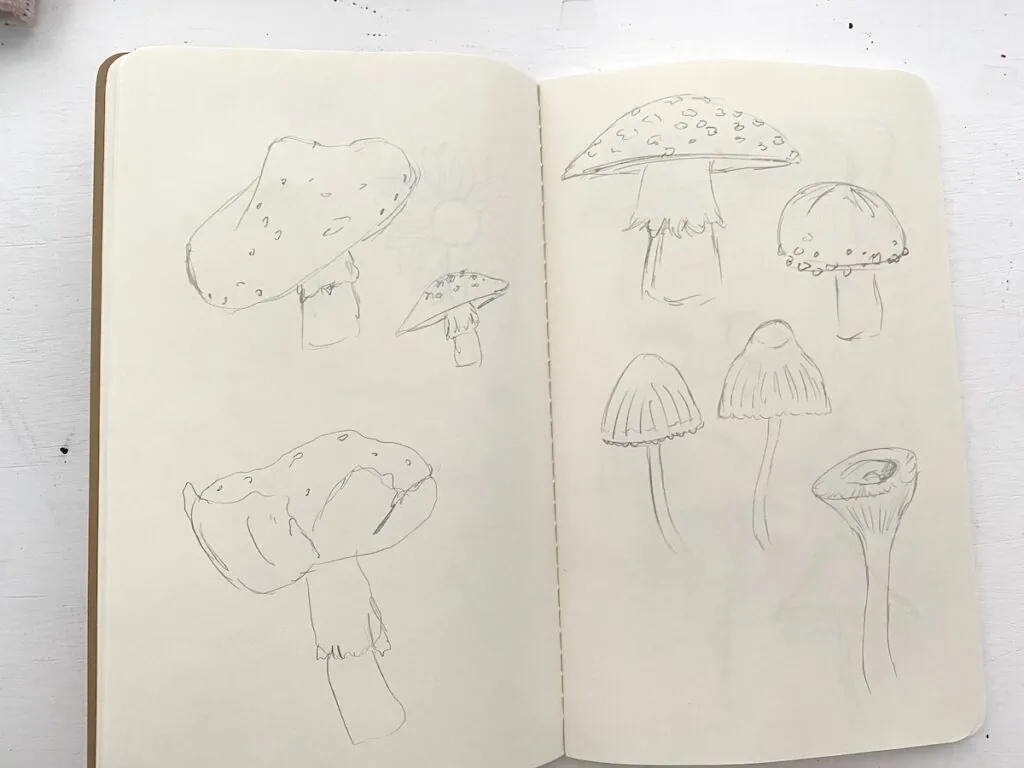
Sketching on paper allows me to make mistakes. Even the ugly stuff may end up working for something. My initial sketches are typically pretty rough.
Sketch from reference photos or real life. If you’re using photos, they need to be your own or they need to be from royalty-free sites like Pixabay or Pexels.
Create way more sketches than you need. Even when I sketch out 40-50 things, I always need more.
If you are creating art for patterns, draw plenty of small filler icons. They come in handy for filling small spaces.
Clean up the sketches that you like the most. Redraw things if needed. If your pencil. drawings are too light, they can be traced with ink.
Tracing
When you have plenty of items sketched, it’s time to trace. You have a few options for tracing.
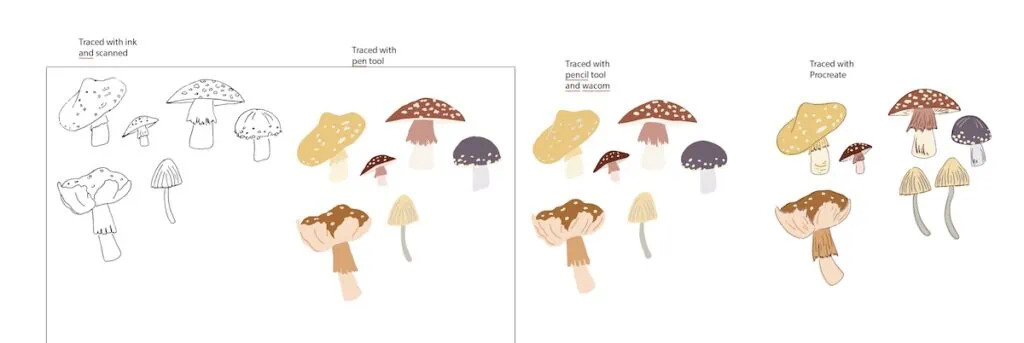
You can trace using ink on tracing paper or using a lightbox. This will keep the hand-drawn look. Then you use Image Trace in Adobe Illustrator to vectorize this art. This can result in wonky lines if you’re not great at inking though.
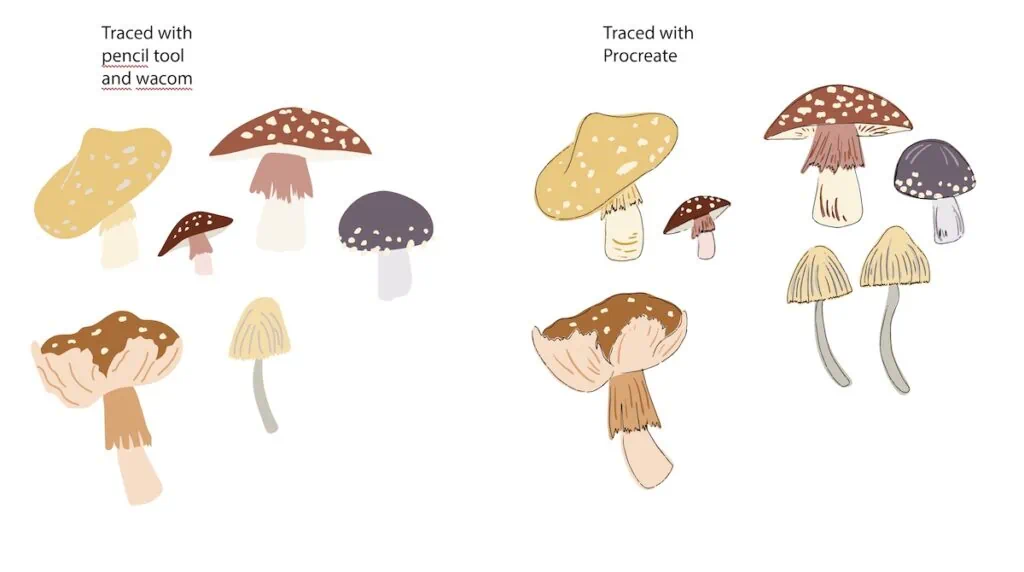
Procreate is also an option for tracing. If you’re comfortable with Procreate, this is a great option. Vectorizing Procreate art is really easy. (This is my preferred method.)
The last option is tracing in Illustrator. This option allows you to draw the shapes with the pen tool or to use the pencil brush or blob brush. If you have a Wacom tablet, this is even easier, but it’s not necessary.
Tracing on Tracing Paper or a Lightbox
Trace your art using this method if you draw lightly or if your art is sketchy and you need to finalize the lines.
Image trace needs images with high contrast for the best results, so inking is a great way to get that contrast.
You can use tracing paper or a lightbox. It’s even possible to tape the art to a window and trace it. Be sure to tape each piece of paper down first. This will prevent the papers from moving.
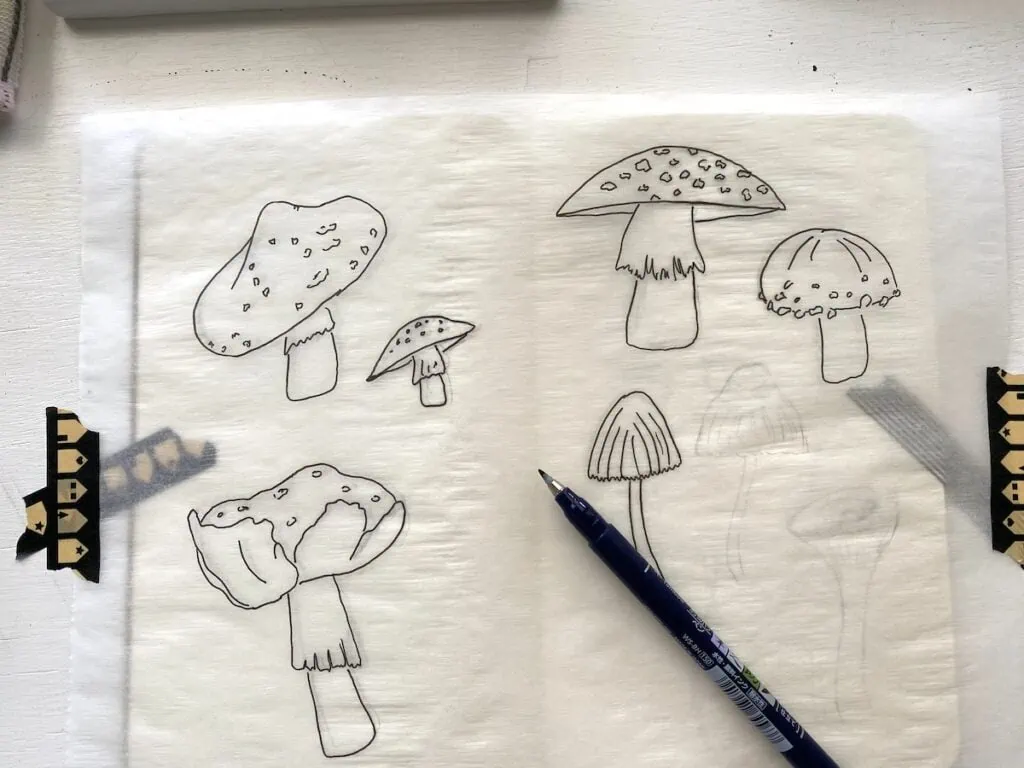
Use a pen that you’re comfortable with. Black ink is the best option for the highest contrast. It shows up great on both computer paper and tracing paper.
Different pens will create different textures and line weights so experiment to find the one you like the best.
When you’re happy with the drawings, you will need to scan them in and Image Trace them in Illustrator (there’s a section further down for this.)
Tracing in Procreate
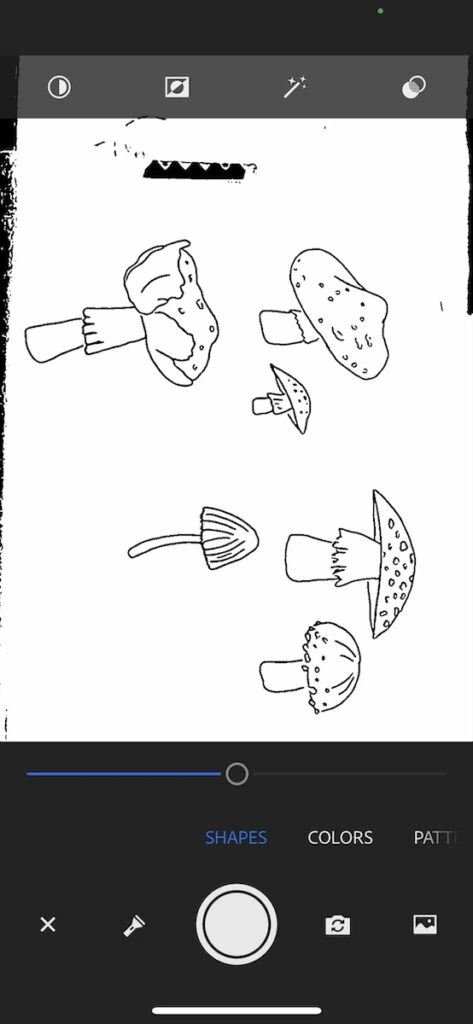
- Take a photo of the drawing with your iPad. Make sure that your lighting is good and that your iPad is straight so that it doesn’t get skewed.
- Open a new file in Procreate. Since we’re vectorizing the file, the size isn’t really that important. Just make sure that it’s big enough for you to draw on.
- Insert a photo and choose the photo of your art.

- If you drew more than one page, add each page to a different layer and turn off each layer as you work.
- Lower the opacity of the photo layer to make it less confusing.
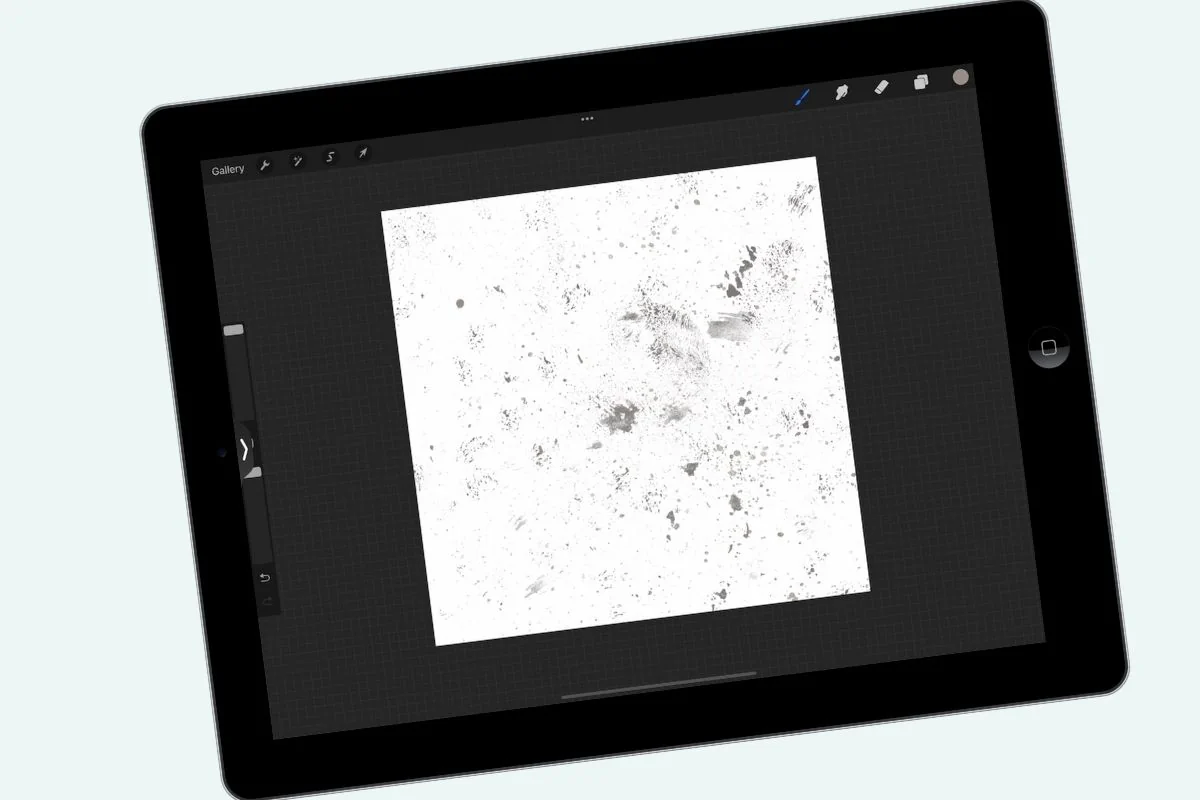
- Create a new layer over the photo and start tracing. The perfect Procreate brush will be determined by the effect you want to create. I’m currently loving my monoline brush.
- You will need to play with the brush size to get a good line weight. Once you find a size that you like, you can save it by clicking the plus sign.
- If the drawing is really rough, start with another sketch layer and use a pencil brush to perfect the lines first. I like to use a bright color so that it will contrast when I draw my final lines.
- When you’re happy with the lines, create a new layer and finalize the lines in black.
- If you need filled pieces, create a new layer for this to draw those pieces and fill them. I like my shapes to be a little wonky compared to the linework.
- Once I have my artwork traced, I normally draw a few more motifs, since by this time, I’m happy with my line weight and the style.
- When you’re happy, turn off the background layer and all of the photo and sketch layers, keeping only the finished work.
- Alpha-lock each layer and fill them with black.
- Export the file as a PSD.
- Optional: Hit undo until the colors are back in your art.


Image Trace is next, which we’ll get to in a minute.
Tips for Exporting Procreate Files to Illustrator
- Try to perfect your artwork in Procreate. Erase any weird bits and wonky edges before exporting the file. It can be cleaned up in Illustrator, but I find it quicker to create a clean file in Procreate first. I don’t finalize the color palette in Procreate. Once it’s vectorized, it’s easy to change the colors.
- Every color needs to be on its own layer.
- Turn off the background layer before importing.
- Alpha-lock each layer and fill each layer with black. Image trace works best when there is a lot of contrast.
- Select PSD under the share options.
- Airdrop or save as needed to export the files to your computer.

Tips for Scanning Hand-Drawn Artwork
Scanning your art is really easy, even if technology feels scary. I don’t have the fanciest scanner. It’s a cheap one that is super easy to use. If you create a lot of large-scale art, you will want a large-bed scanner.
To get the cleanest scan, I hold the lid closed while scanning even though the paper fits. This prevents any weird shadows.
Since I’m vectorizing this art, I choose 300 DPI and I save it as a JPEG. This art is black, so I select black and white.
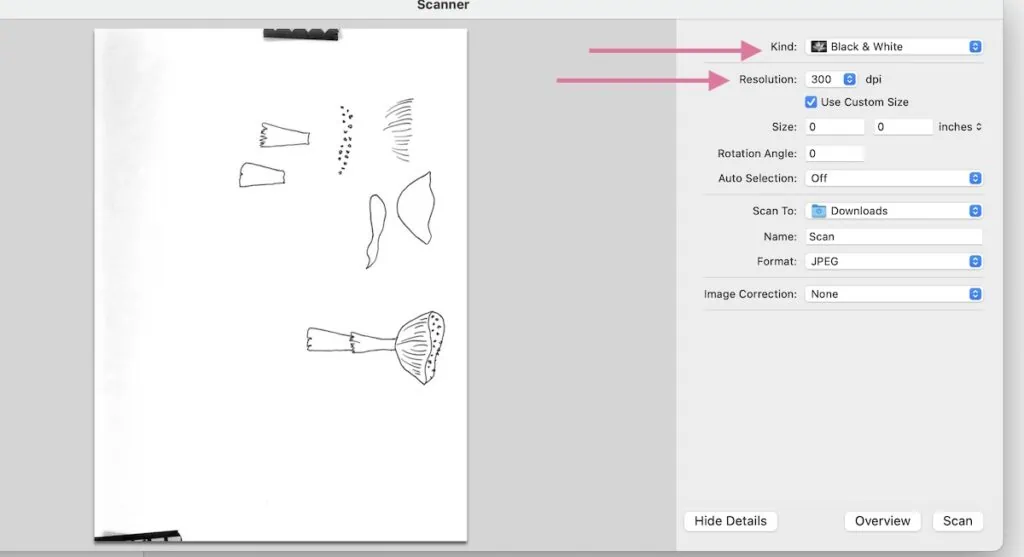
You can separate each element by drawing boxes around them. But I normally scan everything at once to make it quicker.
Tracing in Illustrator
If you choose to trace your art in Illustrator, you should have a decent understanding of the pen tool, the pencil brush, and how to recolor items. Learning basic keyboard shortcuts is also really helpful.
Don’t let the pen tool scare you. It feels weird to use at first, but I really like it now. Mistakes can be fixed by playing with nodes using the Direct Select tool.
- Scan or take a photo of your artwork. Scanning gives you better results.
- Create a new illustrator file. The size doesn’t matter.
- Place the image in a new Illustrator file. You can either drag the file into the artboard or you can go to File, Place, and select the correct file(s).
- Drag out the rectangle to place them.

- Lock the image by going to Object, Lock. This makes it easier to trace now that you can’t accidentally select the scan and move it.
- You can use Image Trace or you can trace them manually.

Pen Tool Vs Pencil Vs Blob Brush
The pen tool can create both filled shapes and line art. The pencil tool creates line art and will need to be filled. The blob brush tool creates a filled line of art.
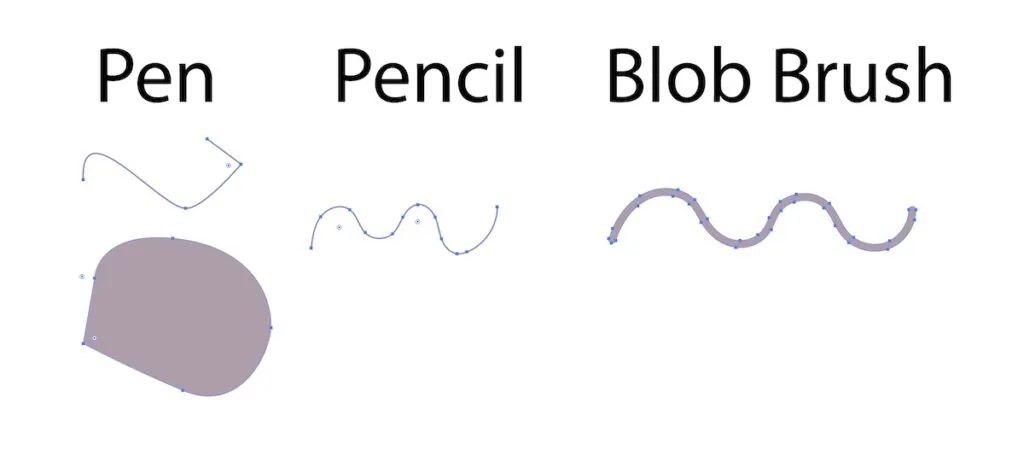
Why does this matter? Well, it matters when you choose your colors. Make sure that you have the correct option chosen. But it also matters for resizing.
When you resize a line, it stays that width. If it’s 1 point at full size, when you make it smaller or larger, it’s still 1 point. This can look funny in relation to other pieces of art.
You can expand lines to make them into shapes that then resize correctly.
The blob brush can create a solid shape if you use it like a crayon and color inside a shape. The size can be changed by hitting the bracket keys: [ and ].
The blob brush and pencil both work like normal drawing. You push the mouse down when want to start drawing and let up when you are done.
The pen brush works by dropping anchor points, (pressing the mouse and letting up for each point. Hold the mouse to make it curve. It takes some getting used to, but it’s pretty fun.
Filling Shapes
You can fill shapes in a few different ways. As I mentioned above the blob brush can create a shape if you keep drawing. Even if you go back to it and fill in empty spaces, they will all connect.
You can use the pen tool to create a solid shape.
You can make an outline, select the shape, and fill it with the live paint bucket tool. Be sure to select the outline and the fill and click expand. Then combine the shapes with the Pathfinder unite option.
You can also use the Shapebuilder tool to fill colors. Expand any lines as necessary and combine them using the unite option.
Changing Colors Easily
Like everything else, there are a million ways to do this.
The color tool is super fun to play with, but it deserves its own tutorial.
The easiest way to fill shapes with new colors is to click on the shape and go into Layer to isolate the object. Click the shape you want to change and choose a new color.
Click out of the isolate mode to get back to all of the layers.
How to Use Image Trace in Illustrator
- Open the PSD file in Adobe Illustrator. You can right-click the file to get the option to “open as.”
- Leave “Convert layers to objects” selected and click okay.
- Toggle the eye icon to hide all of the layers except for one.
- Select the layer by clicking on it.
- Open Image Trace. Image trace can be found by going to “window, image trace.”

- You can play around with the preset options, but I like the “black-and-white logo” preset.
- Click the advanced toggle to open the menu all the way.
- If you draw with a lot of texture, you can play with the settings in Image Trace to capture that texture. Increase paths and corners to see more texture. (If you find a setting that you like, you can create your own preset.)

- Select “ignore white.”
- Click expand.
- Ungroup if using multiple images. Regroup as needed.
- Recolor the art as you go. The color doesn’t matter right now, but it makes it less confusing than seeing black blobs on the screen.

- Don’t resize the vectorized image until they’re all done. Then you can relayer them as needed and resize them all together.
- Keep going until everything is vectorized. You will need to toggle the visibility on for the other layers.
- Move everything off of the artboard to keep it out of the way.
- Regroup complete groups as needed. (Once I have an entire mushroom vectorized and recolored, I group it all together.)
- You can clean up any weird spots with the direct selection tool. Don’t go overboard. It should look hand-drawn still. (I try to get my art as good as possible in Procreate.)
- When you’re finished, make everything easier to work with by copying and pasting everything to a new AI file. This puts everything in the same layer and makes it easier to move the art around. Illustrator layers are not like Photoshop layers. It’s much easier to work in one layer. Everything is still separate in a sub-layer.
- Be sure to save your new file. I always save a .ai file so that I can go back and work as needed.


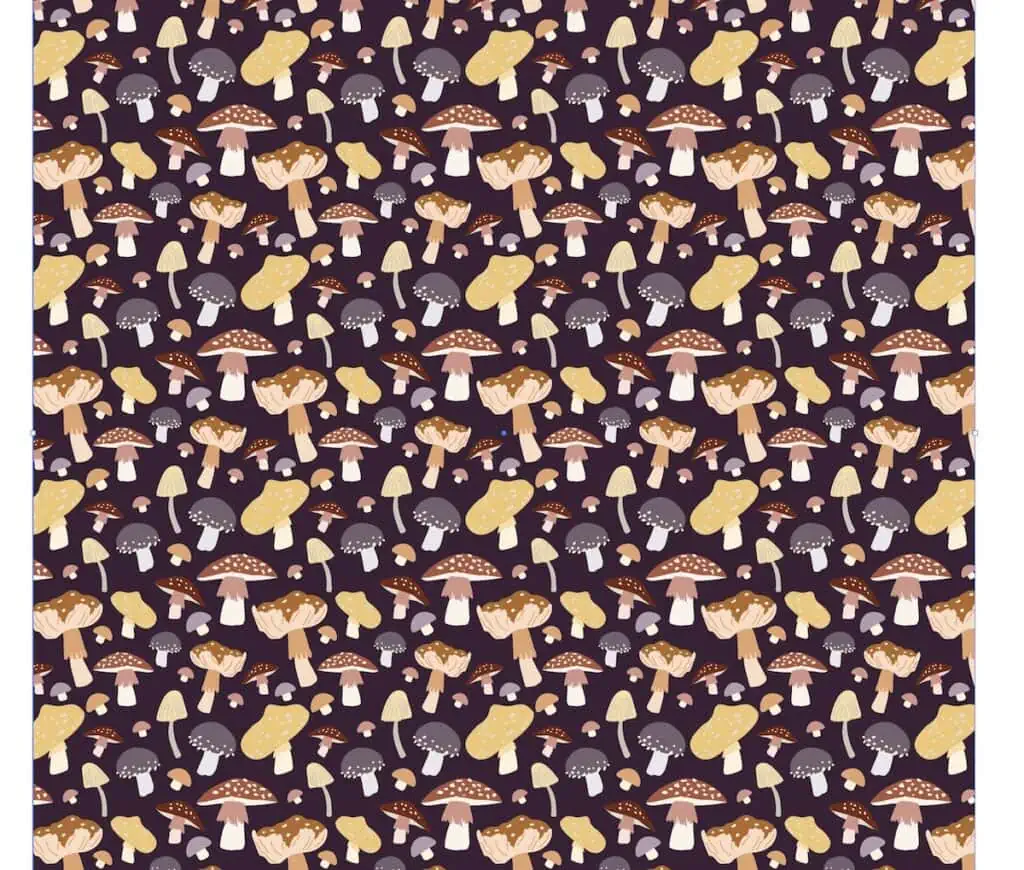
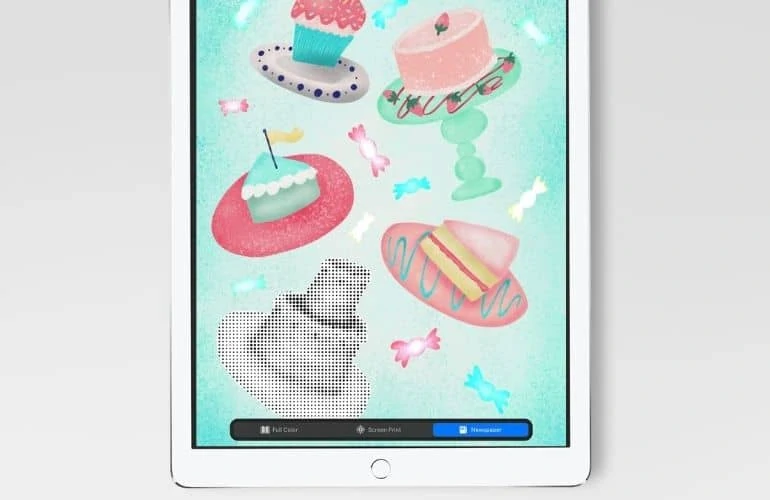
From there you can use your art as you want. I normally use my art for patterns or to use as cut files for my Cricut.
Here’s a cute pattern I made with the mushrooms. It needs a bit of tweaking still, but not bad for a few minutes of work.
Adobe Capture App: A Faster Way to Create Vectors?
Another way to vectorize drawings is to use the Adobe Capture app (iOS and Android). This program will save 10 items before asking for a password.
Your art needs to be clean for this process to work because it picks up stray pencil marks. It saves as an SVG file, which can be used in any vector program. Be sure to export as an SVG or PDF.
It does a pretty good job and it may become part of my workflow. I only learned about it about a week ago. I’ll update this after I play with it a little more.

Pin for Later!


Thank you so much for the useful tips. I struggle a bit with the colouring of my images (after tracing I cover them with a white rectangle, cut everything out through Pathfinder, then recolour all the white fills inside the outlines), so will give your ways a try for sure.