How to Import Brushes in Procreate
Learn how to import brushes in Procreate. It’s so easy to download new brushes to the Procreate app with these simple tips.
This is part of my Procreate brush tutorial series.
You might be interested in this post on making monoline brushes.
This post contains affiliate links. By purchasing an item through an affiliate link, I earn a small commission at no extra cost to you. As an Amazon Associate I earn from qualifying purchases.
Here are some ideas for places to get Procreate brushes.
How to Import Brushes in Procreate
Brushes can be imported one at a time or as a set. Download the set into your file folder on your iPad. Single brushes end with .brush and sets end with .brushset
Importing brushes is easier if you already have a document open on Procreate. It’s not necessary, but you can see the brushes when you open the app. (It just feels a little more confusing without this step.)
Make sure you don’t also have Procreate pocket installed on your iPad or you may have trouble getting your brushes to import in the correct app.
If the directions for installing a single brush don’t work, use the directions for importing brush sets instead.
Learn how to make brushes in Procreate.
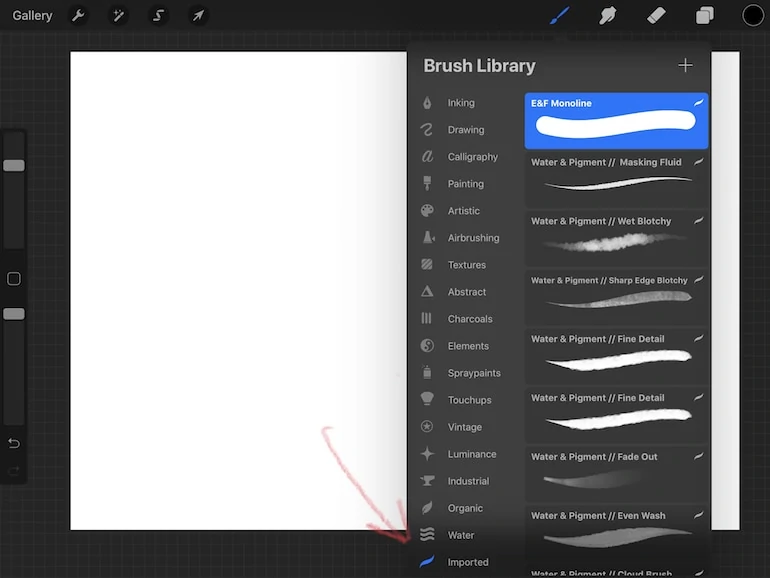
Importing Single Brushes into Procreate
- Open your files folder on your iPad and find your brush.
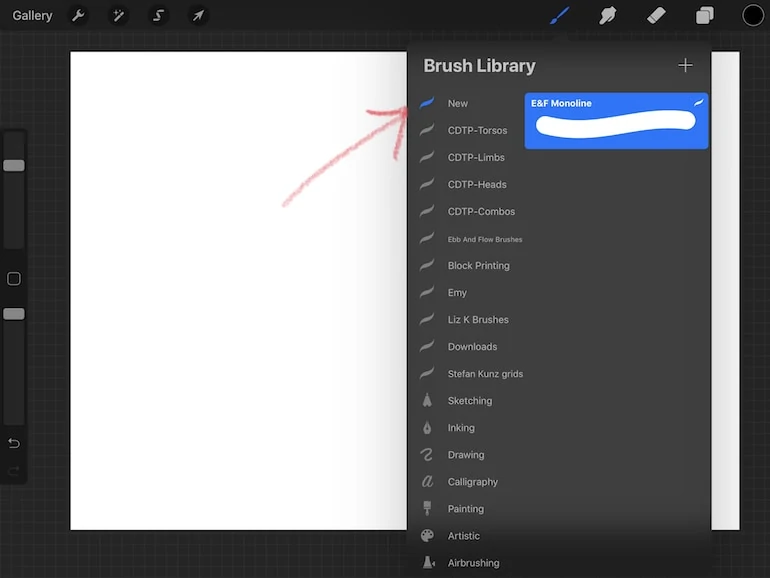
- Click on the brush and it will import the brush into your “imported brushes” folder at the bottom of the list.
Moving Your Brushes to a New Brush Folder
This does NOT work while using an Apple pencil. You have to use your finger.
- Locate the brush that you want to use.
- Use your finger and hold the brush until it shakes a bit. It will be highlighted in blue.
- Drag the brush to the correct folder. (If your brush is higher in the list, just hold it in the highest place until the list scrolls up.)
- Drop the brush in the correct spot. (A green plus sign will appear as this happens.)
- Your brush will be in the new location and disappear from the old location. No need to go back and delete!
- If you want brushes in both folders, duplicate the brush before moving.
Be sure to check out the new Procreate 5X Updates!
Importing Brush Sets
There are 2 ways to install brushes. The first way is super easy.
Locate your brushes and double-click the brush set file. The brushes should be installed.
If that doesn’t work for some reason, try this instead:
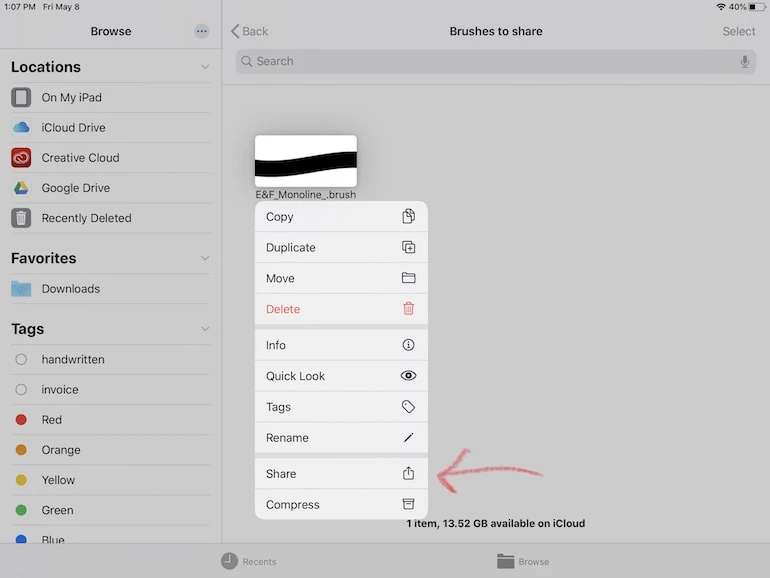
- Open your files folder and locate the brush set.
- Hold the brush set until a menu appears.
- Select Share at the bottom of the menu.
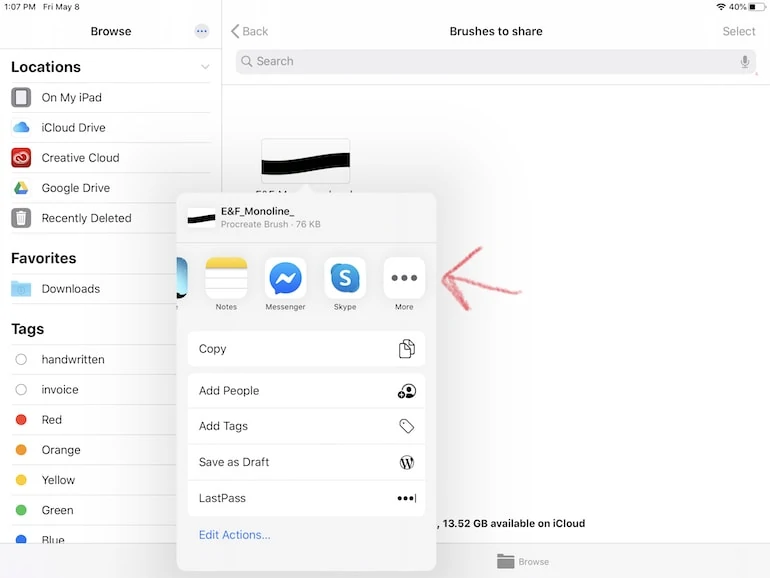
- Scroll through the app icons at the top and choose … for more options.
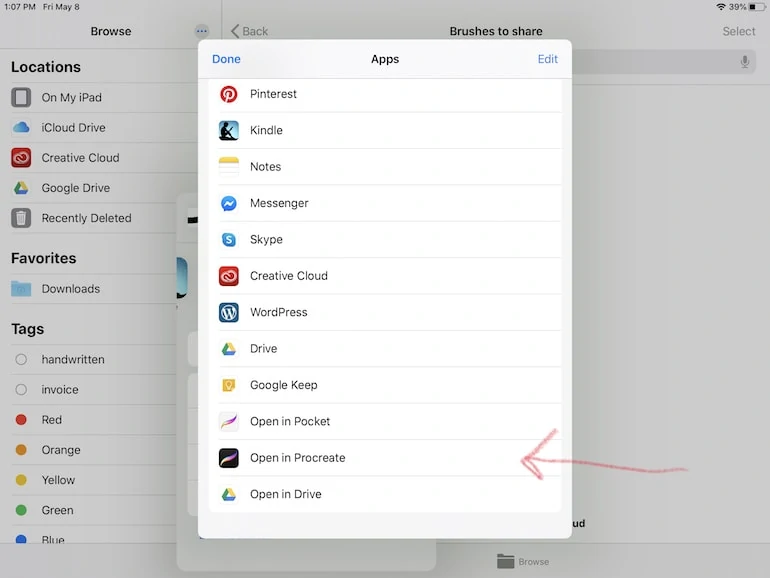
- Scroll down to “Open in Procreate.”
- The new brush set folder will appear at the top of the brush folder list.
How to Export Brushes in Procreate
If you want to share brushes with others (or sell them), you will need to know how to export your brushes.
Exporting Single Brushes
I usually create a folder in my iPad file folder for brushes. From there I can either email myself the brush file or open it from my Mac. If you have a PC, emailing or using a dropbox folder is probably the better choice.
- Open a document in Procreate.
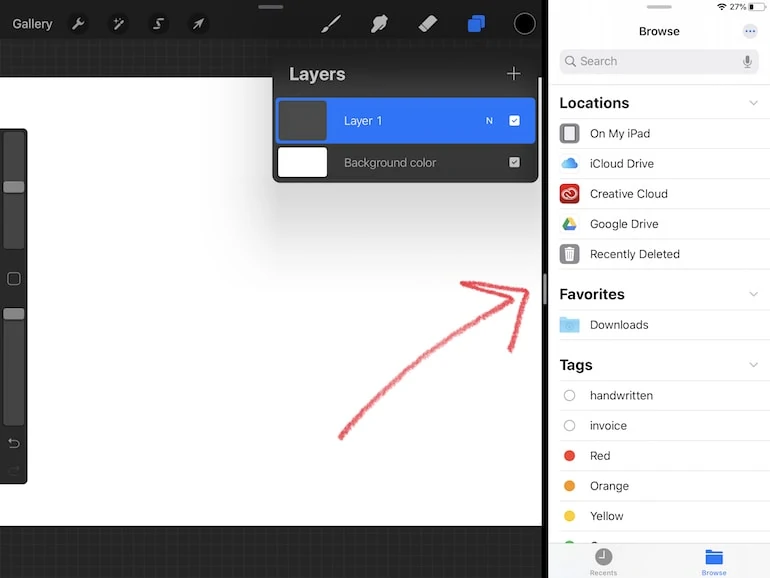
- Use your finger to swipe up and drag the files folder to the side of the procreate app for a split-screen view.
- Find the folder where you will store your brushes and open it.
- Select the brush you want to use.
- Drag it into the folder.
- Your brush can be shared now!
Exporting Brush Sets
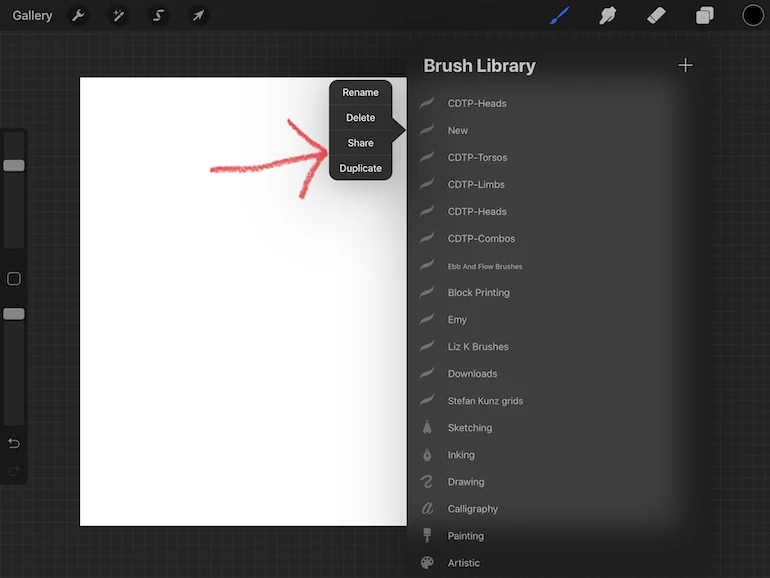
- Locate the brush set folder that you want to export.
- Tap on the name of the brush set twice. A menu should appear.
- Select Share from the menu.
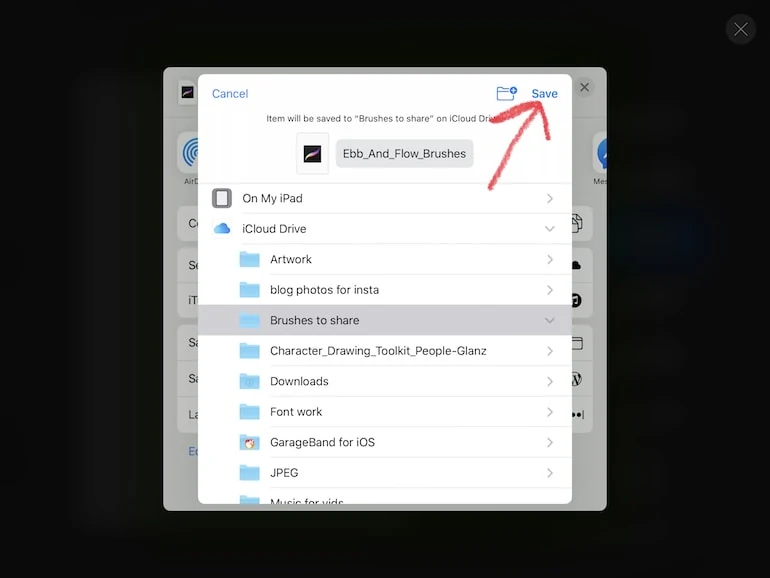
- Select where you want to save your file.
- Click Save.
New iPad? Learn how to move your brushes to the new iPad.
Check out my free brushes for Procreate:
- Monoline brush
- Lettering brush
- Stamp brush
- Watercolor Brushes
- Pencil Brush
- Inking Brushes
- Color Dynamics Brush
- Dashed Line Brush
- Simple Pattern Brushes
- Dotted Line Brush
You Might Also Like:
- Procreate Brush Settings
- How to Install Color Palettes in Procreate
- Procreate Adjustments Options
- All About Adobe Fresco
Pin for Later!
