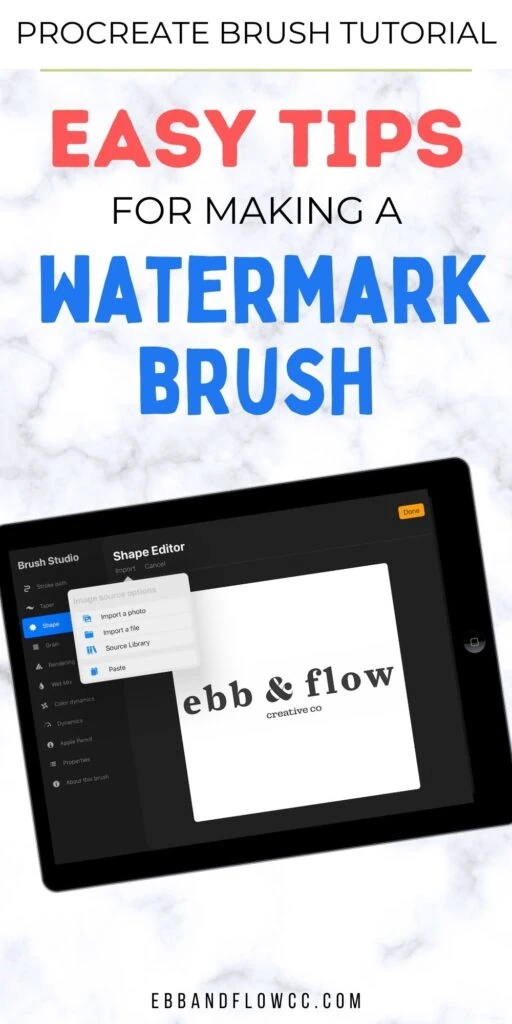
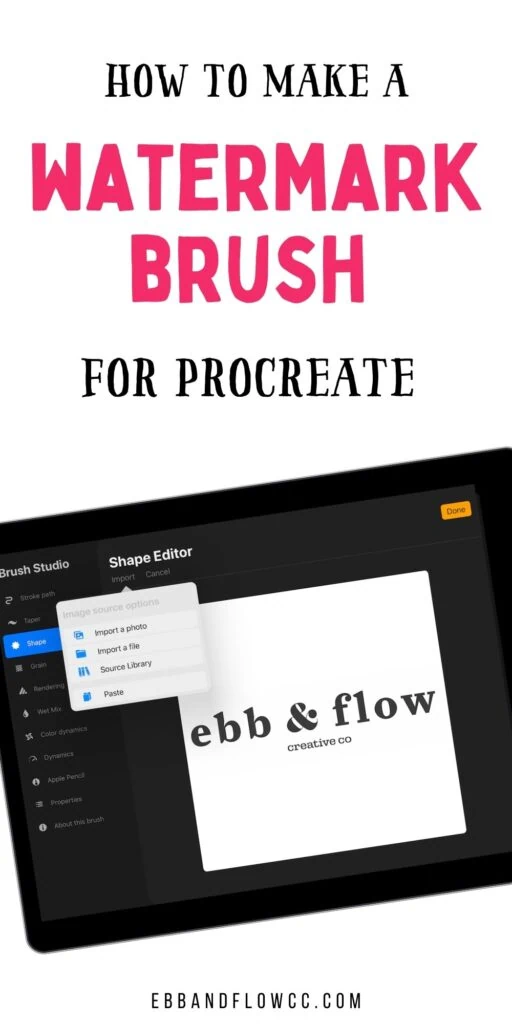
How to Make a Watermark Brush in Procreate

I’m a self-taught artist who loves sharing tips and tutorials for painting with watercolor and gouache, and using the Procreate app on the iPad.
Learn how to make a watermark brush in Procreate. Making a watermark stamp brush will save you so much time for adding a signature to your art.
You might also like these other Procreate brush tutorials.
This post contains affiliate links. By purchasing an item through an affiliate link, I earn a small commission at no extra cost to you. As an Amazon Associate I earn from qualifying purchases.
One of the easiest brushes to make for Procreate is a watermark brush. You can easily add your logo to your artwork with a stamp brush.
Alternatively, instead of your logo, you can make a brush for your signature to add to your artwork.
Watermarks and signatures provide a way for others to find your work if for some reason it gets copied or saved without referencing you.
Procreate will convert colors to black when making stamp brushes, so if your logo contains lighter colors, you might want to convert it for better results.
How to Make a Watermark Brush in Procreate
- Upload your logo to your iPad.
- Start a new square canvas. (It must be square or the stamp will be skewed.)
- Make it large for the best results. I suggest at least 3000px by 3000px.
- Open the image in Procreate.
- Copy the canvas. This option is in the Actions panel (top left corner with wrench icon) under Add.
- Start a new brush in the brush studio.
- Choose the shape tab.
- Click edit.
- Paste the copied canvas.

- Use 2 fingers to tap the image to invert it.
- Click done to make the shape change.
- Change the stroke to 100 in the stroke menu.
- Change the opacity to 0 in the Apple pencil settings. (This make the brush be opaque when using the Apple pencil.)
- Change the max brush size if desired. This will make the brush larger.
- To make the brush easier to see in the menu, make sure that you toggle the stamp preview button. You can also change the size of the stamp in the menu.


To make a signature brush, just sign your name instead of importing your logo.
Once your watermark brush is made, just add it to a new layer. You can adjust the size or opacity from the main screen.
You Might Also Like:
Pin for Later!