
Free Procreate Lettering Brush for Modern Calligraphy

I’m a self-taught artist who loves sharing tips and tutorials for painting with watercolor and gouache, and using the Procreate app on the iPad.
Download a free Procreate lettering brush. Plus learn how to create your own brush pen for modern calligraphy lettering.
If you like this tutorial, you might be interested in my other brush tutorials for Procreate.
You might also like these free lettering worksheets for brush pens.
This post contains affiliate links. By purchasing an item through an affiliate link, I earn a small commission at no extra cost to you. As an Amazon Associate I earn from qualifying purchases.
How to Make a Brush Pen for Lettering on Procreate
If you’re new to lettering, working on the iPad can be a great way to learn. Procreate is my favorite drawing app because you can do so much with it.
I love working on lettering on my iPad because it’s so easy to erase mistakes. It’s also easy to keep practicing until I get the hang of a certain letter or style.
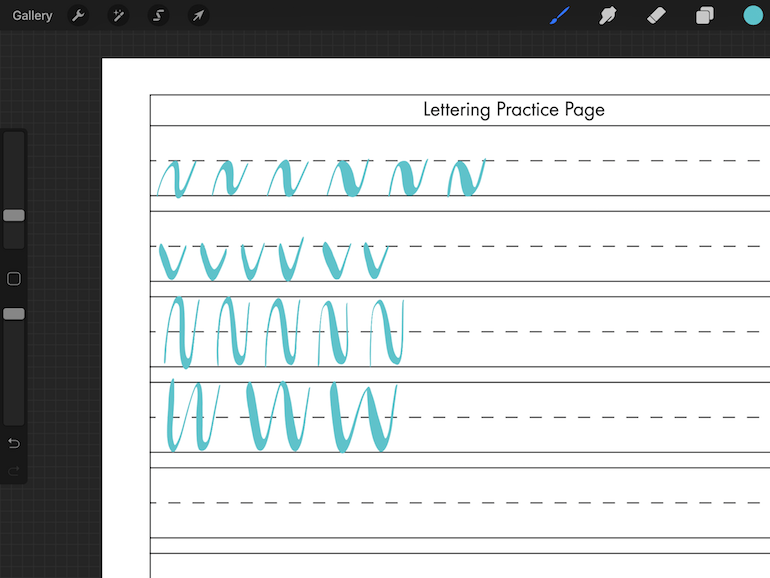
I normally upload my lettering worksheets and create new layers to practice on. When I fill one layer, I hide it and create a new one. This is an easy way to see that you’re getting better as you practice.
Delete the layers when you add too many and start again.
Practicing lettering on my iPad has made me more confident for trying it with markers and even paintbrushes.
Tips for Using a Lettering Brush
- Adding pressure to the downstrokes makes the lines thicker, but you get better results with medium pressure.
- Write slowly for better results.
- Works great with these free lettering worksheets!
- If it’s not perfect, you can either undo it and try again or fix it by drawing over it or deleting the parts that you don’t like.
How to Make a Lettering Brush for Procreate
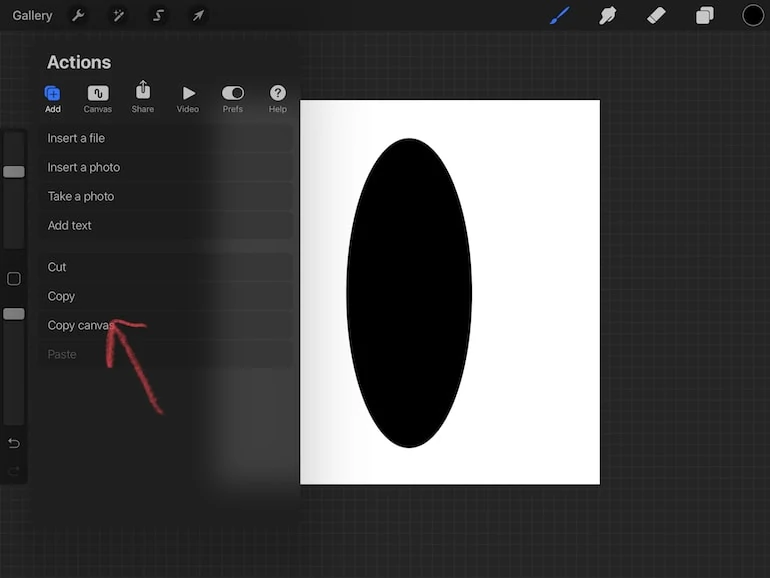
Making an Oval for the Brush Shape
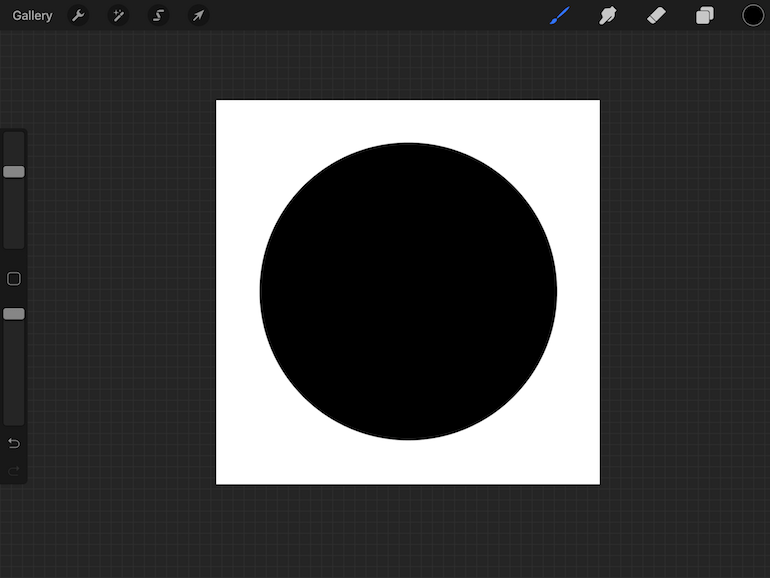
- Start a new square document. (It has to be square or the image will be skewed.)
- Add a black circle. (You can either draw it and use the shape builder to make a perfect circle and fill it in or make a large dot with a monoline brush.) Click here to learn more about making stamp brushes.

- Enlarge the circle if necessary.
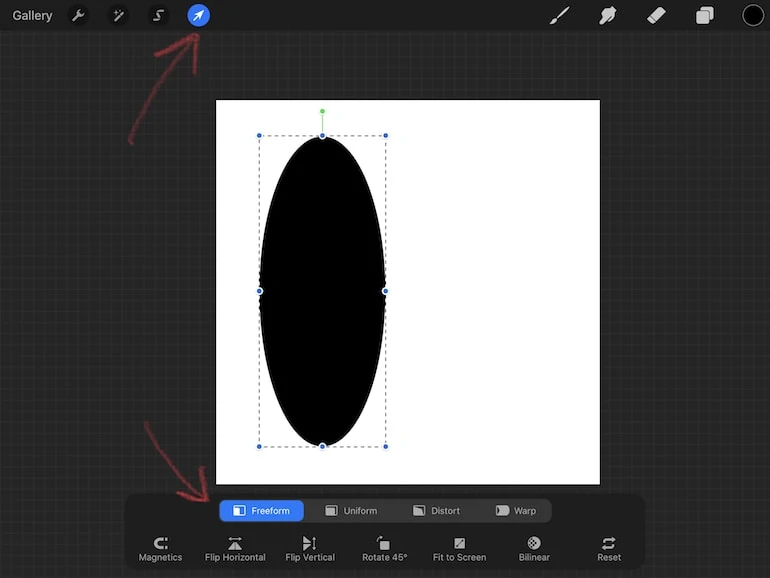
- Use the select tool.
- Select the freeform tool (uniform is chosen by default.)
- Make the circle narrow into an oval.
- Center the oval in the center of the square.
- In the Actions panel (wrench in left top corner), choose Copy Canvas.

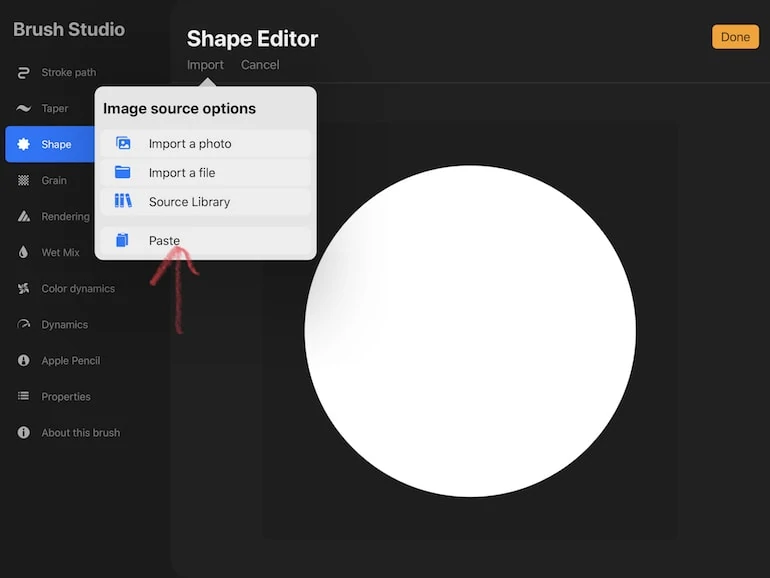
Finishing the Brush Pen
- Start a new brush.
- Choose shape in the brush studio.
- Click edit on the shape source.
- Choose Import and then Paste.
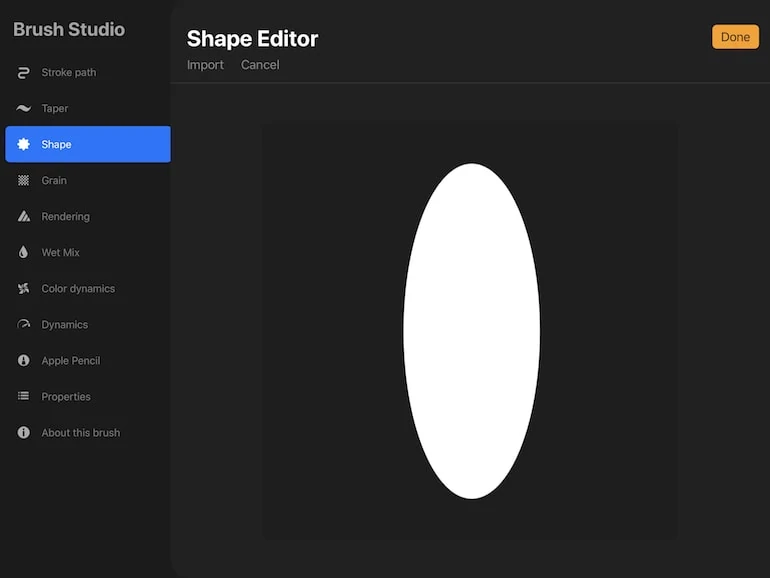
- Use a two finger tap to invert the shape.
- Click Done.
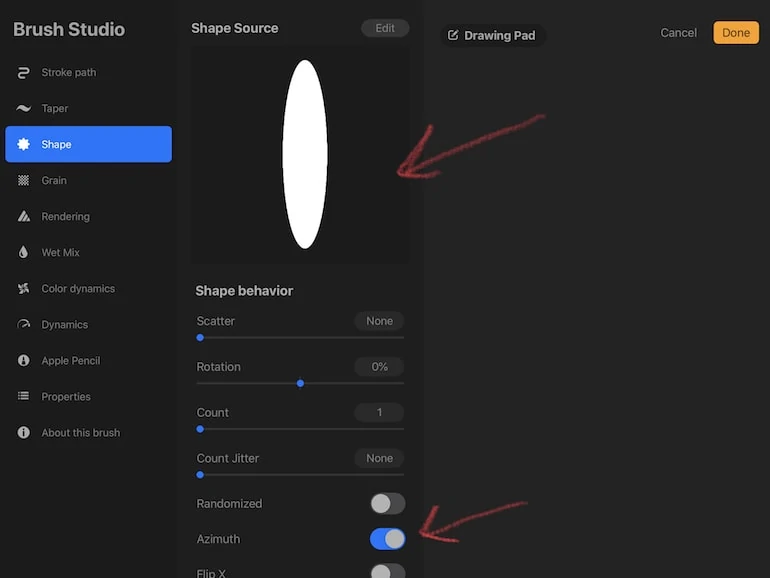
- In the shape panel settings, toggle on azimuth.
- Open the Stroke Path and set spacing to 6% and streamline to Max.

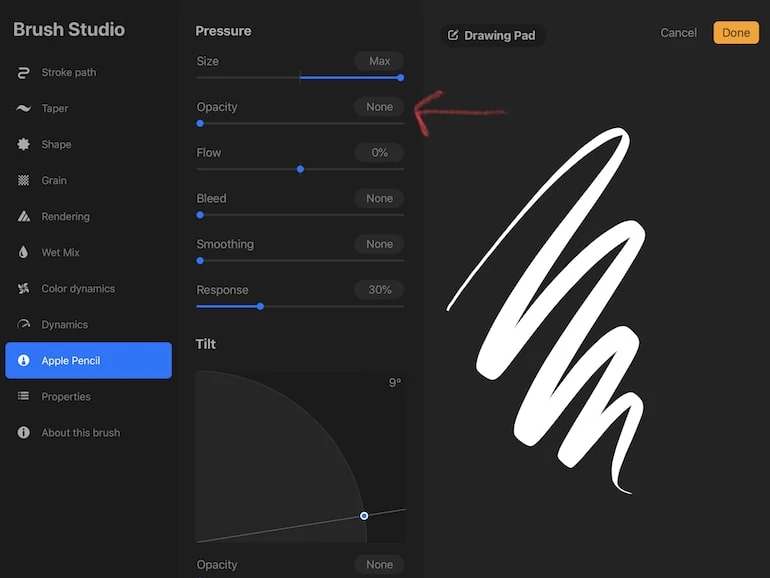
- In the Apple Pencil settings, change opacity to none. (This changes the the transparency at the beginning and ends of the stroke.)
- Name your brush as desired.

You might be interested in this color-changing lettering brush tutorial!
Options to Alter the Pen Brush
- Change streamline. I have it set to max to smooth the line all the way. A lower setting will make the writing more authentic. Plus you can write faster.
- Change the oval shape source orientation. Use a twisting motion to change the oval to a horizontal oval.
- Make a thinner or fatter oval for the brush source. This creates drastically different brushes!
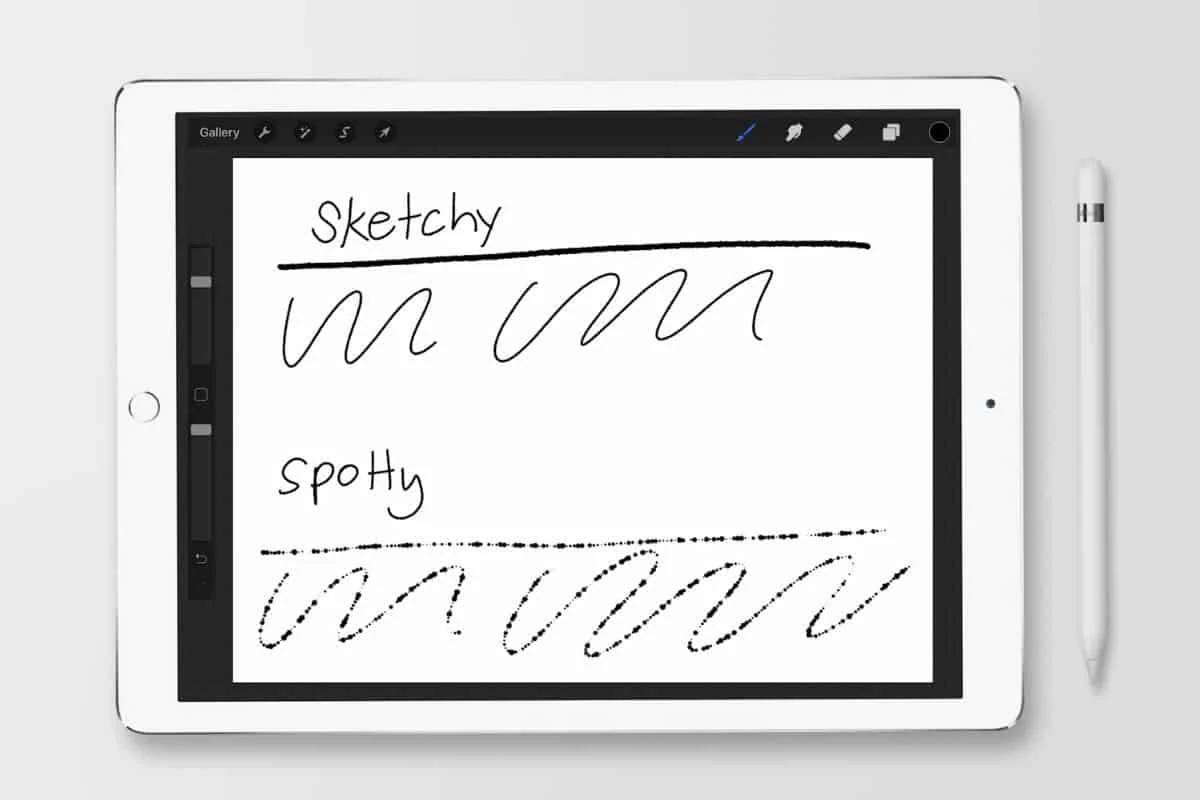
- Changing the grain source to a texture gives you a scratchier, chalk-like brush.
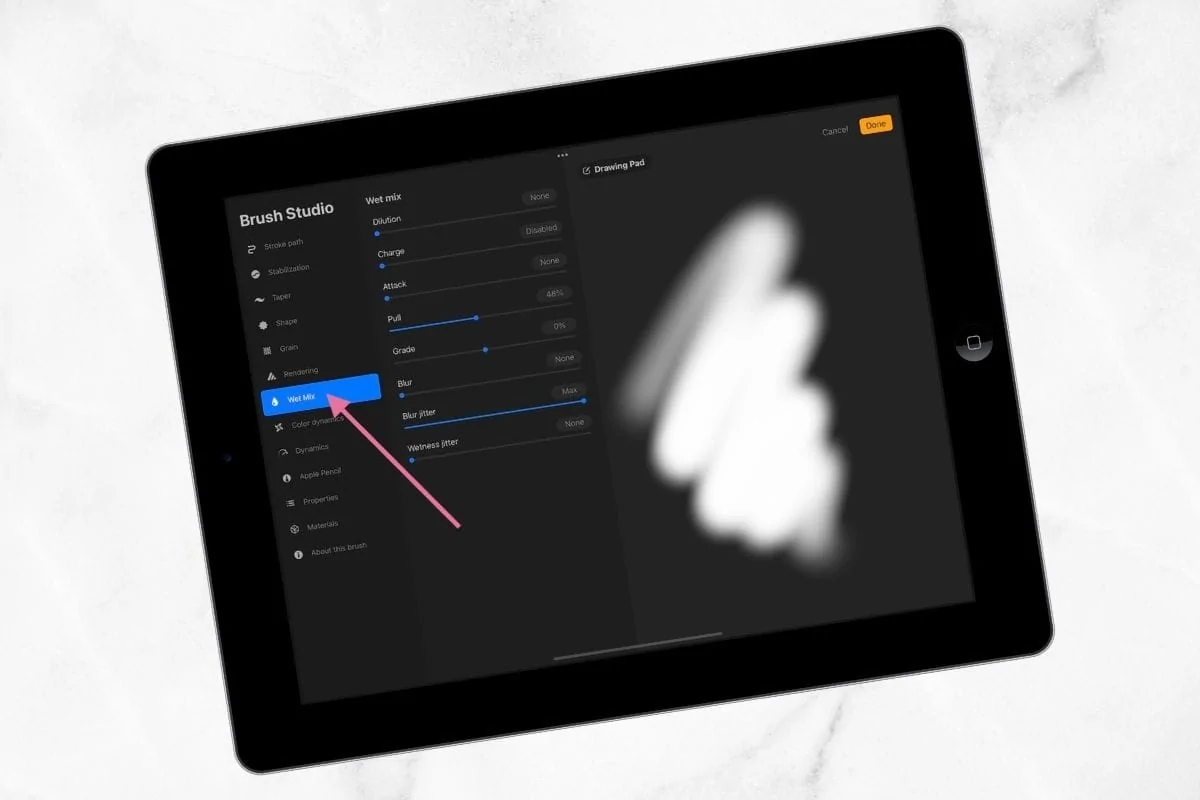
- You can also play with the settings in the Apple pencil panel to change how the brush reacts when using the Apple pencil.
For more information on the brush studio settings, check out this post.
Download a Free Procreate Lettering Brush
These downloads are for personal use only. Please do not redistribute or sell.
Dear teachers and students: this download will not work if you try to access it when logged into your school email account. Try a personal email account instead.
Click here to download a free brush pen for Procreate.
Here’s how to import brushes in Procreate.
You Might Also Like:
- Free Monoline Pen for Procreate
- How to Install Color Palettes in Procreate
- Procreate Brush Settings Explained
- How to Make a Pencil Brush for Procreate
- How to Make Inking Brushes
- Square Monoline Brush Tutorial
Pin for Later!
I would like to do lettering, but I’m left handed. Is it possible for me?
You can do anything you want! My daughter is left-handed, so I know the struggle with smudged hand-writing and the like. I would try to learn digitally first. That will help you avoid the smudged lettering. My other recommendation is to find a left-handed hand letterer to learn from. If you can see video of them drawing, you can mimic the way that they draw. When you move on to traditional media, I would start with inks that dry really quickly, like alcohol ink. Hope this helps!