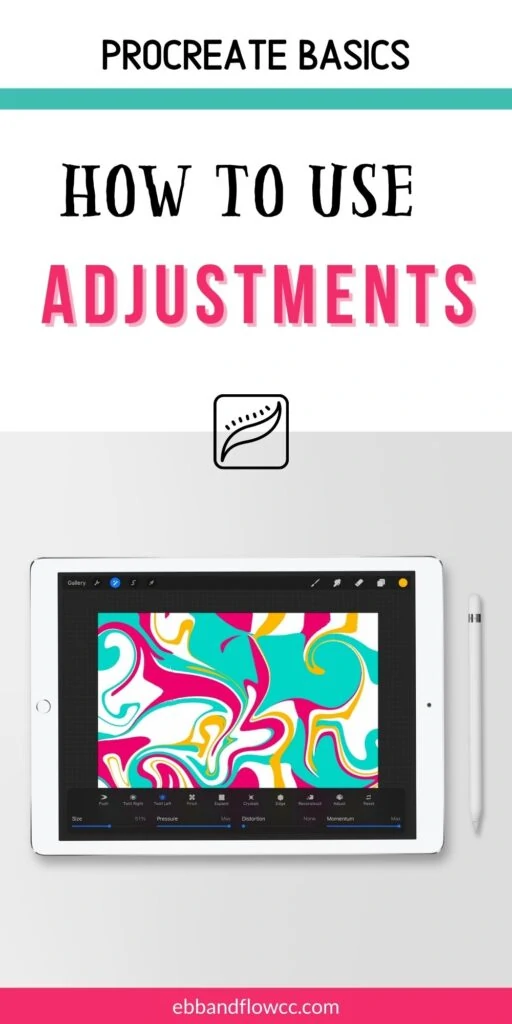
How to Use Adjustments in Procreate

I’m a self-taught artist who loves sharing tips and tutorials for painting with watercolor and gouache, and using the Procreate app on the iPad.
Learn how to use adjustments in Procreate. This tutorial walks you through all of the adjustment options for your artwork in the Procreate app for the iPad.
For more Procreate tutorials, click here.
This post contains affiliate links. By purchasing an item through an affiliate link, I earn a small commission at no extra cost to you. As an Amazon Associate I earn from qualifying purchases.
This tutorial is written for Procreate 5X, the latest version at the time of writing.
Procreate is a drawing app that works with the iPad. It has a lot of fun features to use with illustrations. Today, I’m talking about the adjustments panel.
The adjustments panel can be found by clicking the magic wand icon in the top left corner of the screen.
Adjustments can be used for color correction or editing, adding blur effects, and adding artistic filters.
This post is part of my series on how to use Procreate.
Adjustments in Procreate
These settings can be applied to the layer or by using the pencil. The layer option changes the entire layer. Use the pencil option to change a small part of the layer.
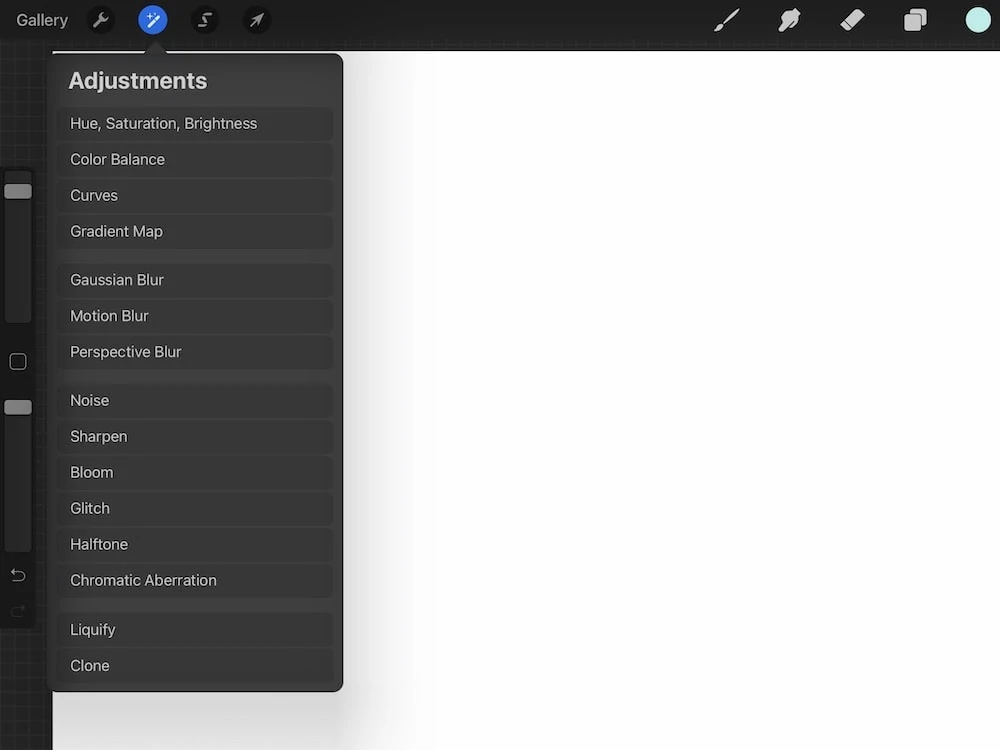
Color Adjustments
Hue, Saturation, Brightness
This adjustment allows you to change the color of your artwork. Hue refers to the color, saturation refers to the intensity of the colors, and brightness allows you to lighten or darken your art.
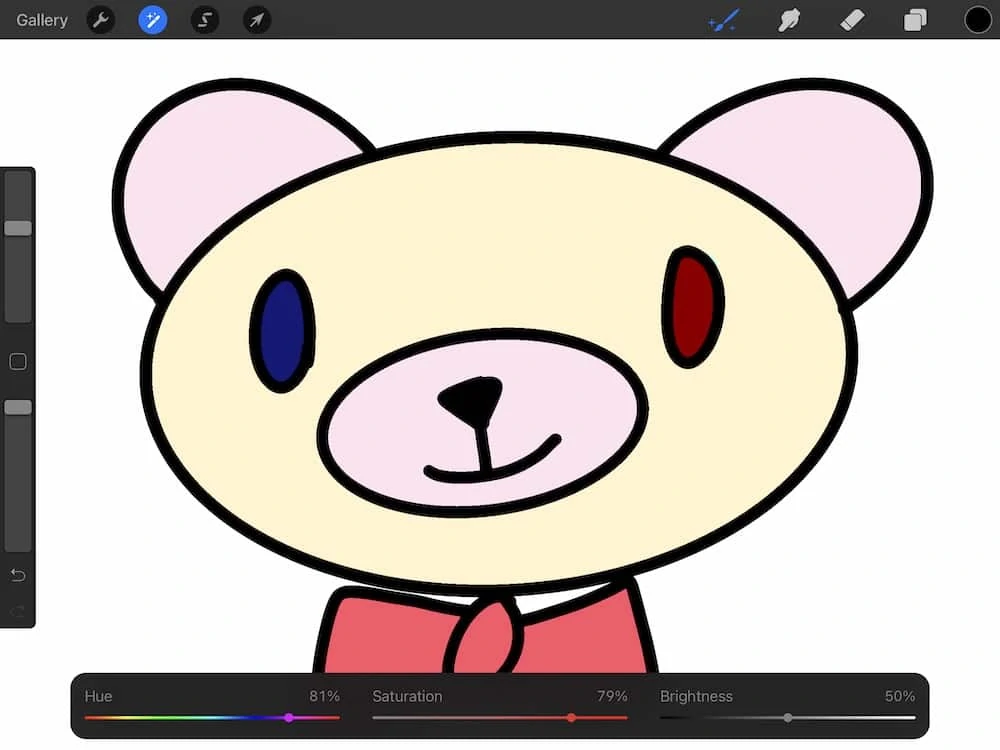
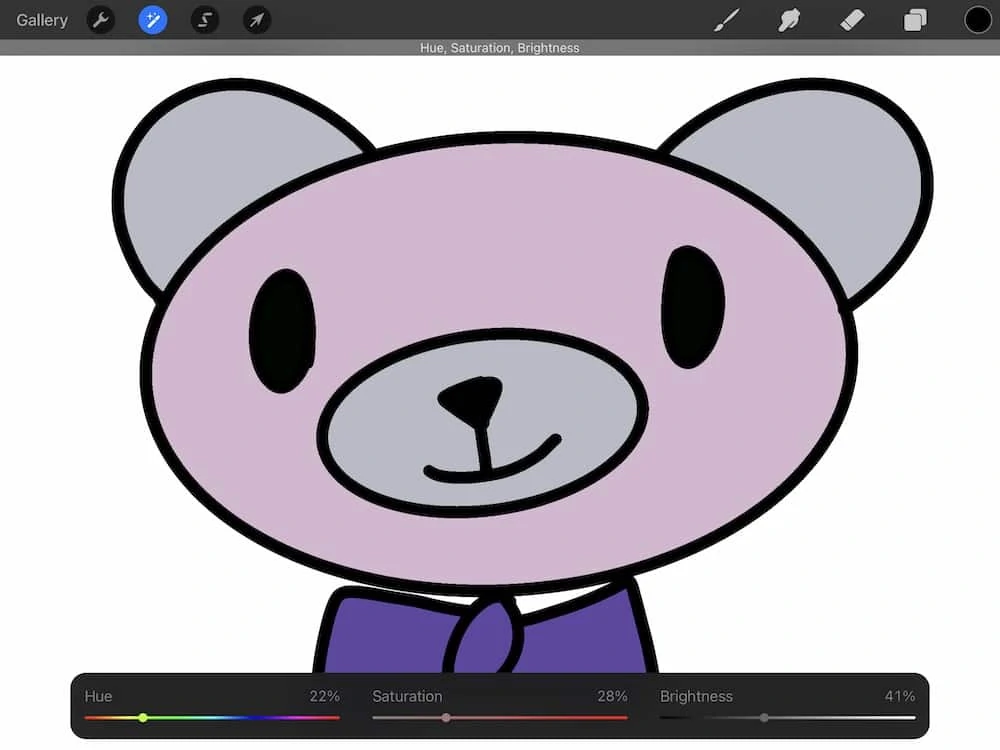
To keep these changes, you can click the saturation icon again or if you want to keep making adjustments, click on the canvas and click apply.
Color Balance
This setting allows you to change the hue settings using red, green, and blue (or RGB.)

You can apply the settings to the shadows, midtones, or the highlights by clicking on the sun icon to the left.
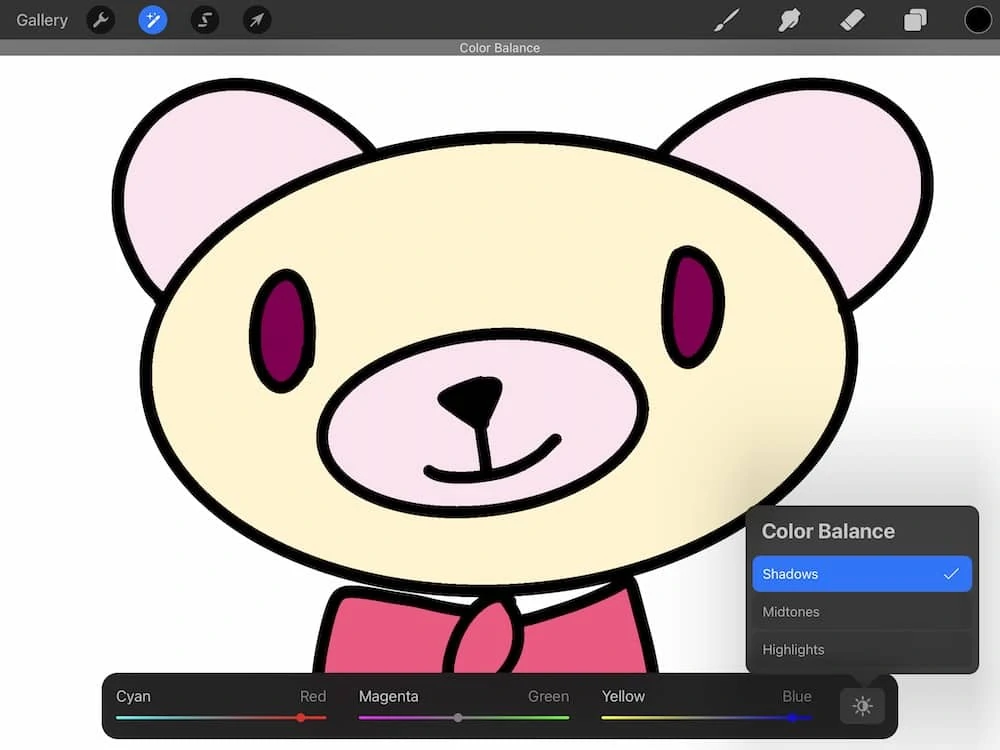
To keep these changes, click the adjustments icon.
Curves
This is another way to change the red, green, and blue colors. Click on the color that you want to change and then click on the line to add a node. You can move this node around to change the colors.
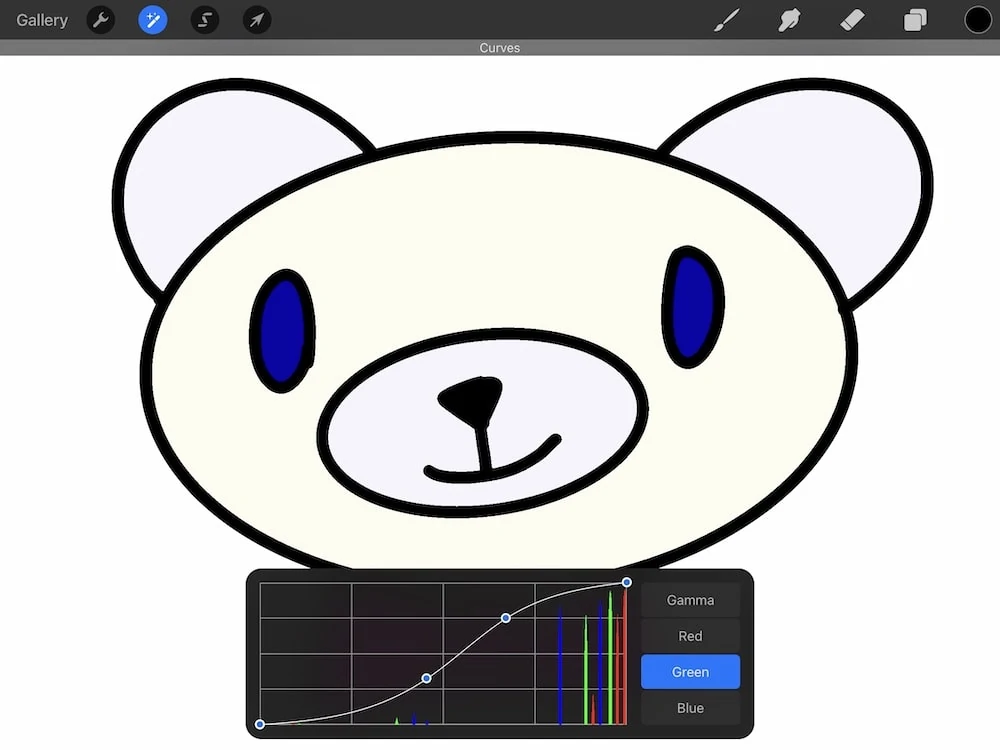
If desired, you can add more than one node.
The gamma setting changes all 3 colors at once.
To keep these changes, click the adjustments icon.
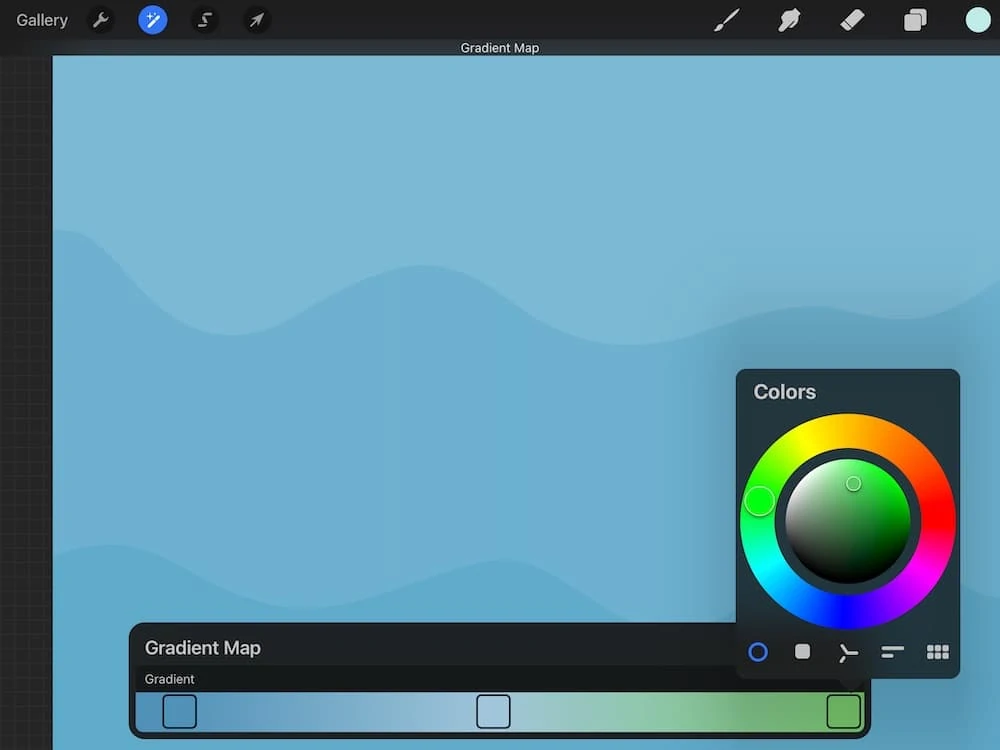
Gradient Map
This applies a gradient map to your layer. This works by changing the highlights, midtones, and shadows in your color scheme.
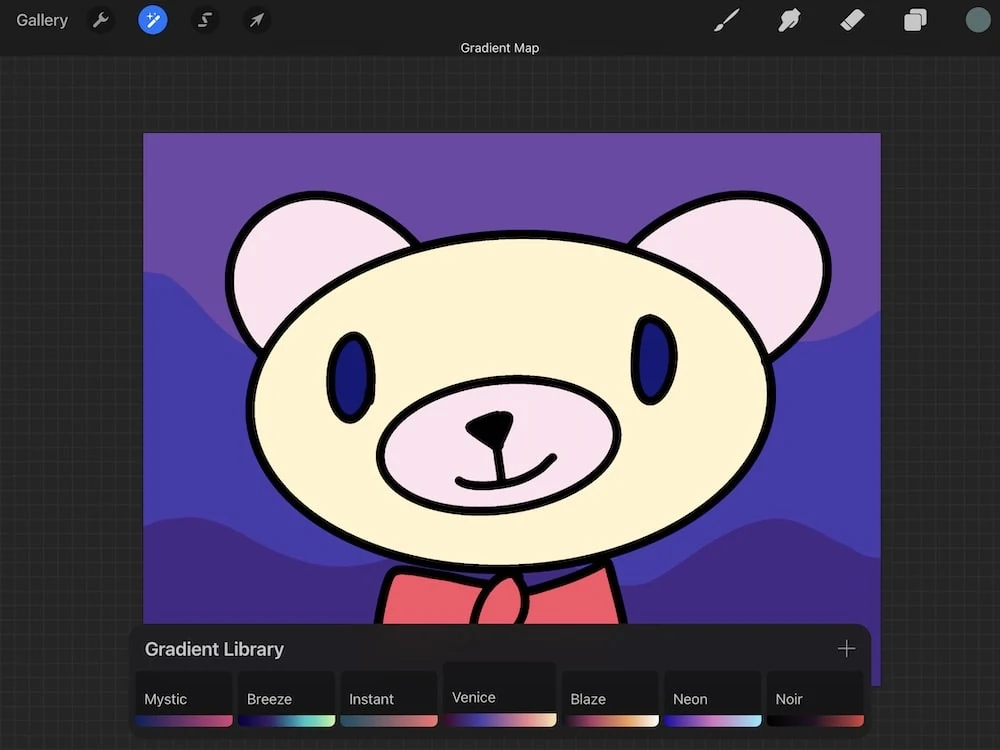
There are 8 preset color schemes, but you can make your own as well. Click the squares to change the colors. More squares can be added by clicking in the color range.
For the best results, choose colors with a variety of tones (not like my example below.)
This works best on designs with a lot of color variation.
Blur Options
Gaussian Blur
This setting allows you to smooth your layer with a blur. Click gaussian blur, then slide your finger at the top of the screen to adjust how much blur you want.
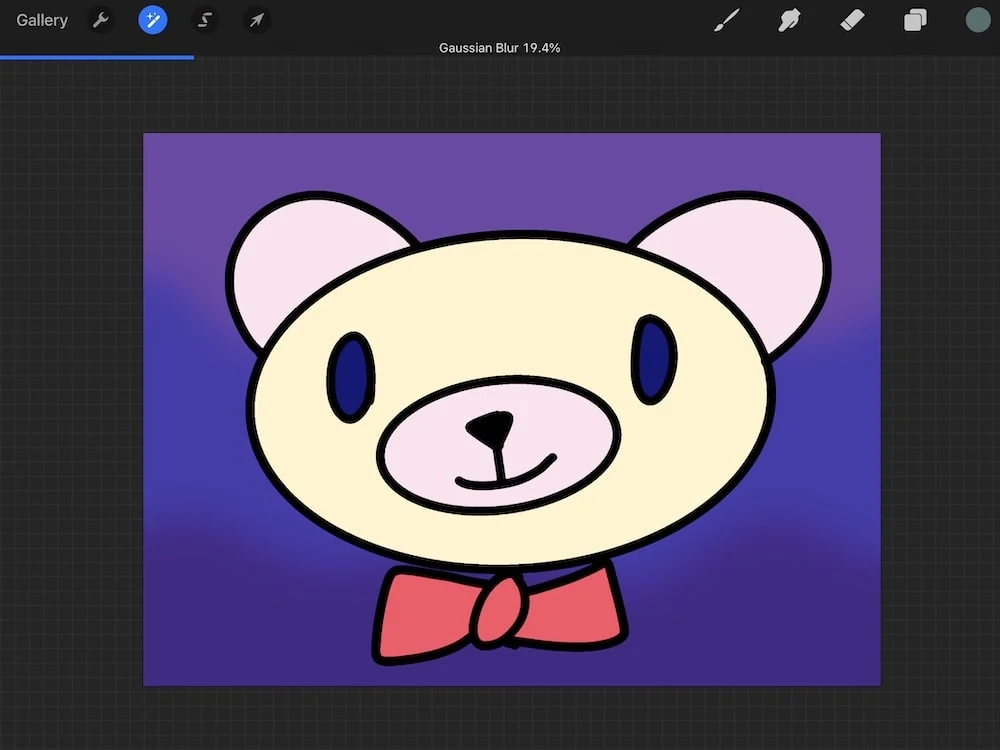
I love using this setting with the gradient map. It makes the perfect smooth gradient blend for a background.
Motion Blur
This setting allows you to add a blur effect that makes it look like the image is moving.
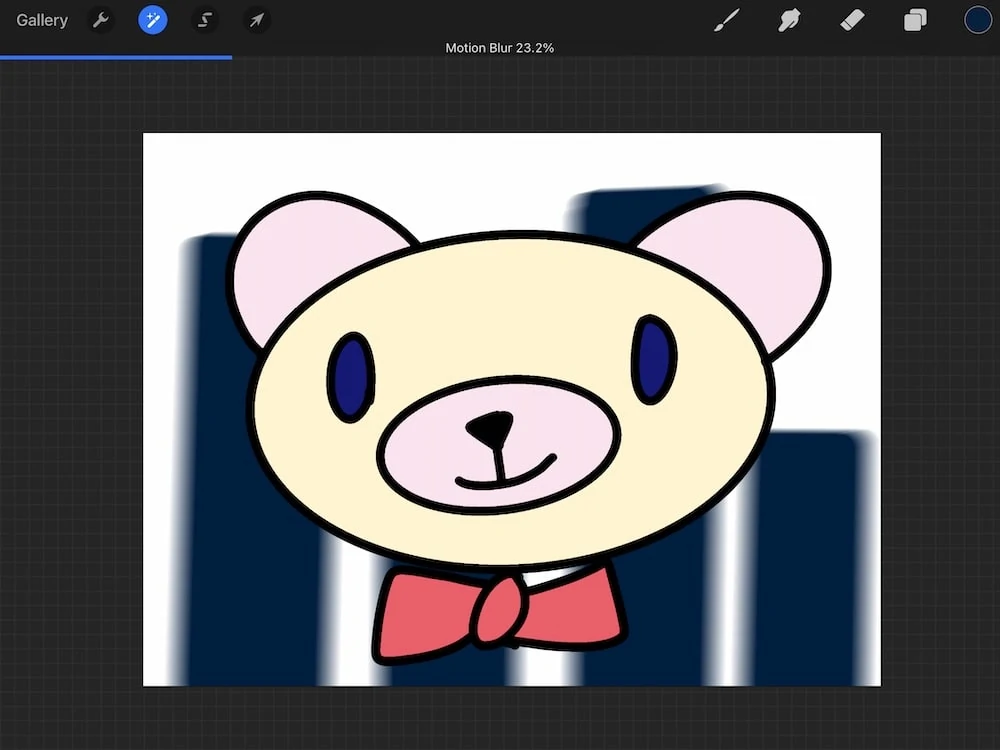
Drag your finger to the left to increase the amount of movement.
You can also drag your finger diagonally to add a diagonal movement.
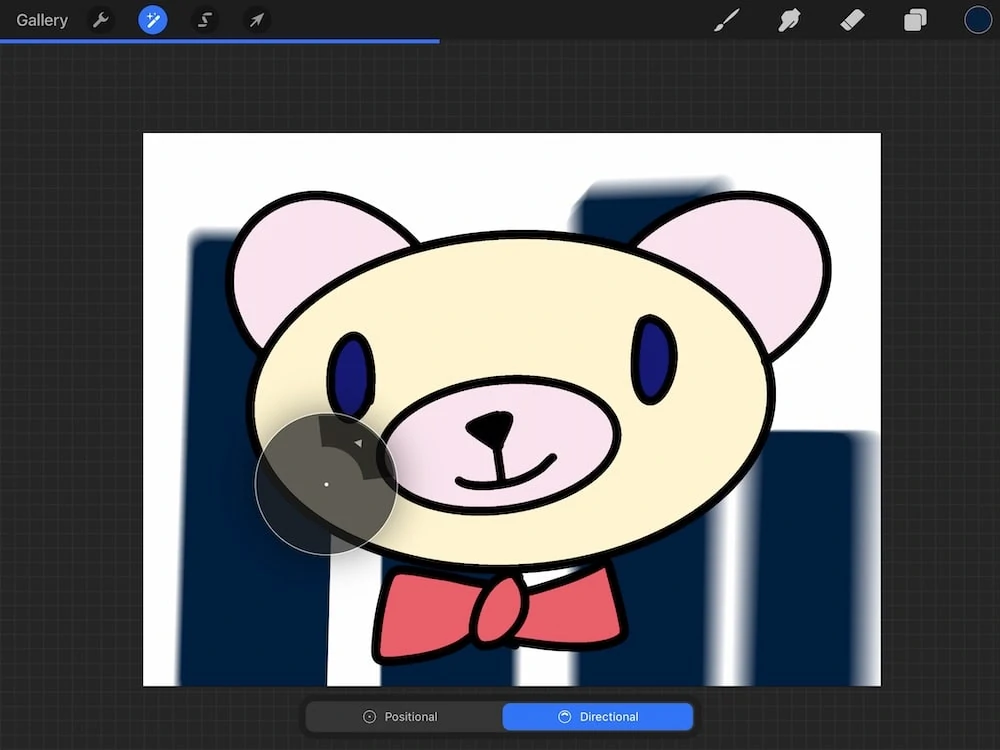
Perspective Blur
This setting allows you to add a radial or partial radial blur to give the effect of “zooming or blasting.”
When you select this option, a circle appears on the screen. Drag it to the center of where you want to place this effect.
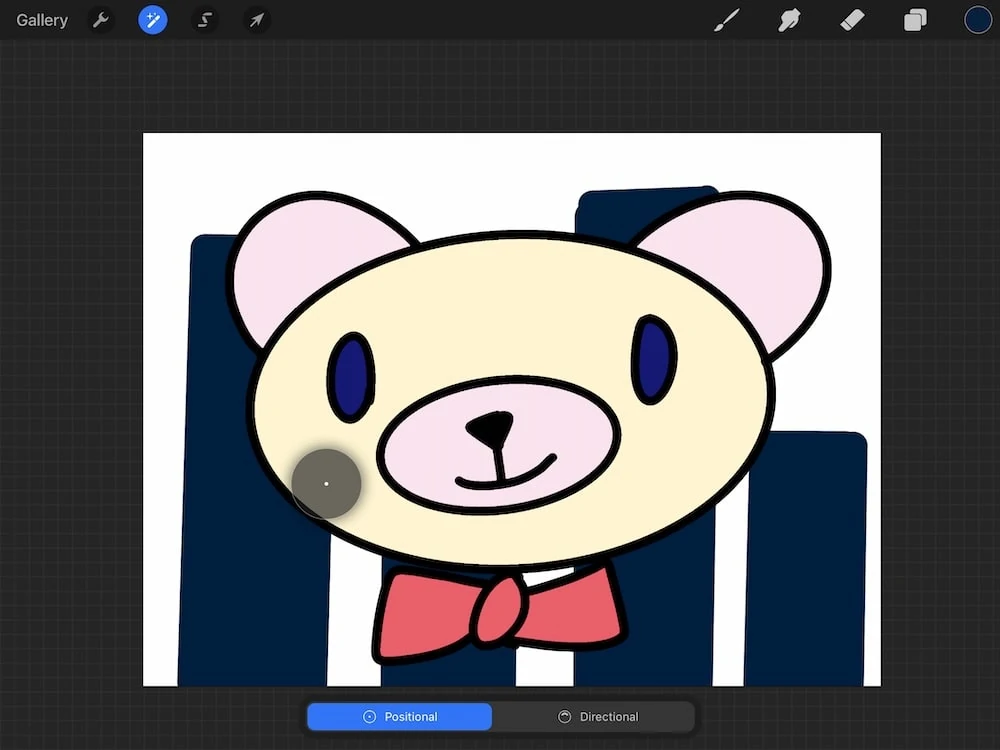
Then you can drag your finger across the screen to adjust the amount of blur.
You have the option for positional and directional. Positional applies the blur all the way around the circle.
Directional only applies it in the direction chosen (there’s an arrow in the circle that you can move.)
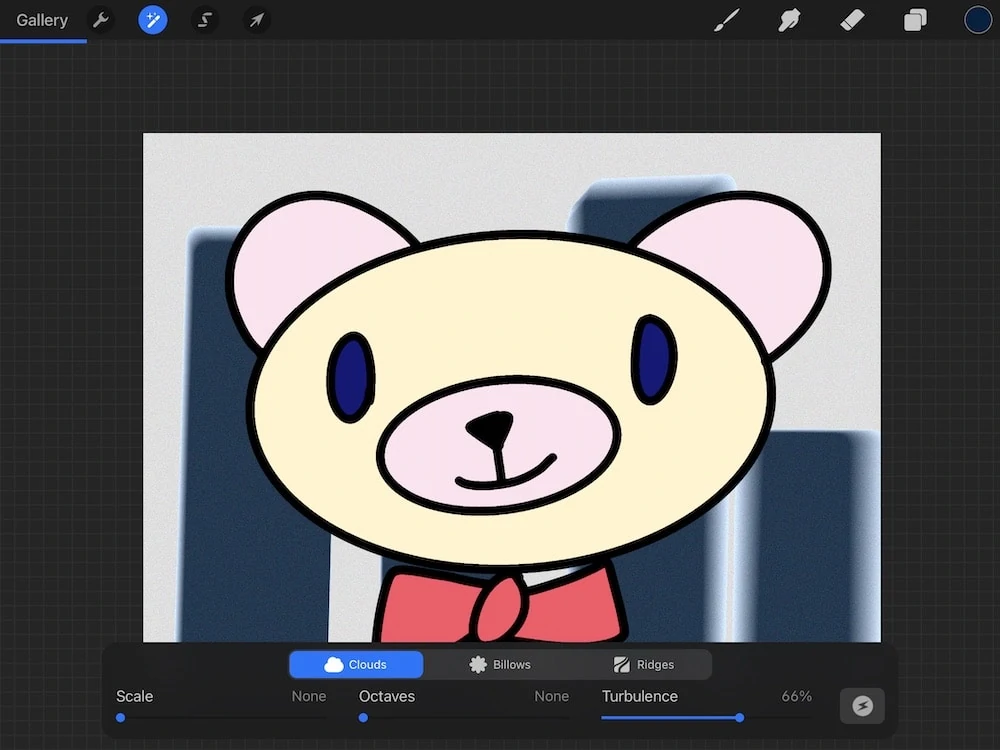
Noise
Noise
This adds a grainy effect to the layer. Drag your finger across the screen to apply more or less of the effect.

You have 3 options for noise styles: clouds, billows, and ridges. They change density of the noise effect for different effects.
Scale changes the size of the noise pixels. Octaves adjusts the complexity of the noise, and turbulence twists the noise effect to add more complexity.
There’s also an icon that looks like a lightning bolt. This is where you can alter the channel settings.
The single setting changes the noise to black and white. The Multi setting changes it to colored.
The additive setting is a toggle that lets you turn on or off the transparency of the noise effect. When it is turned off, the entire layer is affected (not just the art) because the noise is opaque.
Sharpen
This setting allows you to sharpen your art to achieve an in-focus look.
It works like the previous effects, by dragging your finger across the screen until you’re happy with the effect.
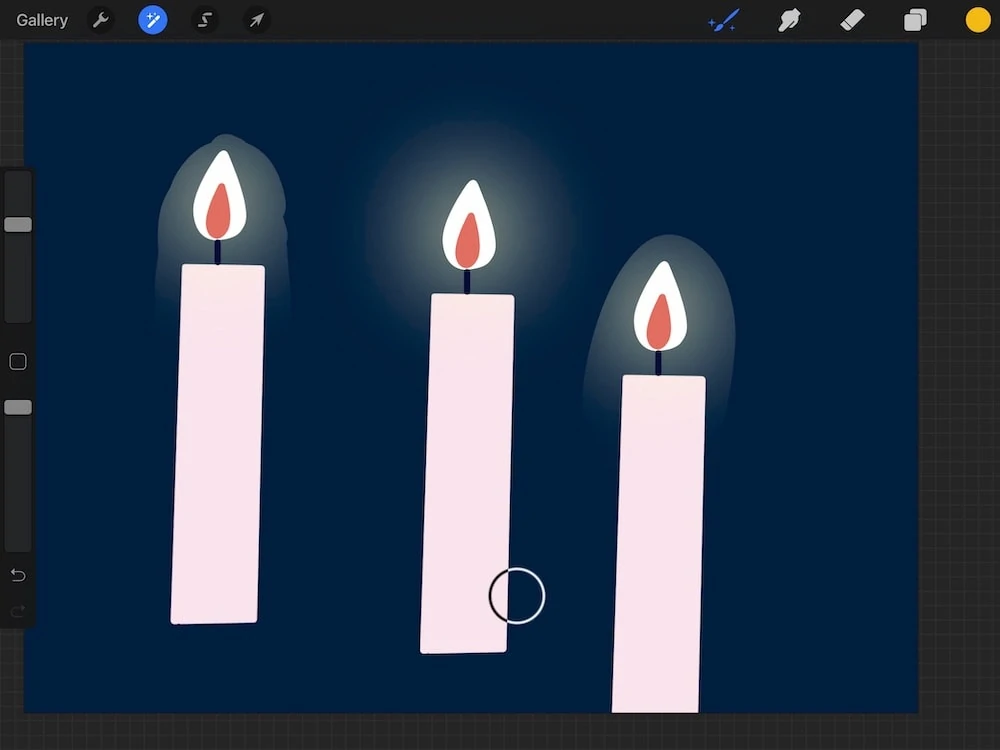
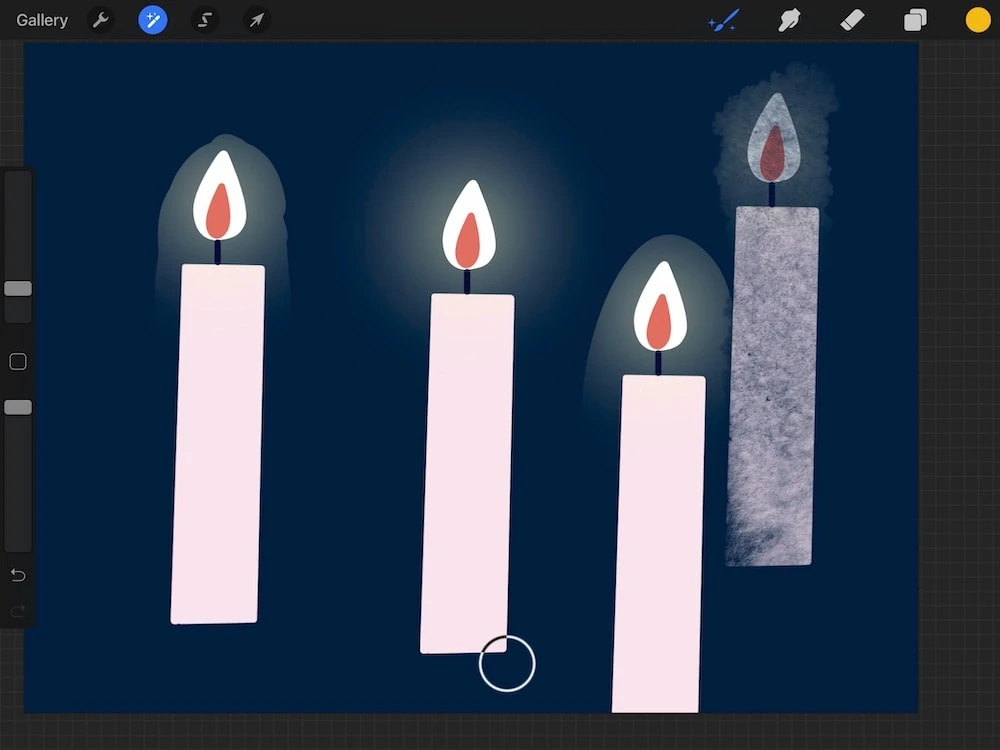
Bloom
This effect creates a glow around an object. Use this effect by sliding your finger across the screen to increase the bloom effect. It’s great for creating lighting in an illustration.
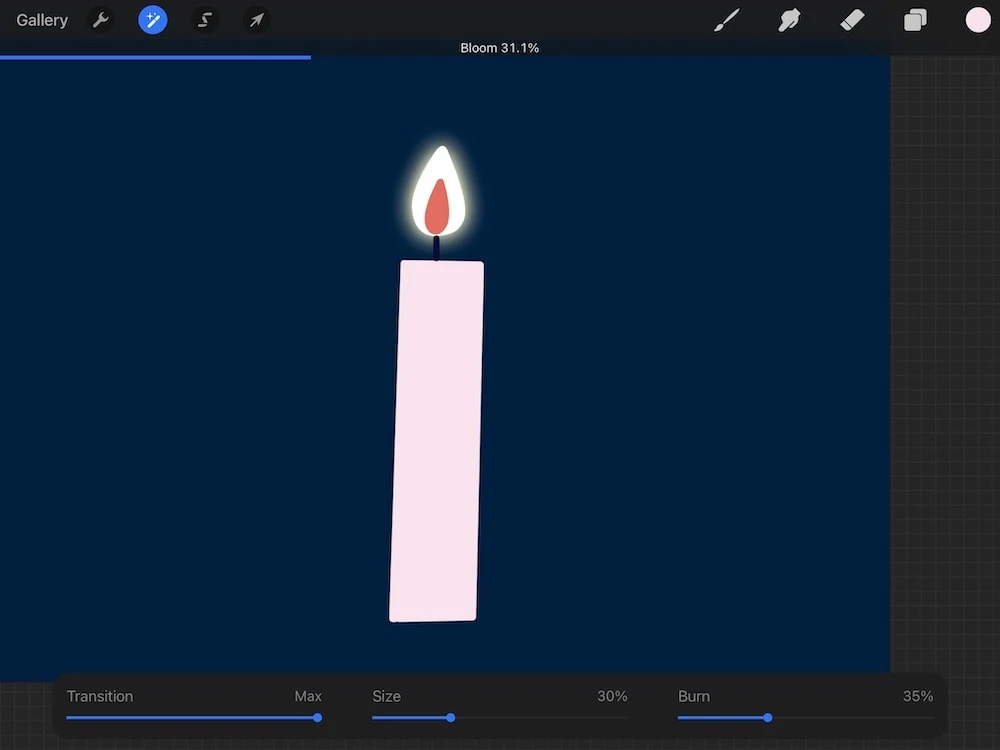
You can also alter the transition, size, and burn amounts for different effects.
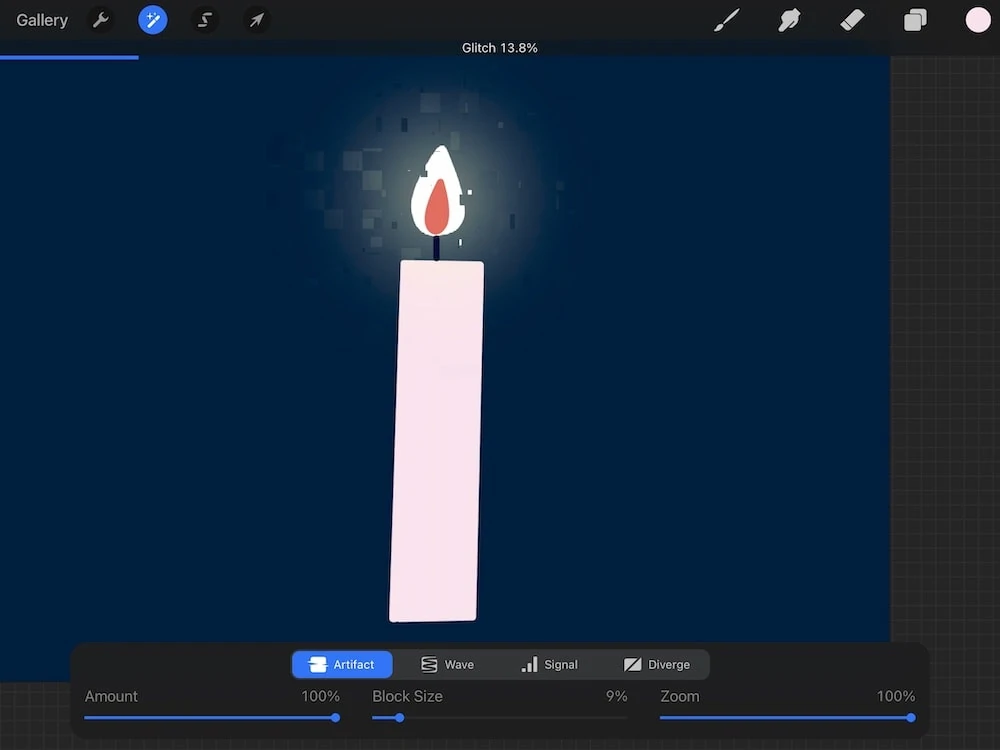
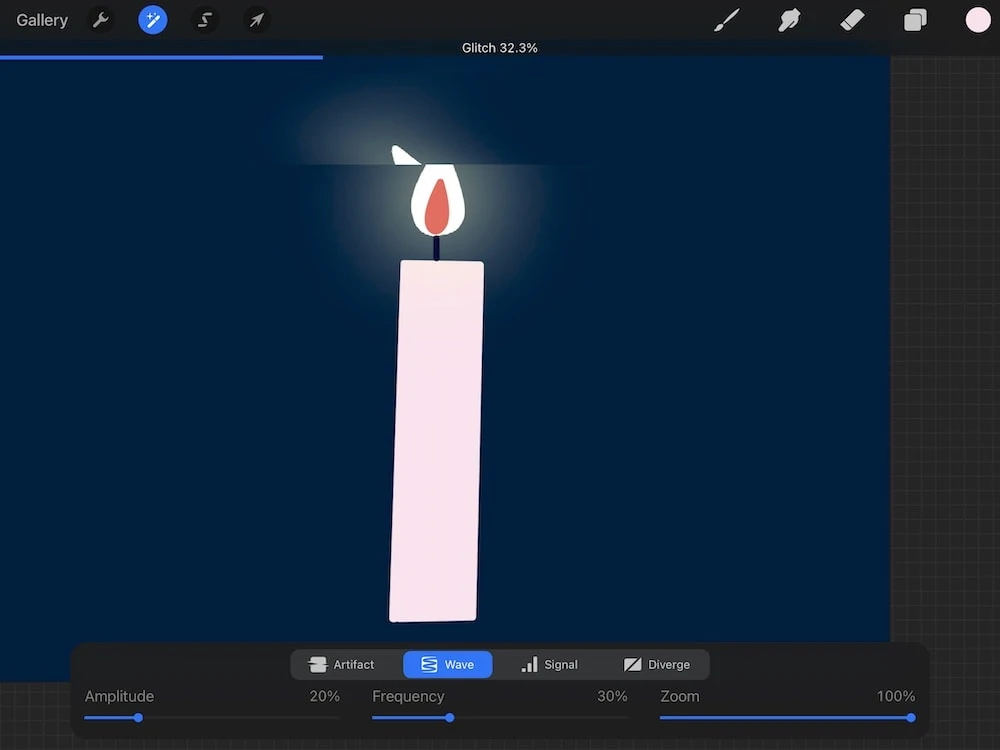
Glitch
This setting applies an effect to make your art look like there are analog flaws, similar to old VHS tapes or film.
You have 4 options for glitch styles: artifact, wave, signal, and diverge.
They are applied by sliding your finger across the screen to increase the effect.
The artifact effect applies horizontal lines and blocks across the layer.
The wave effect applies distorted waves.
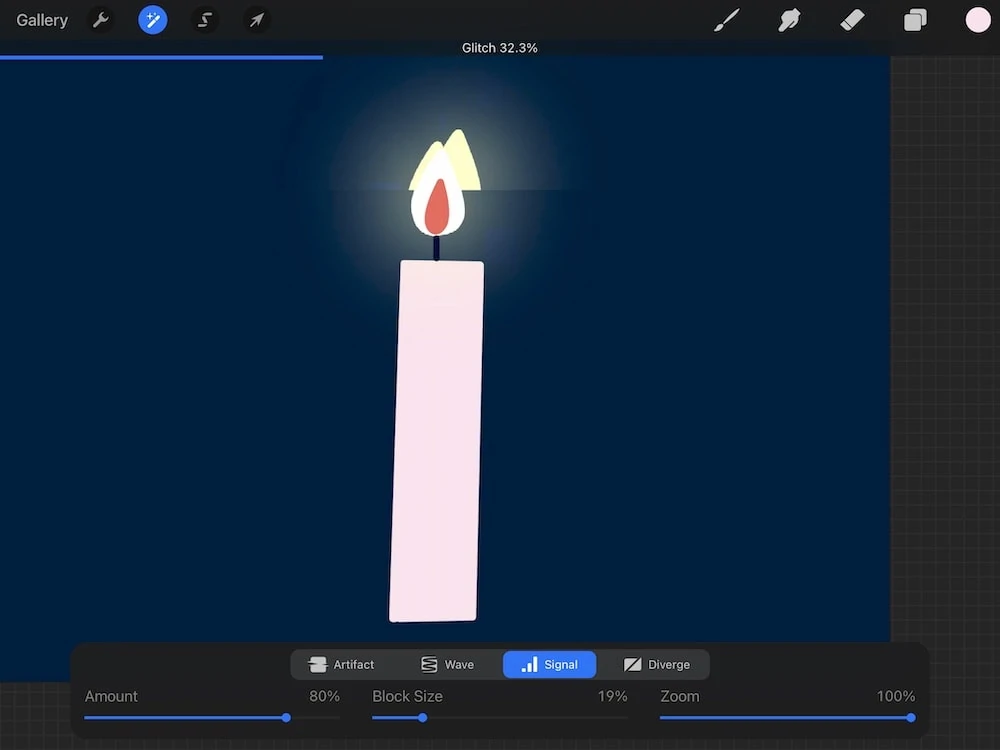
The signal effect applies horizontal lines and blocks with a distorted version of your image.
The diverge effect applies horizontal lines and color changes.
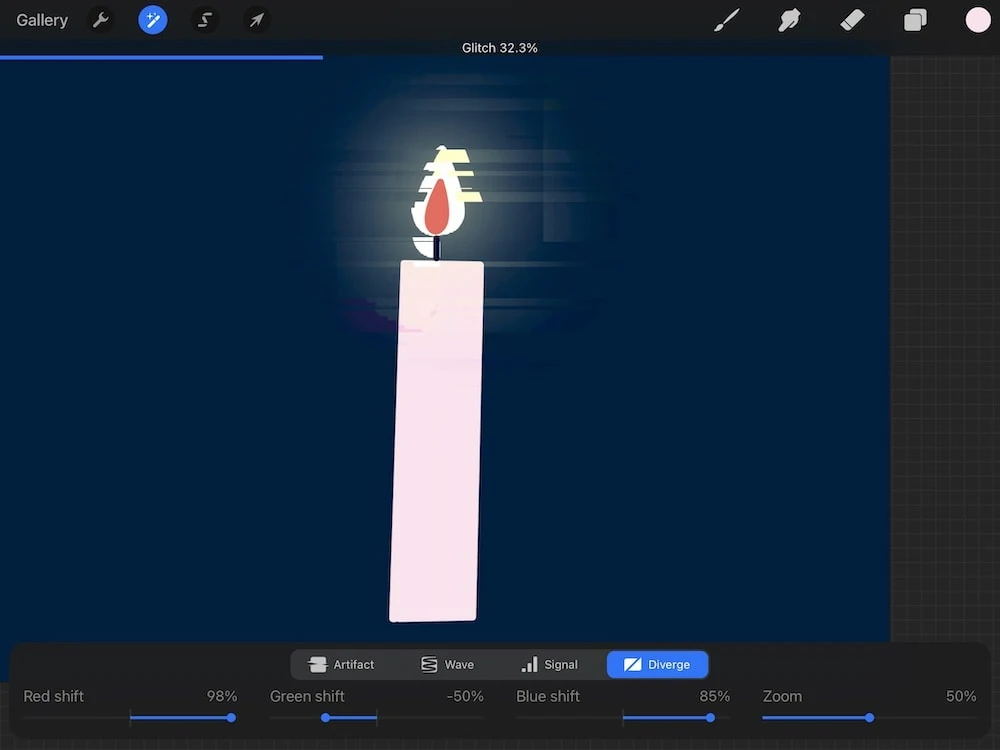
You also have the option to play with how the colors shift for red, green, and blue, as well as a zoom option to alter the size of each effect.
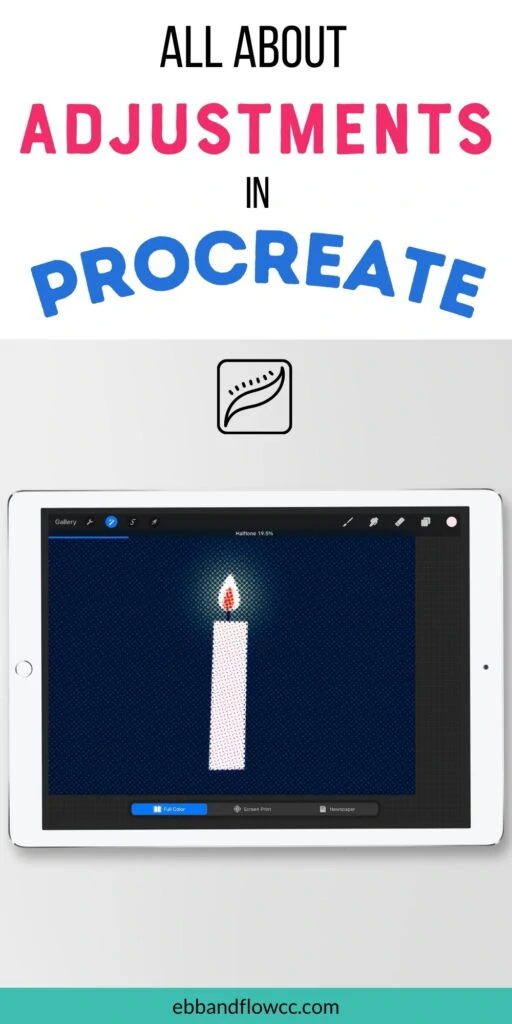
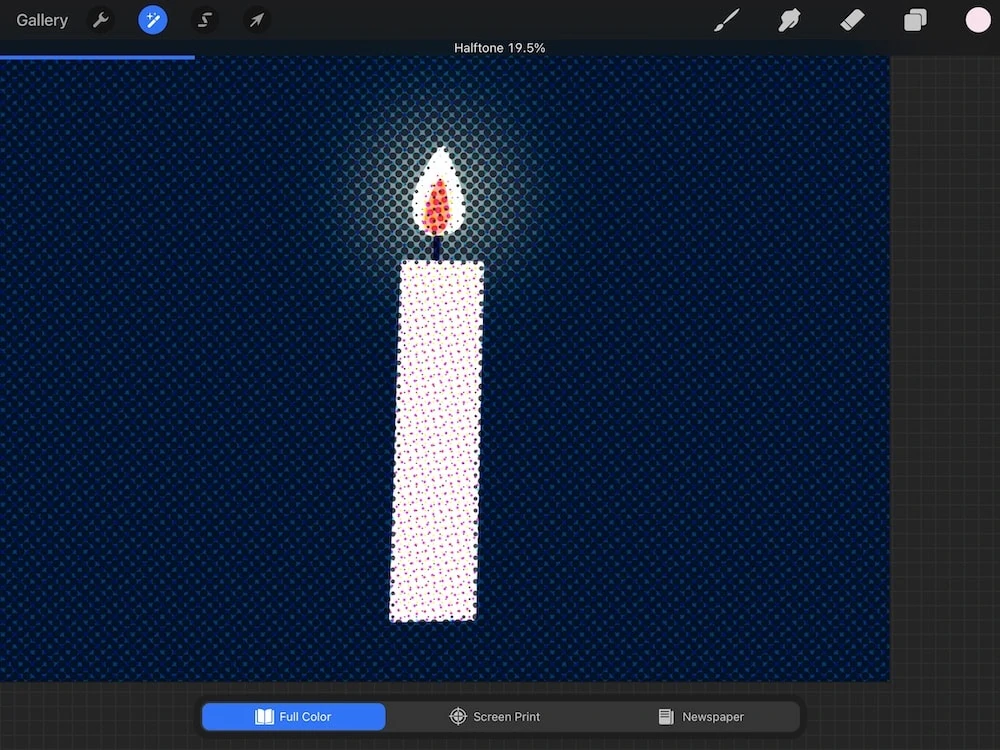
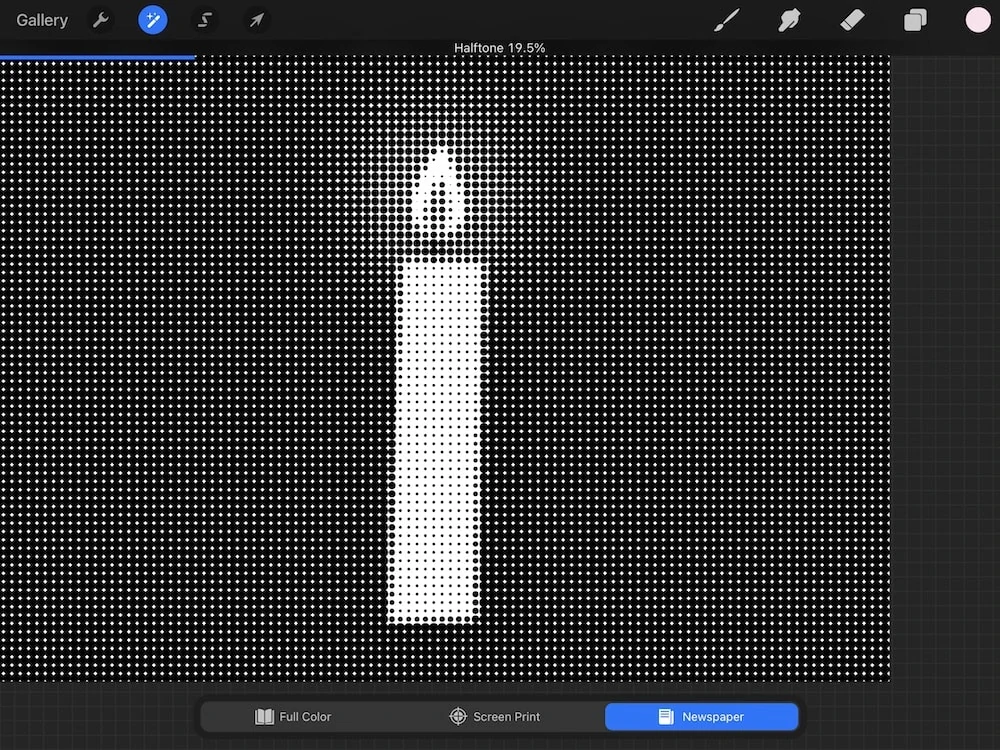
Halftone
This effect applies a halftone effect to your illustration. This is perfect for a retro look or a comic book look.
Slide your finger across the screen to apply this effect.
You have options for full color, screen print, and newspaper.
Full color applies a color halftone while keeping the image background to mimic magazine printing.
Screenprint applies a halftone effect with a white background to mimic screenprinting.

Newspaper applies a grayscale halftone effect to mimic newspaper.
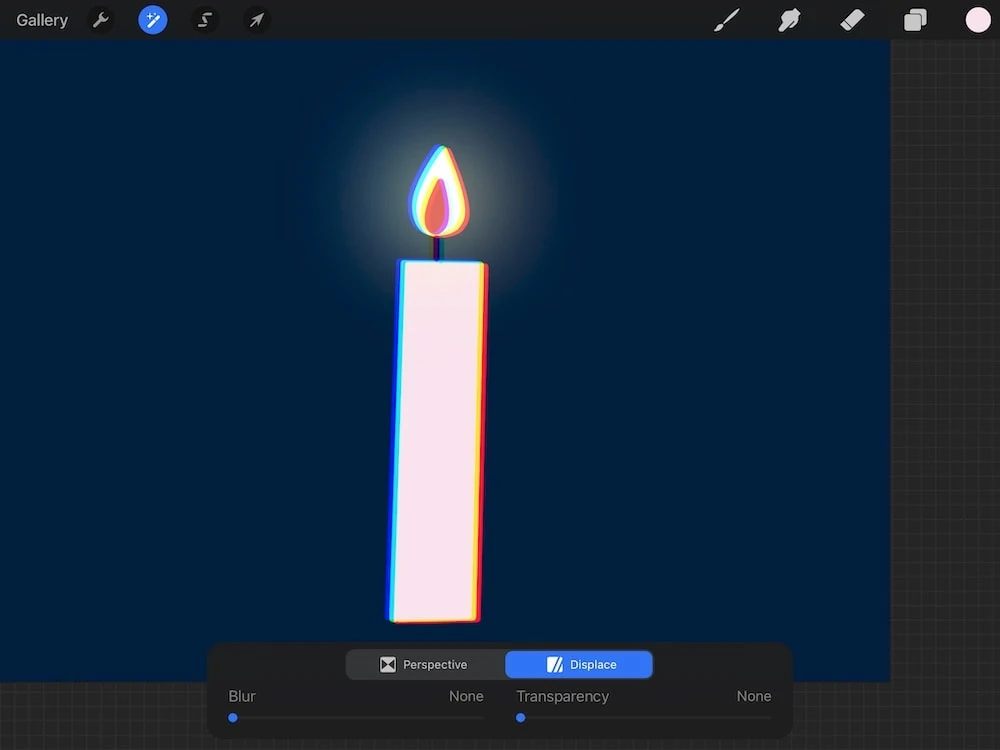
Chromatic Aberration
This effect mimics a camera’s ability to shift the red and blue planes of the art. With Procreate, you can exaggerate this effect.
To me, this effect mimics a retro screenprinting misprint effect.
To use this effect, slide your finger across the screen. With this effect, less is more.
Procreate offers 2 styles: perspective and displace.
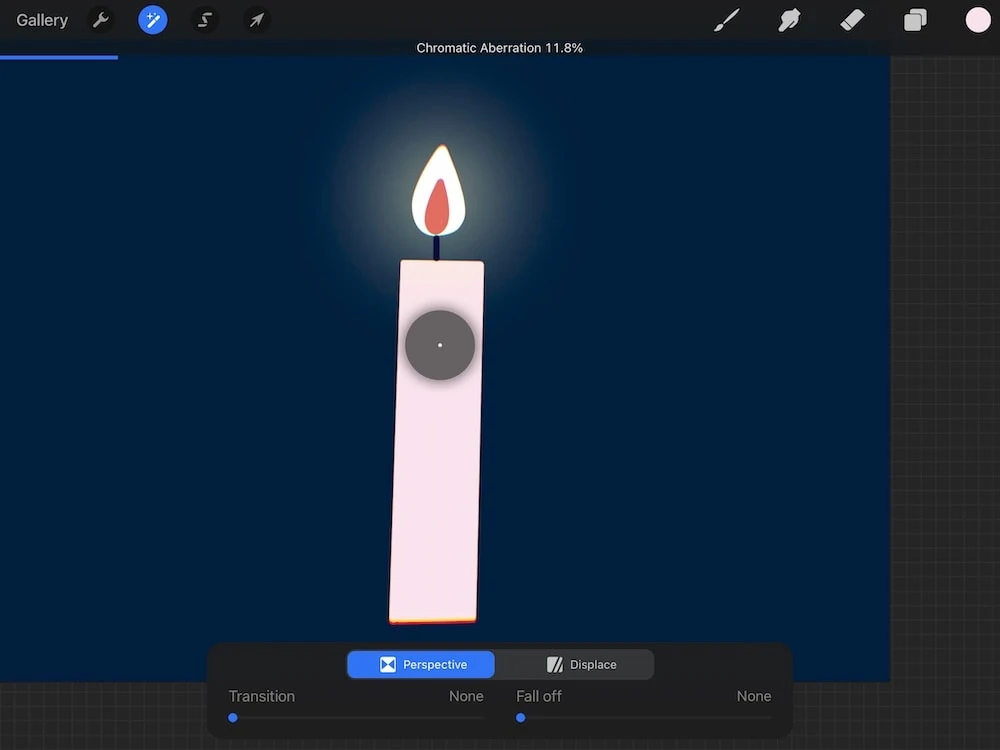
Perspective gives you a focal point for the effect. When placed in the center, the effect centers on the art. When places far from the center, the effect is more exaggerated.
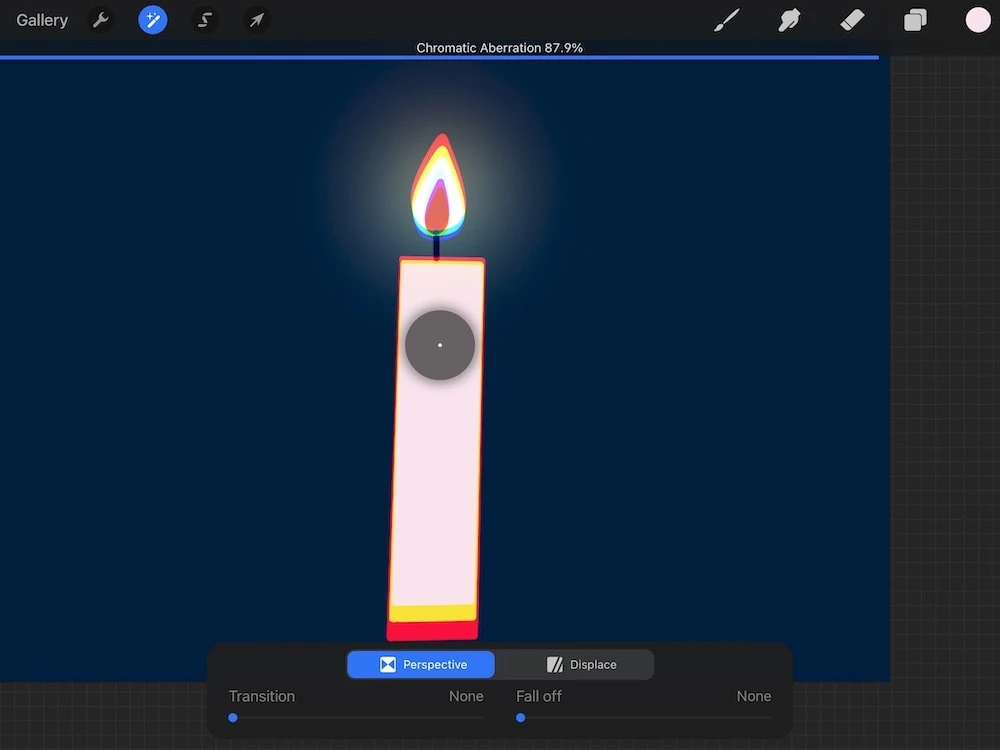
The transition setting alters the blur amount that radiates from the focal point. The fall off setting changes the radial distance from the focal point
Displace changes the effect horizontally and vertically. Move your finger left and right or up and down to get different effects.
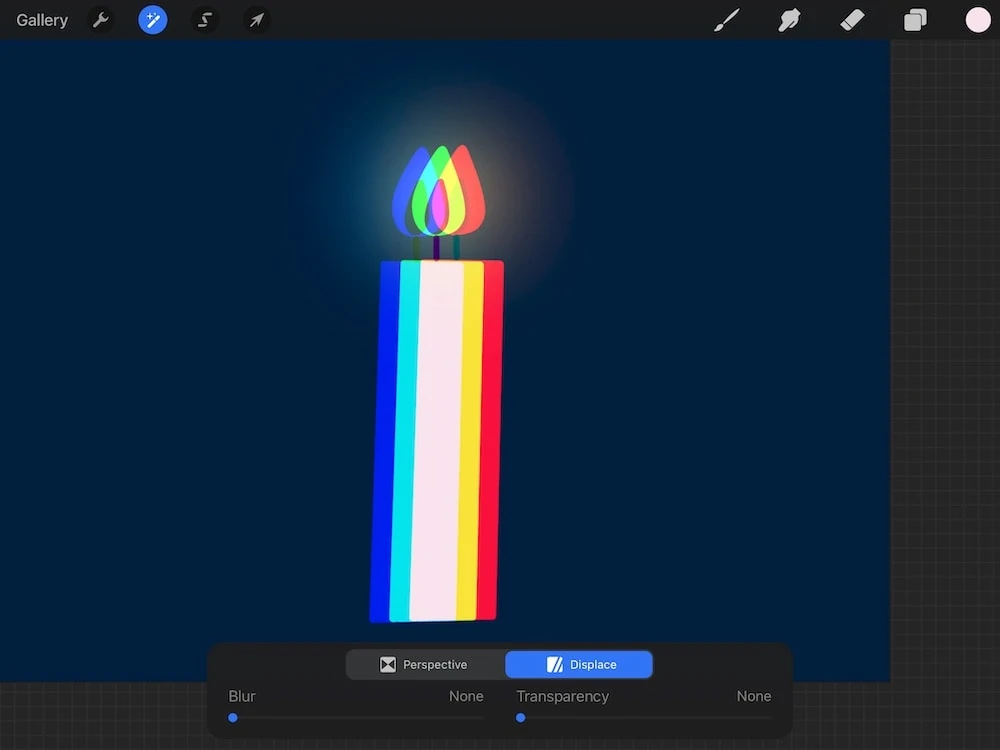
Increasing the blur makes the effect more subtle and it almost glows. The transparency slider changes the transparency of the effect.
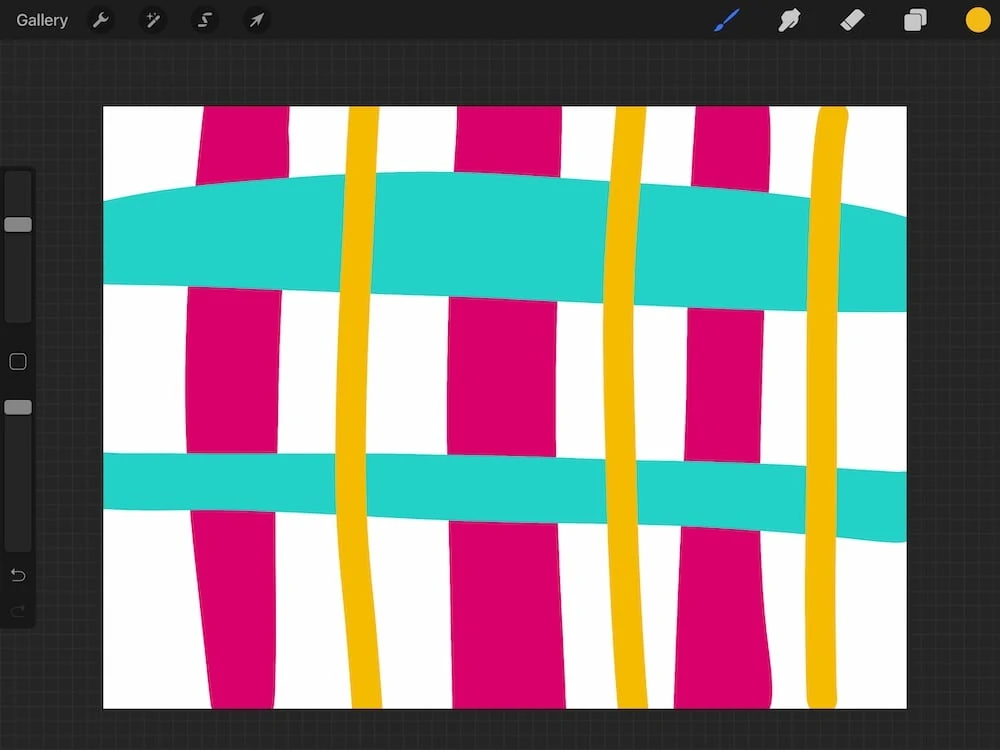
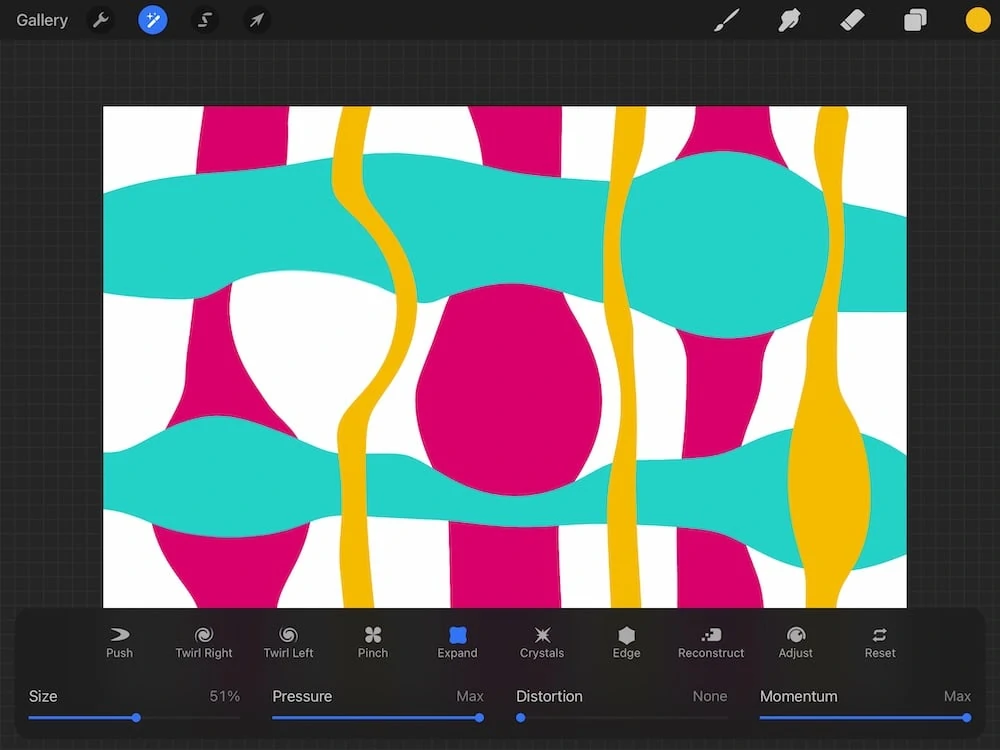
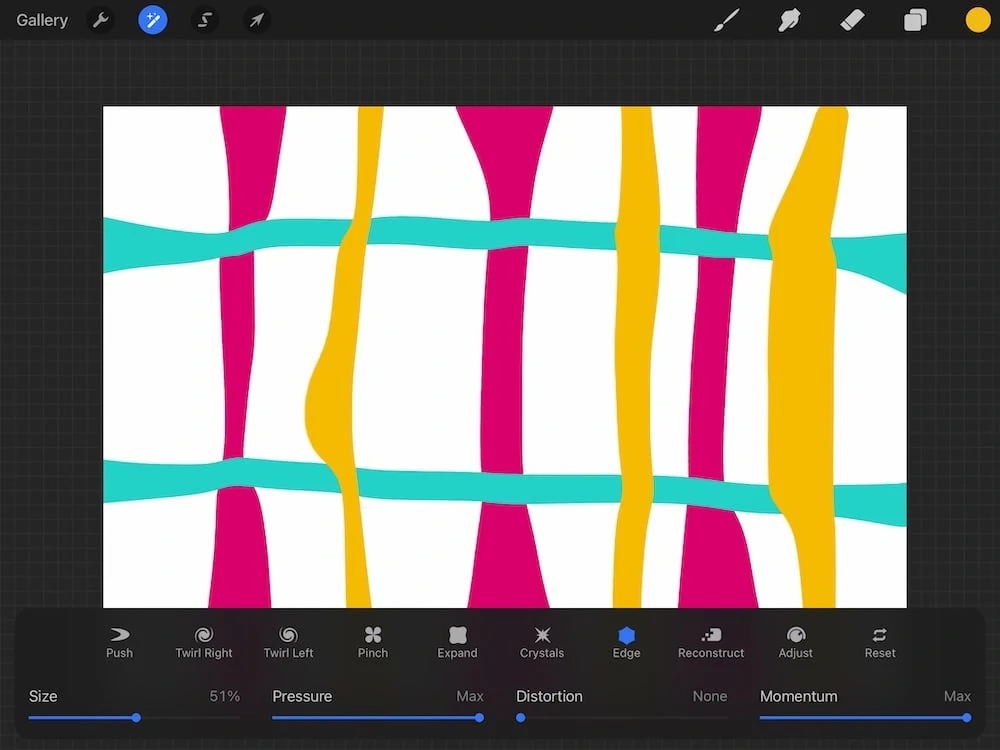
Liquify
This setting warps the layer you are working with. You can use this to change the shape of an item or use it to create marblized artwork.
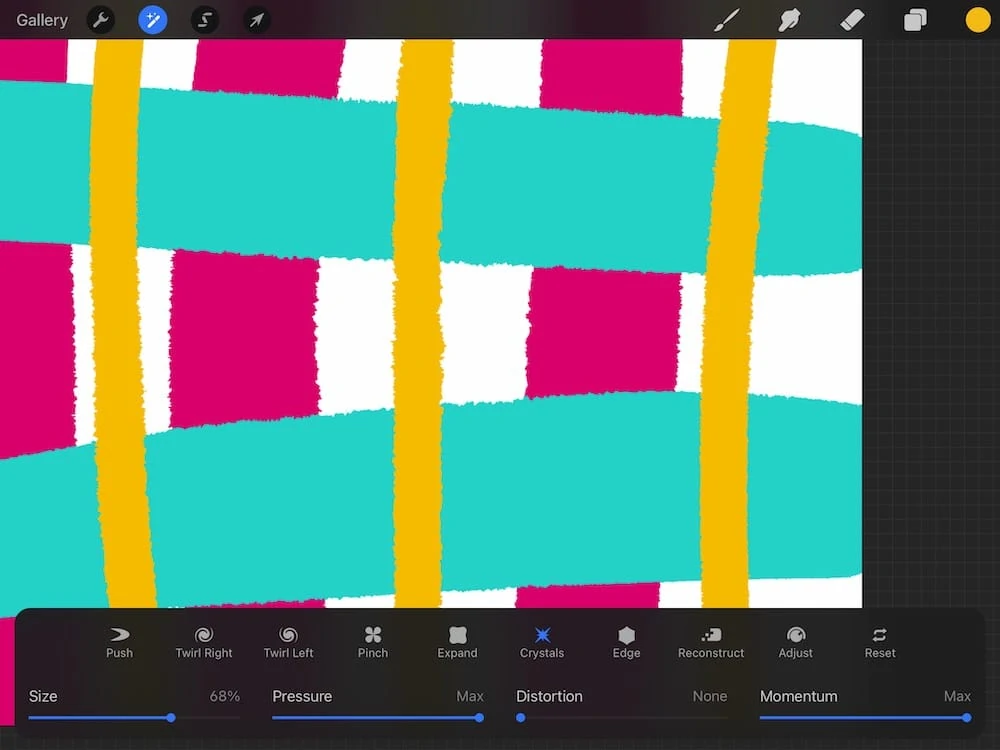
Push. This effect pushes the pixels in whatever way your draw.
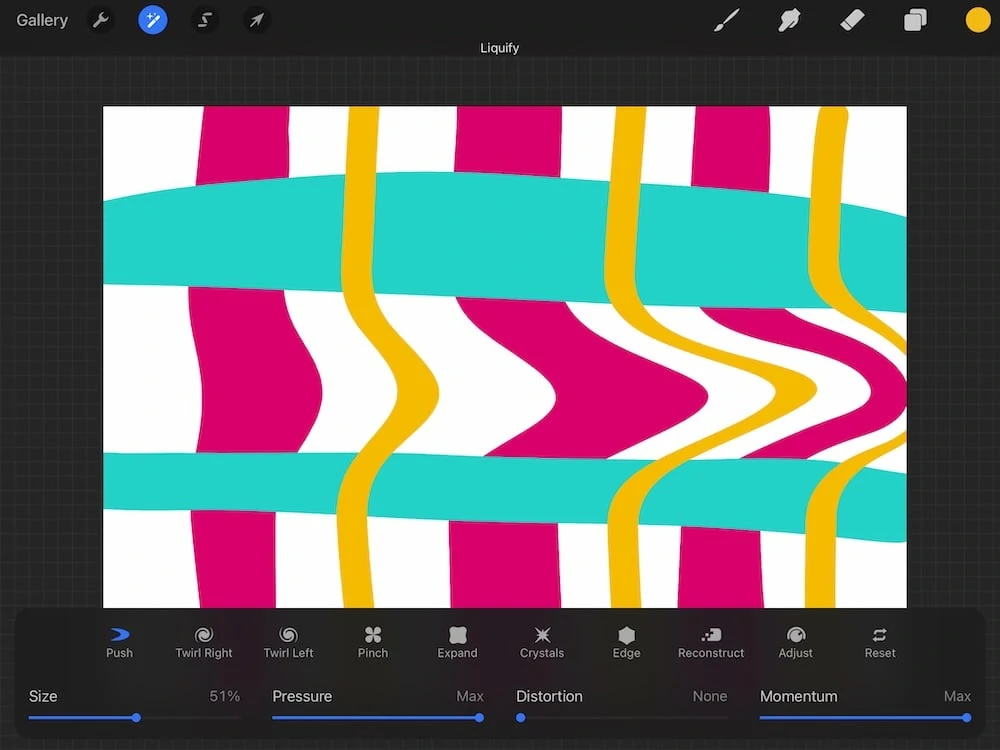
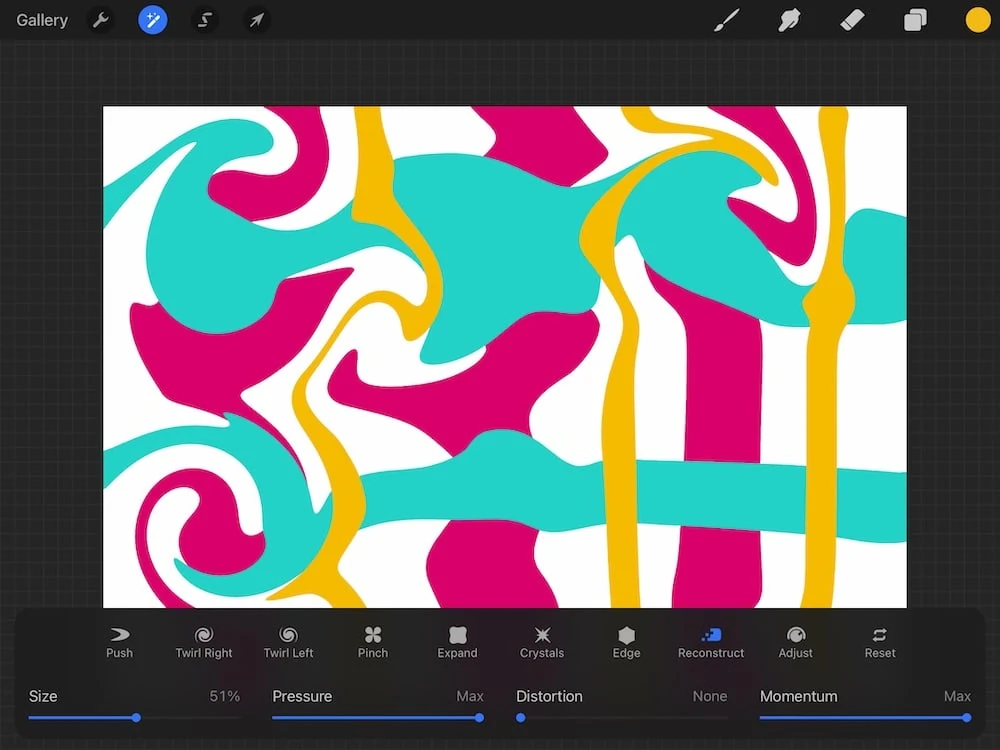
Twirl right and left. This twirls the image in a right or left spiral. Hold it in one place for a more exaggerated swirl.

Pinch. This effect pinches in wherever your draw. It works best by holding in one place.
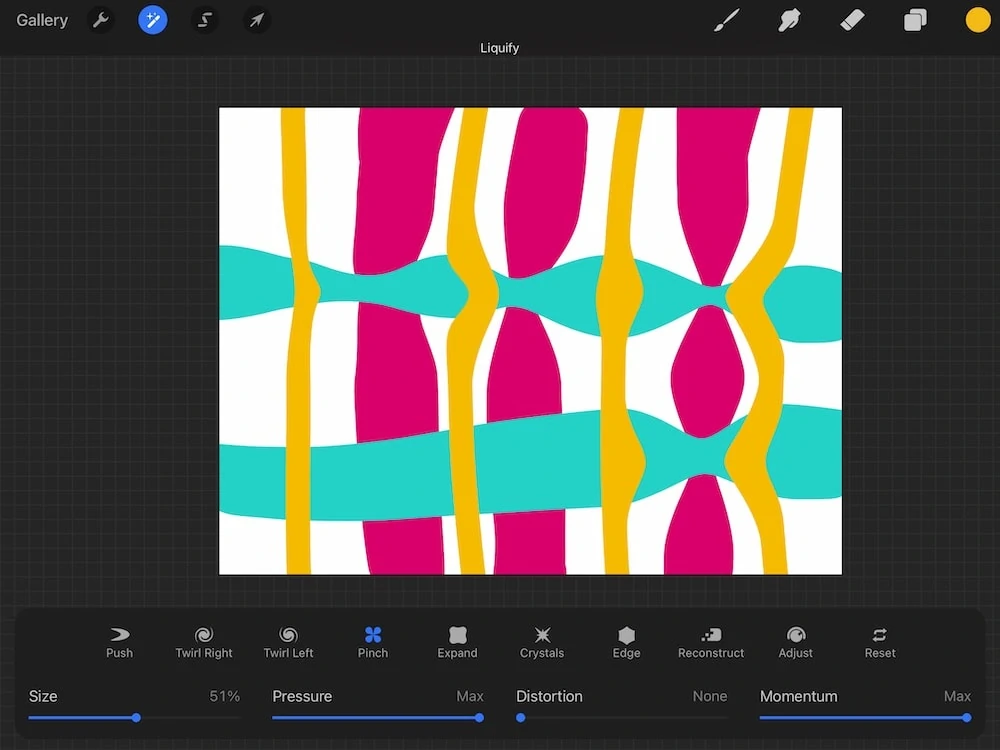
Expand. This effect makes whatever your draw over expand.
Crystals. This adds a jagged effect to shapes that you draw on.
Edge. This effect brings pixels in towards a line. It can be made to make lines skinnier, but it does create distortion.
Reconstruct. This effect works to restore some of your art when you get a little too carried away with the liquify effects.
Adjust. This setting allows you to adjust the strength for each setting. If your swirls went a little crazy, this is an easy way to turn them down a bit.
Reset. Reset is an undo for the liquify setting.
When combined, you can make really fun, swirly, marbleized art.
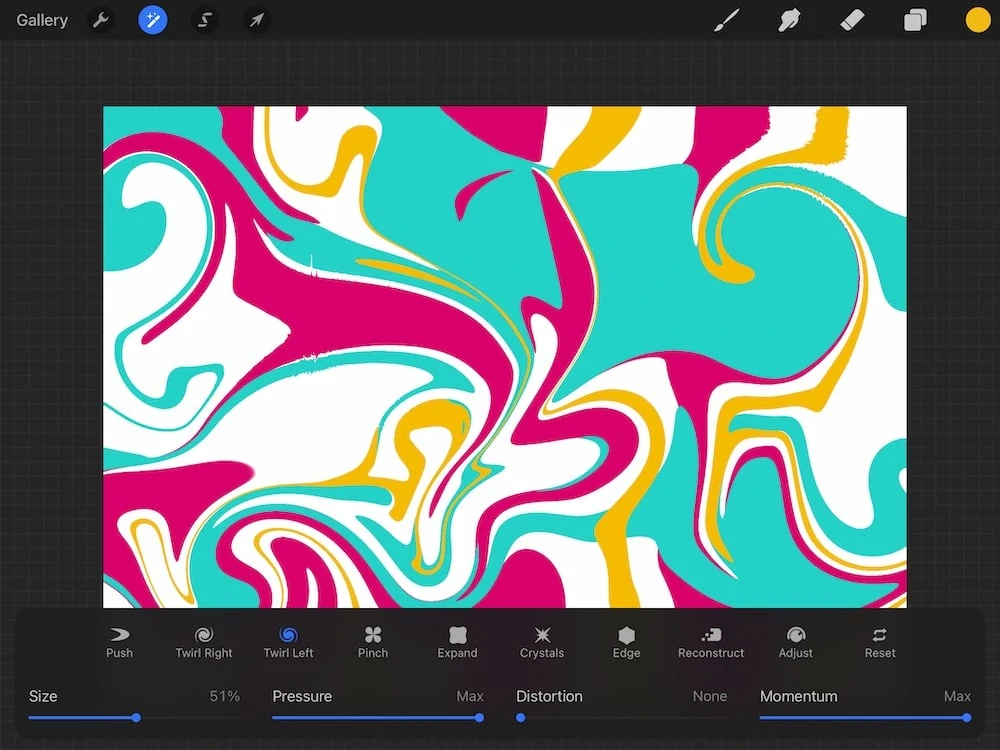
You can also change the brush size of each effect, the pressure when using the Apple pencil, the distortion amount, and the momentum which changes how long the effect keeps going after your remove your brush.
Clone
This effect allows you to duplicate part of an image.
To use this effect, click clone. Drag the disc to the part of the illustration that you want to clone, then draw with the Apple pencil in the location for where you want to clone it.
If you pick up the pencil during this process, a new drawing will begin, so keep drawing until your clone is complete.
You can also change your brush to make textured clones of your existing art.
You can change the brush size and the transparency, just like when using regular brushes.
You Might Also Like:
- How to Install Brushes in Procreate
- Importing Color Palettes in Procreate
- Using the Color Picker in Procreate
- Using Selections and Transform in Procreate
- Using Drawing Guides in Procreate
- Tips for Using Blend Modes in Procreate
- How to Animate with Procreate
- Adding Text to Procreate
Pin for Later!