How to Use Procreate

I’m a self-taught artist who loves sharing tips and tutorials for painting with watercolor and gouache, and using the Procreate app on the iPad.
Learn how to use Procreate. This overview on the basics of Procreate will have you drawing in no time!
Get even more Procreate tutorials here.
This post contains affiliate links. By purchasing an item through an affiliate link, I earn a small commission at no extra cost to you. As an Amazon Associate I earn from qualifying purchases.
Procreate is my favorite drawing app on the iPad. Procreate works best with the Apple pencil because many of the brushes work with the pressure of the Apple pencil.
You can check here to see which iPads work with which Apple pencil. I currently have the 10.5″ pro version and the Apple pencil 1. They still work great!
You might also want a screen protector to make drawing feel more natural and prevent glare. I am about to buy this screen protector for my iPad.
At the time of this writing, I am using Procreate 5X.
Just a note before we begin. This tutorial is going to be LONG. Like really long. So be sure to use the table of contents to skip to the areas you need.
As I wrote the post, I decided to break parts of this up to keep it from being 10,000 words. Who wants to read that? So click around for more info!
You might also like this post on the Procreate Brush Studio.
How to Use Procreate
Gallery View
When you open Procreate, you see the gallery view. This is where all of your Procreate artwork is stored.
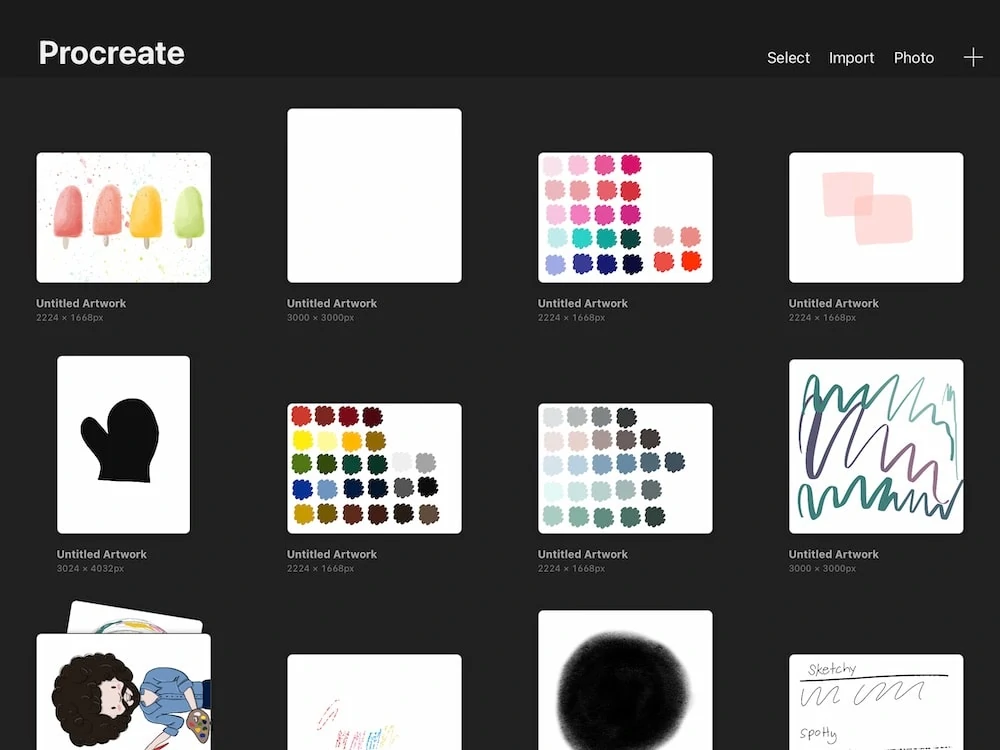
To keep this area organized, you can create stacks of art. Click select and click the circles next to the artwork that you want. From there you can click “stack” at the top of the screen.
To rename, tap the name and a screen will come up to type a new name.
How to Create a Piece of Art
Click the plus sign in the top right corner. This brings up a dialog box to create a new canvas. The preset sizes are typically not of great quality, so I recommend making your own.
Learn more about making the perfect canvas size here.
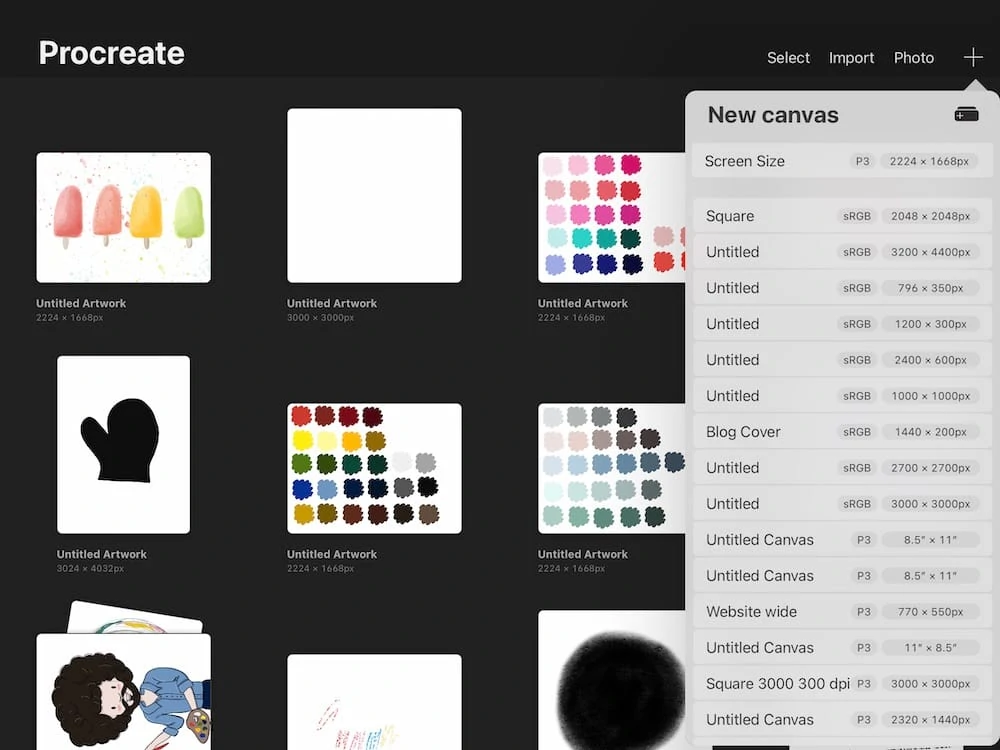
Click the plus sign in the corner and enter your pixel size (I like a width over 3000px to ensure good quality.) If you are making something to print at home, make the document 8.5″ x 11″ (or the size of your paper if you’re not in the US.)
Choose your DPI. This is where you choose the quality level. It’s set to 300 automatically, which is a good amount.
The canvas size and DPI can reduce the number of layers that your art can have. This also depends on the iPad that you’re using. Newer iPads with more storage can handle more layers.
You can also choose your color profile. For pieces that are going to be printed, choose CMYK. “Generic CMYK profile” is probably fine for what you’re making.
If you just want to use it online and share it on Instagram or something, choose RGB.
If you’re creating something for Print on Demand, be sure to check with the manufacturer when choosing your color mode. They all differ. If you’re not sure what to choose, stick with RGB.
You can also choose your time lapse settings here. Procreate records everything you do, so if you want to use those videos, you can change the settings here.
Canvas properties gives you the option to change the background color. You can also toggle on the option to hide the background. (You can do these in the layers panel as well.)
Procreate Interface
The white background is the canvas. You can make a pinching motion with your fingers to zoom in and out of the canvas. It can also be rotated around, which comes in handy when drawing stuff.
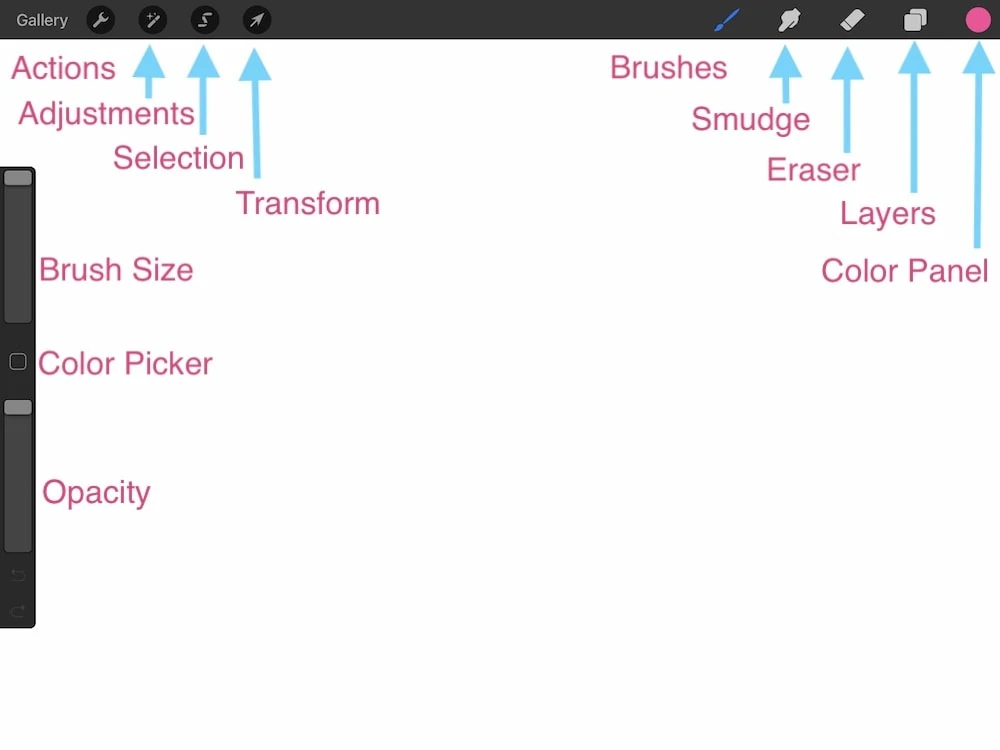
The sliders on the side control brushes. (Your slider may be on the other side, but that can be changed in the preferences, under the “right-hand interface”.)
The top slider controls the brush size. Moving the slider up makes the brush size increase and moving it down makes the brush size decrease. As you scroll, it will tell you the percentage of the brush size.
(Get more tips for resizing brushes here.)
If you love the size of your brush, try to remember it as you work. (Update: The latest Procreate update allows you to bookmark a favorite size. Just click the plus sign.)
The bottom slider changes the opacity of the brush.
The square in the middle of the sliders can be set to do different things. I have mine set to be the color picker because that is how Procreate worked before the latest update. (This can be changed in the preferences sections under gesture controls.)
The curved arrows are for Undo and Redo. You can also use a 2-finger tap to undo and a 3-finger tap to redo.
In the top left corner, “Gallery” takes you back to the gallery screen of your artwork. If you leave art before you are finished, Procreate saves your work. Even blank canvases will still be there.
I’ll cover all of these options in detail, but for now, here’s an overview of what the icons do.
The wrench icon opens the Actions panel. This is the area where you can insert photos or files, alter the canvas, share your art, edit the video settings, and change preferences and there’s an area for help.
The magic wand icon opens the Adjustments panel. You can easily change colors here, as well as apply fun effects to your art. Read more about the adjustment options here.
The curvy ribbon icon is the select tool. This allows you to select items on a layer.
It’s used in conjunction with the arrow icon to edit the selection.
For a full tutorial on the selections and transform tool, click here. It was too long to include in this post.
On the right side of the screen, the brush icon opens the brush library. Procreate comes with a ton of fun brushes, but you can buy and make your own if you want. I have a full explanation of the brush studio here.
The finger icon is the smudge tool. This allows you to blend your art. Some brushes work better than others for this.
You have to select the brush for smudging, just like when choosing a brush. To use your current brush, you can hold the finger icon until it says “smudge with current brush.” Get tips for using the smudge tool for blending.
You can also make your own blending brushes to use with the smudge tool.
The next icon is the eraser tool. Like smudging, some brushes work better than others for this. For a clean eraser, I like using my monoline brush.
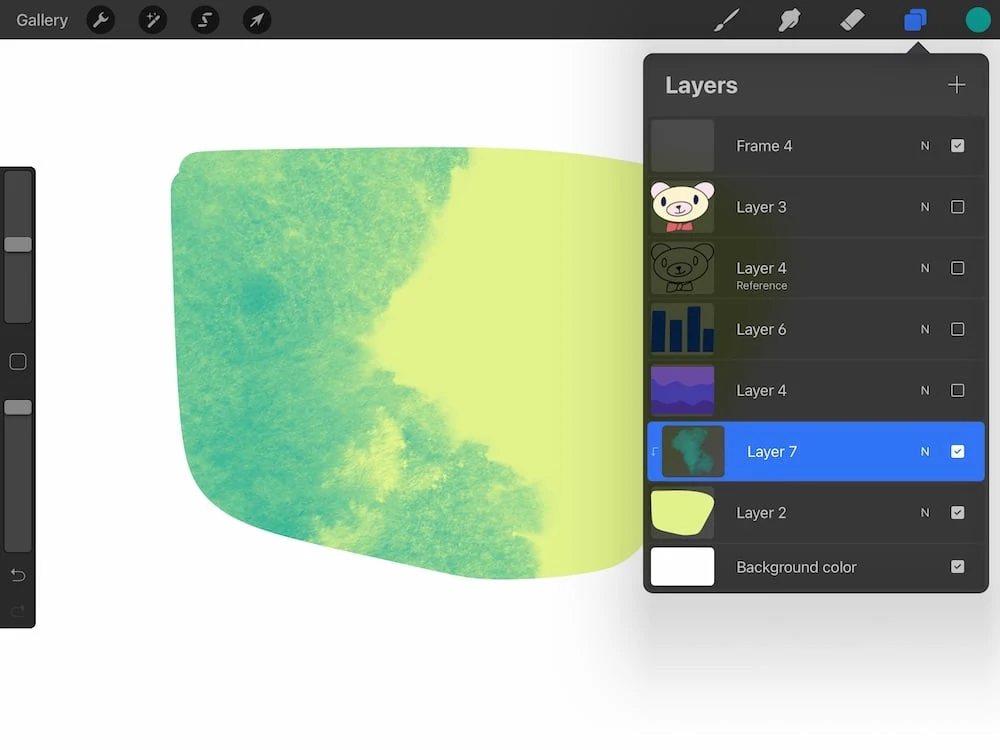
The double square icon opens the layers panel. It’s important to use layers when creating art in Procreate. It makes editing different elements much easier.
The circle icon is the color panel. There are many options to choose colors in Procreate.
Drawing with Procreate
Drawing with Procreate is easy. After you start a new canvas, you’re ready to start creating art.
Brushes
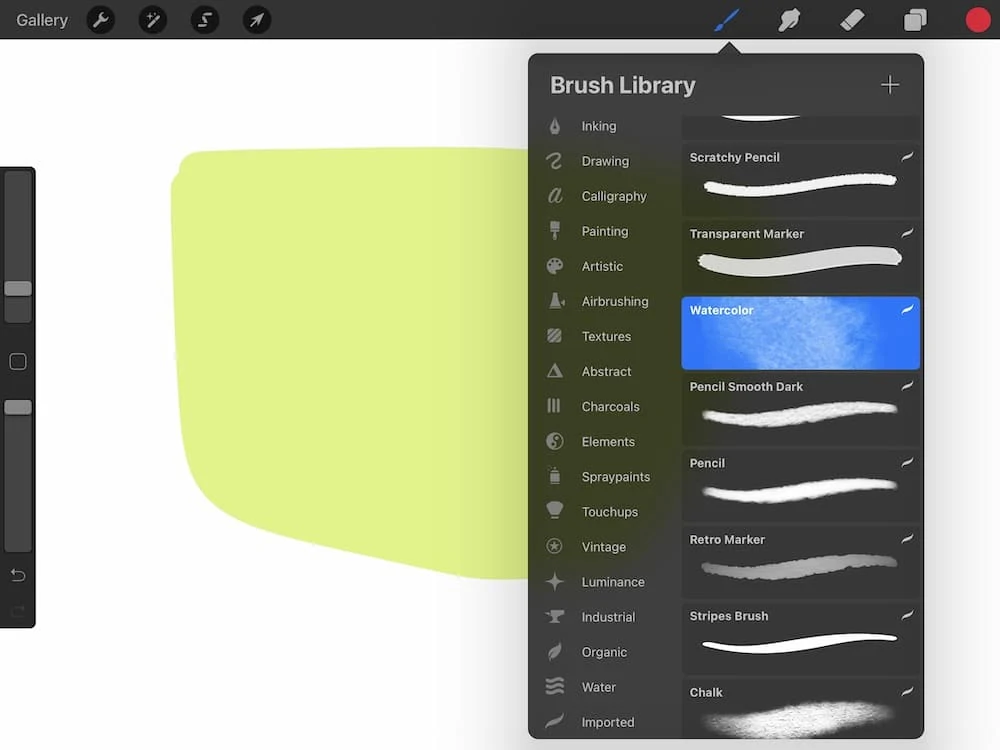
Procreate comes with a ton of brushes to use, but it also includes the ability to make your own brushes or import brushes from other sources.
If you want to buy brushes, I have a shop where I sell my brushes. My other favorite source is Creative Market. This is my favorite set that I’ve bought so far because it makes drawing bodies easier.
You can also alter default brushes to make them work better. I have a ton of tutorials for making brushes for Procreate here.
My favorite default brushes are Nikko Rull (Painting), Soft brush (airbrushing), and the 6B pencil (sketching.)
Colors
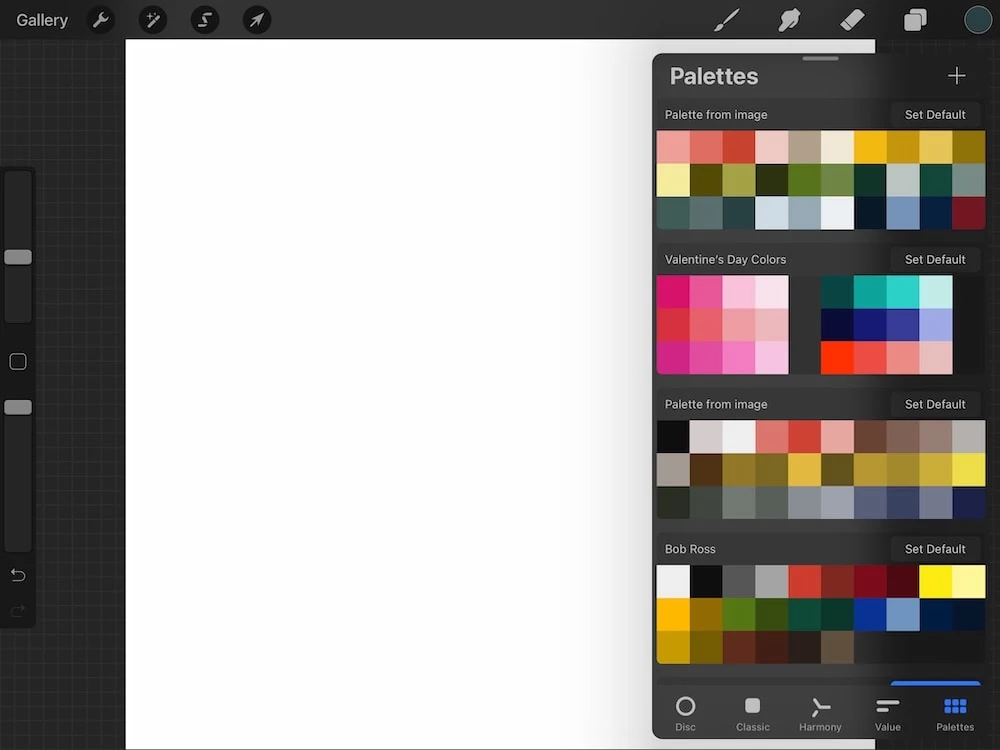
Procreate comes with a few default color palettes, but it’s easy to make your own. With Procreate 5X, you have the option to create a new palette from scratch, from the camera, from a file, or from a photo.
Get easy tips for making a color palette from a photo.
You can also import color palettes from other sources. I have several Procreate color palettes that you can download.
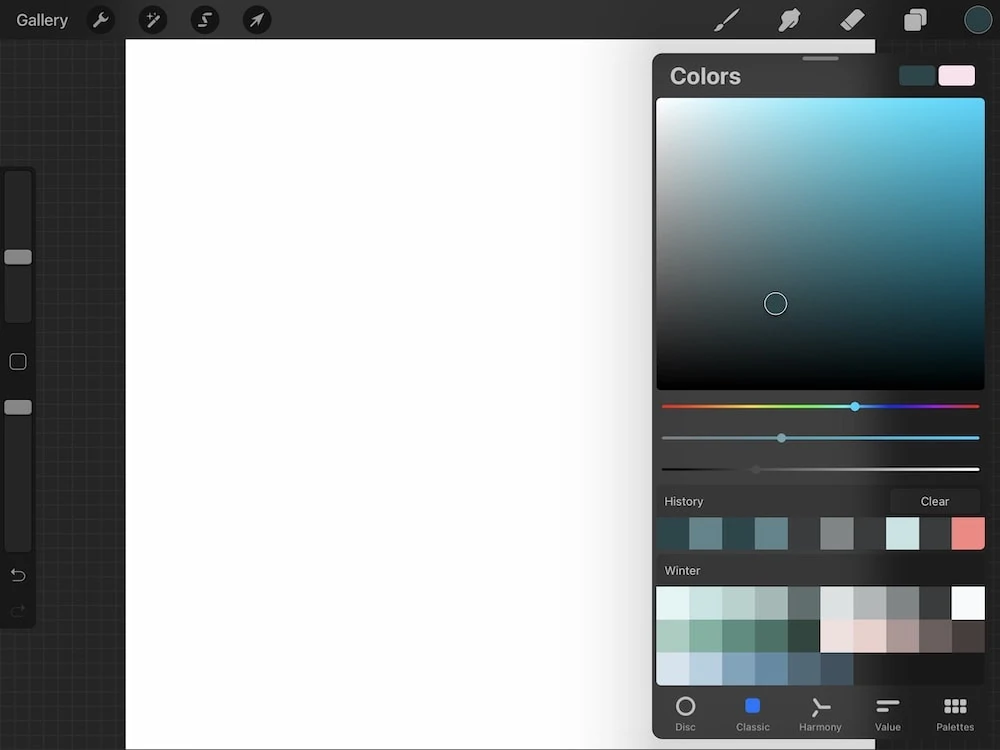
At the bottom of the panel, you have options to choose colors through different views: disc, classic, harmony, value, and palettes.
Choose the one that you’re comfortable using.
Learn more about these options for creating Procreate color palettes.
I prefer to make color palettes from scratch using the disc tool. Just move the dot of color to your preferred hue and then move the center dot around to get the right saturation and value.
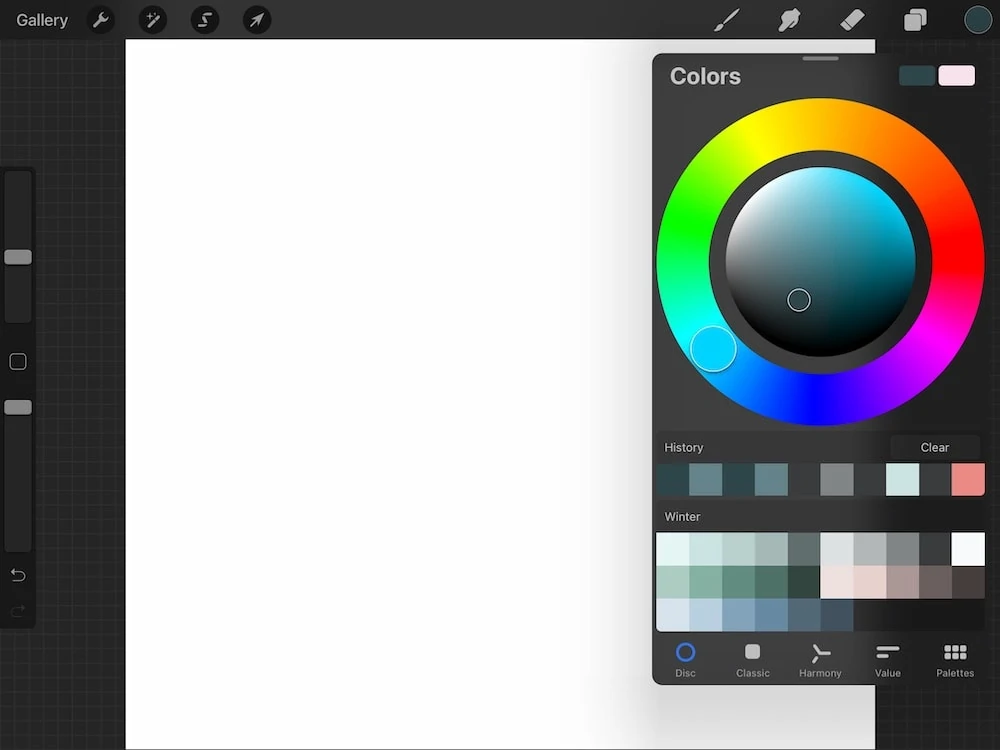
Then click into the new palette box to save the color to your palette. You can also rename the palette by clicking where it says “untitled.” You can save 30 colors to one palette.
To delete a color, hold the color until the dialog box comes up to delete it. You can also move colors around by dragging them to a new spot.
Choose “default” to have the palette show when you’re working on your art.
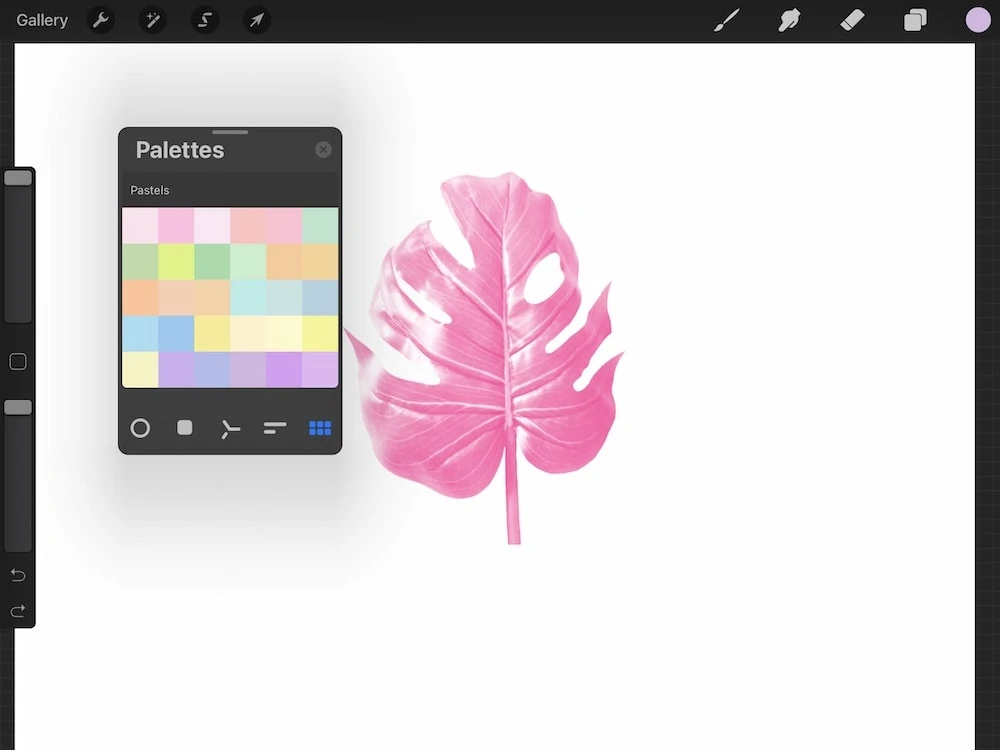
You can also drag the palette box out to your canvas to float over your art for easy color changes. Drag the gray line at the top of the box to move the palette.
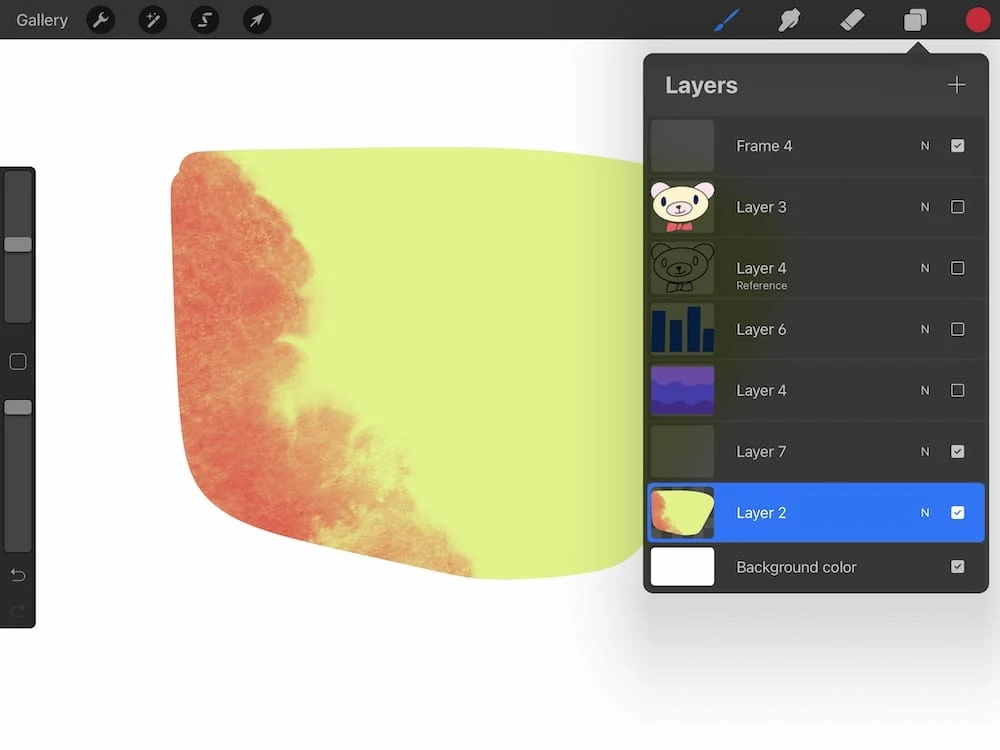
Using Layers
When drawing in Procreate, it’s a good idea to use layers. I use them in a few different ways.
When working, my first layer is usually my sketch. Then I can lower the opacity, and start a new layer on top to refine my drawing.
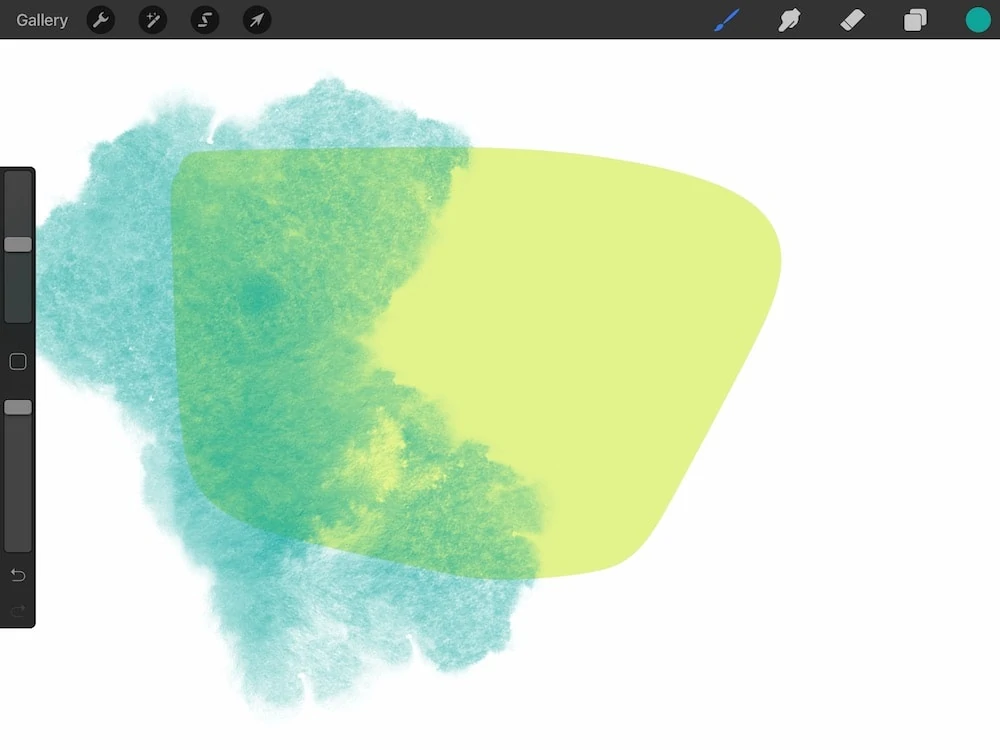
Another way I like to work is to keep different colors on different layers. This makes editing the colors easier down the road.
I also like to use different layers if I’m working on lettering or something that requires precise alignment. It’s easier to move one word at a time.
Layers can also be used to add texture to a specific item. You can use the alpha lock setting in the layers panel to isolate the shape and the brush will only show up on whatever you drew. More on this in a moment.
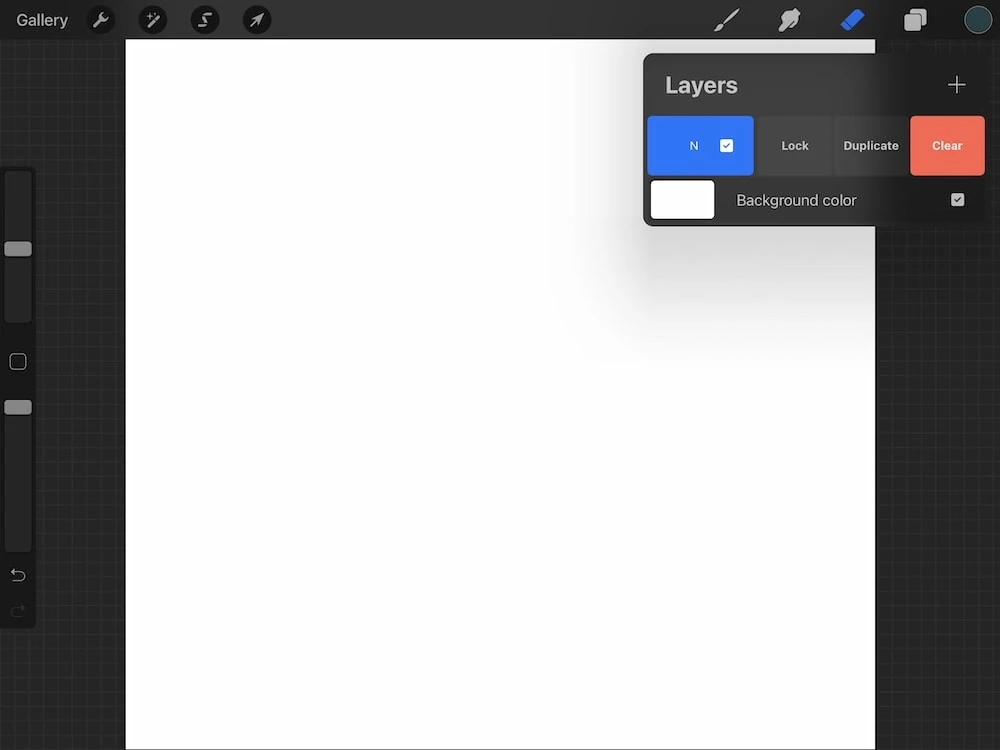
Layer Settings
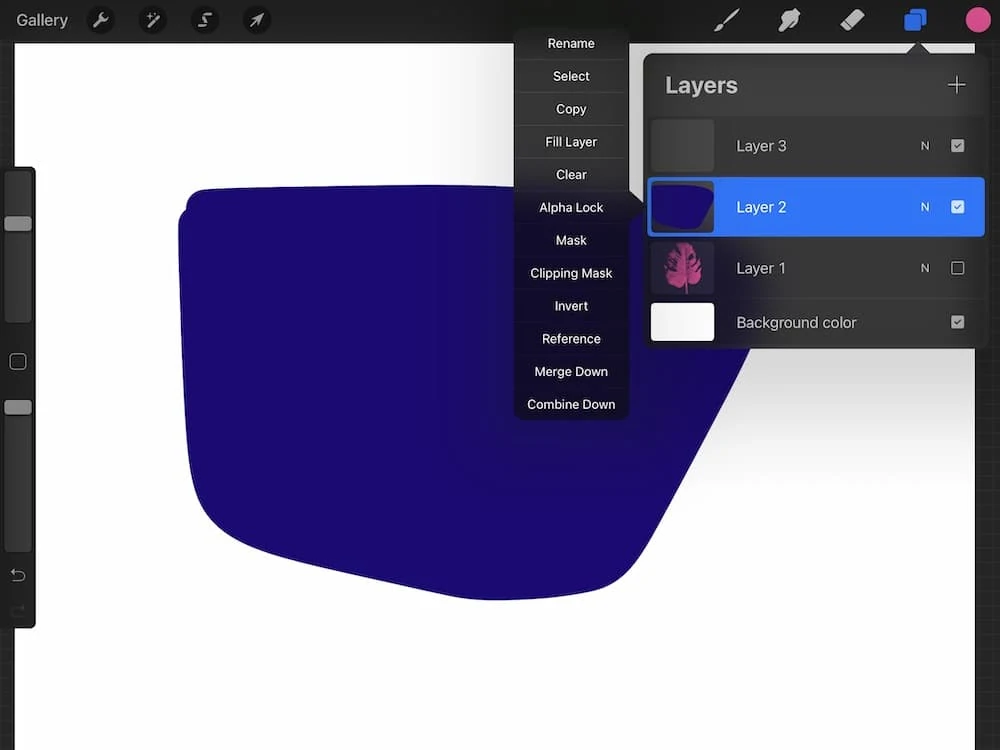
Sliding a layer to the left will reveal a few options. You have the option to lock the layer, duplicate it, or clear the layer.
Rename
This allows you to name layers. This can be handy for illustrations with many layers, especially if you’re using black or gray because it doesn’t show up very well in the layers panel thumbnails.
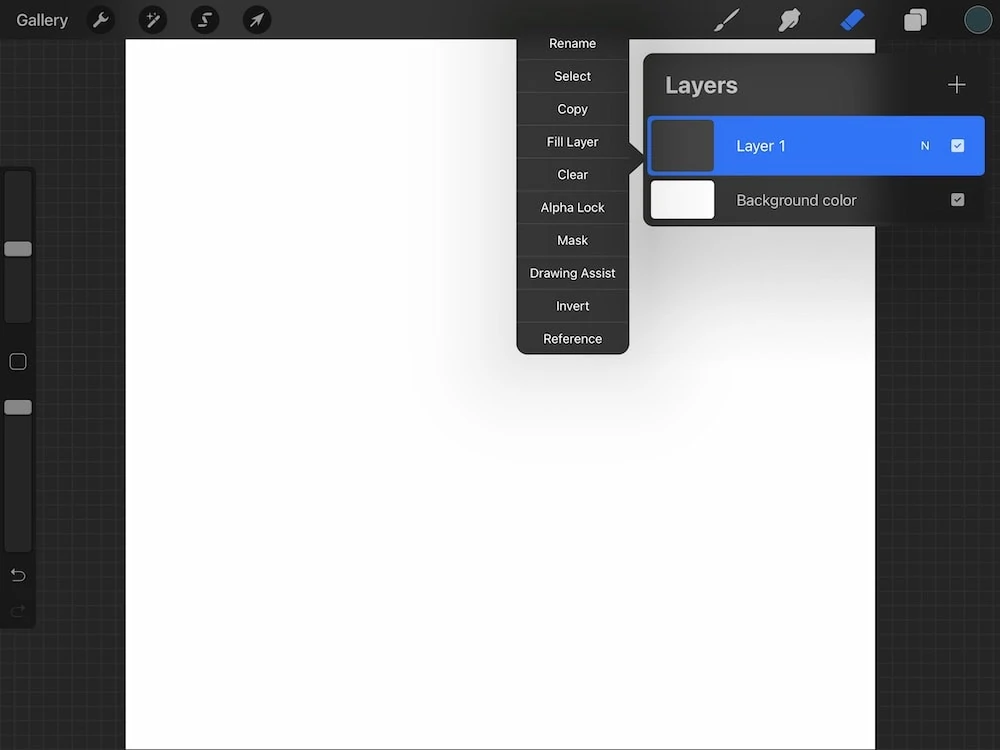
Select
This selects everything on the layer. It will bring up a dialog box to select what you want to do with this layer.
Note: if the color fill is selected, the layer will be filled with the current color selection.
Copy
This copies the layer on top of itself.
To paste it to another layer, use 3 fingers to swipe down. This brings up a dialog box for copying and pasting. Choose paste and it will copy the image to a new layer.
Gray diagonal lines will be moving in the background when selected. To deselect, click the transform icon (the arrow) twice.
Fill layer
This fills the entire layer (drawing and all) with the selected color.
Clear
This clears the layer.
Alpha lock
Select this option to apply textures or shading to a shape. The brush will only show up on the shape, not the background.
The background of the layer thumbnail will become checkered.
Layer Mask
This is a way to edit the shape without destroying the original layer. Drawing with black “erases” parts of the layer. Drawing with white “reveals” the layer.
Clipping Mask
This is a way to add texture without destroying the original layer.
To use this, create a new layer on top of your image. Draw in this layer over the previous layer.
I have an entire tutorial on alpha lock, masking, and clipping masks.
Then click on “clipping mask”. Only the parts drawn on the original image will show.
Invert
This changes the color to the opposite color.
Reference
This option is used for filling lined art in illustrations. Draw the line art and set it as the reference. Then start a new layer and fill the closed areas of the illustration.
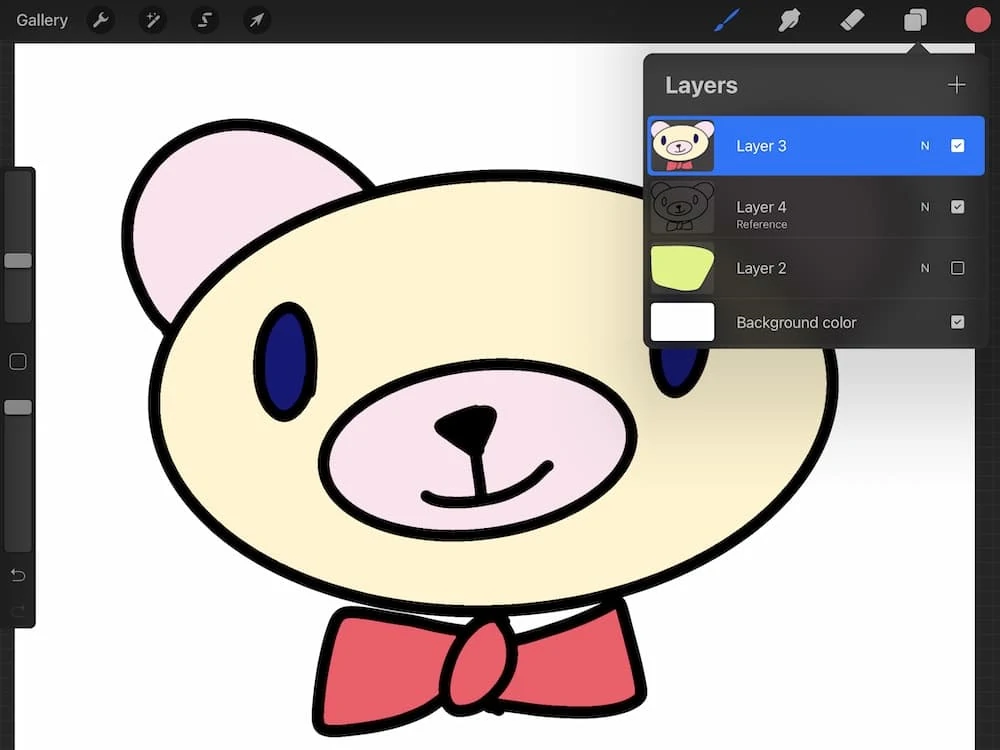
Think of it as a coloring book.
Merge Down
Using this option combines the layer with the layer below it. This is a good way to use fewer layers if you’re running out of layers.
I don’t use this option unless I have to.
Combine Down
This is an easy way of creating groups of layers. This allows you to move the entire group, not just the layer.
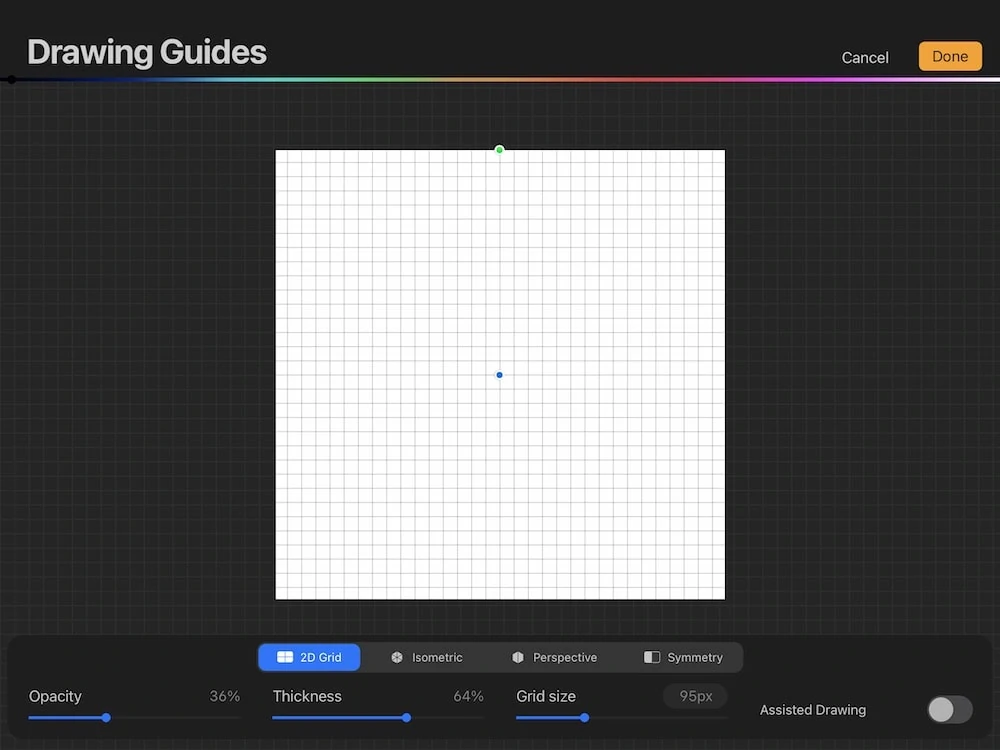
Drawing Assist
This option only appears in the layers panel if you have turned them on in the canvas menu in the Actions panel. It can snap lines to be perfectly straight with the grid.
Here’s a full tutorial on how to use drawing guides.
Blend Modes
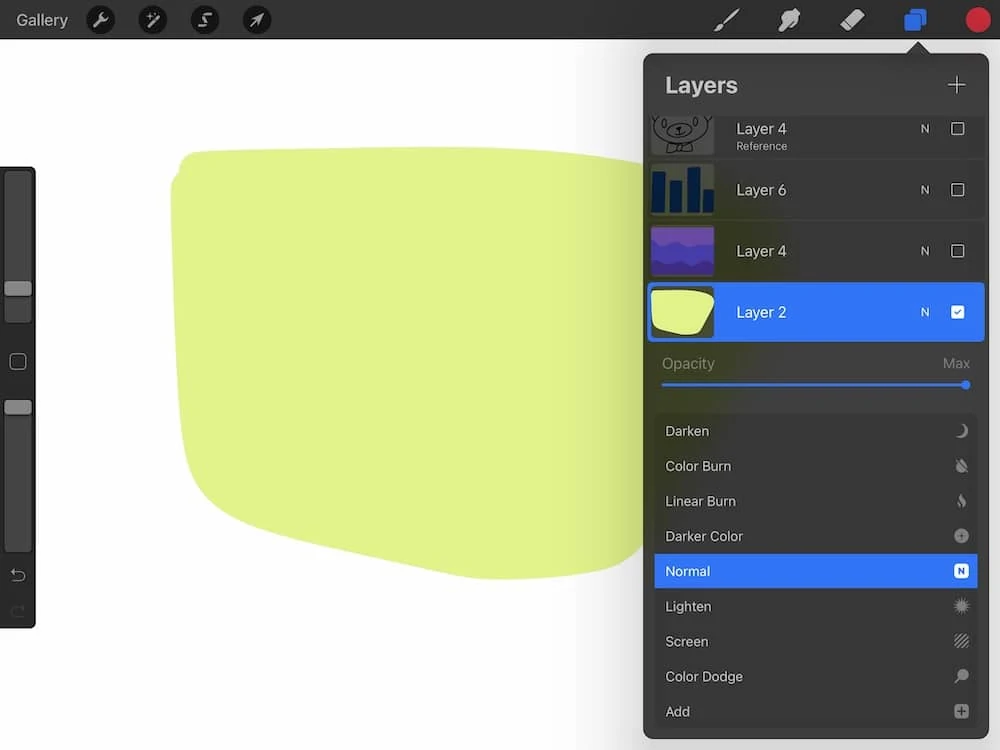
The last layer option is one that I use all the time. Blend modes allow you to change how the layer blends with the one beneath it.
By default, it’s set to normal (N) and is useful for changing the opacity. I use this option when I’m redrawing my initial sketch.
I can still see my lines, but when I lower the opacity, I can make changes without getting confused. It also helps me create a better drawing.
You can change the opacity of any blend mode type to make the effect more or less subtle.
My full overview of the blend modes is now available. For brevity’s sake, I’m choosing to write about them in their own post since there are so many.
I also have a post about how I use the multiply blend mode.
Actions
This panel controls how your canvas functions, allows you to add photos and files and has sharing options and preferences.
Add
Insert a file
This allows you to insert a file from the files on your iPad. I use this option when I’ve added a photo to my files folder, but haven’t saved it as a photo on my iPad.
This is great for adding reference photos or for using to create color palettes.
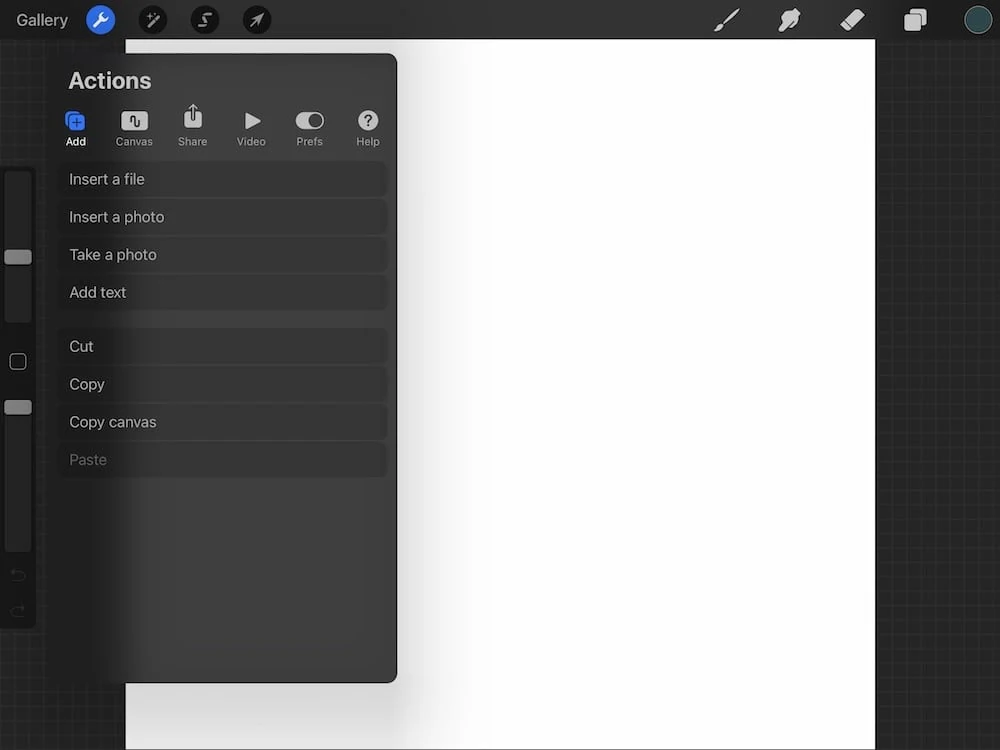
Insert a photo
This allows you to add a photo. It opens the photos app on your iPad.
Take a photo
This uses the camera function on your iPad to take a photo.
Add text
This is a newer option that allows you to add text. There aren’t that many fonts installed by default, but it’s possible to install your own fonts on the iPad.
Here’s a full tutorial on how to add text to Procreate illustrations.
Cut
Like on a computer, cut removes the selected layer. From there you can copy it to a new layer or delete the selection.
Copy
This copies the layer.
Copy Canvas
This copies every visible layer. I use this option a lot for making brushes.
Paste
This pastes the selected layer.
Cut, copy, and paste can all be accessed by pulling 3 fingers down the screen. It brings up a dialog box to choose your option.
To cut and then paste into a new layer, you would drag 3 fingers down, select cut, choose a new layer, drag 3 fingers down again and choose paste.
Canvas
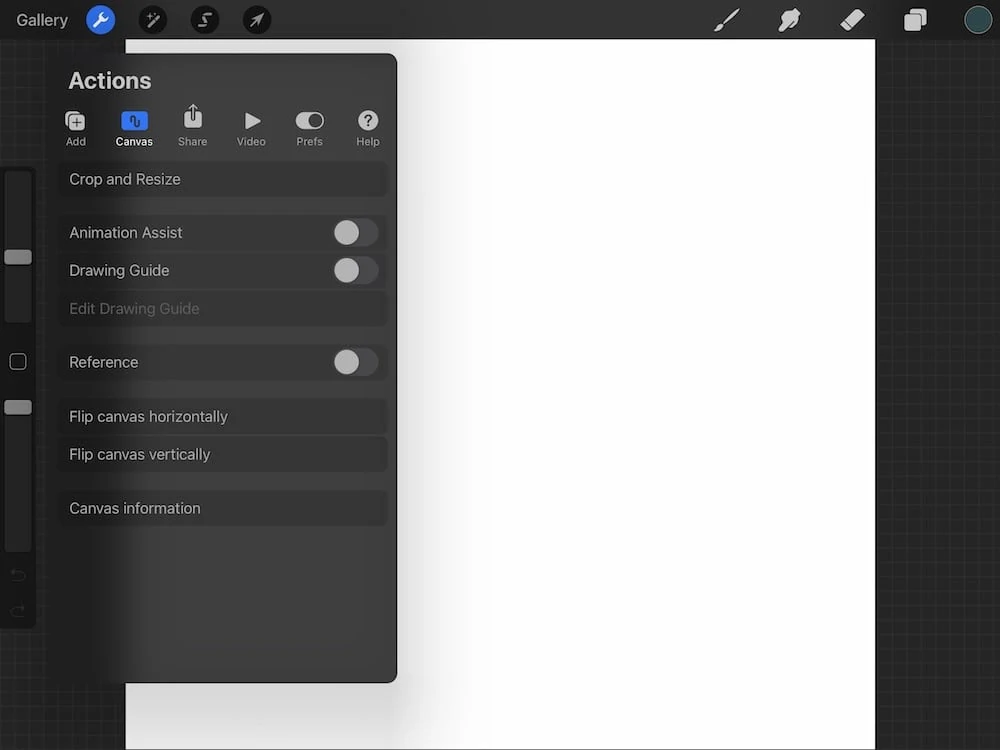
Crop and Resize
This option allows you to crop and resize the image. Remember that Procreate is raster-based software (pixels), so making an image larger will result in a blurry image. It works fine for making it smaller though!
Animation Assist
This turns on options to help create animations. You can use layers to create easy animations in Procreate. I have a full tutorial on making animations with Procreate.
Drawing Guide
The drawing guide allows you to add grids to your art to make drawing easier. You can also set up snapping to make alignment easier.
Edit Drawing Guide
This is where you can edit the drawing guide. It has a lot of options and deserves a full tutorial.
Reference
Use this option to add a reference photo in a floating window. You can move the image and even zoom in and out by choosing a pinching motion with your fingers.
Flip Canvas
This allows you to flip the canvas horizontally or vertically.
Canvas Information
This gives you all of the information for your canvas including the size and DPI. I find this to be a handy feature when playing with older artwork.
Share
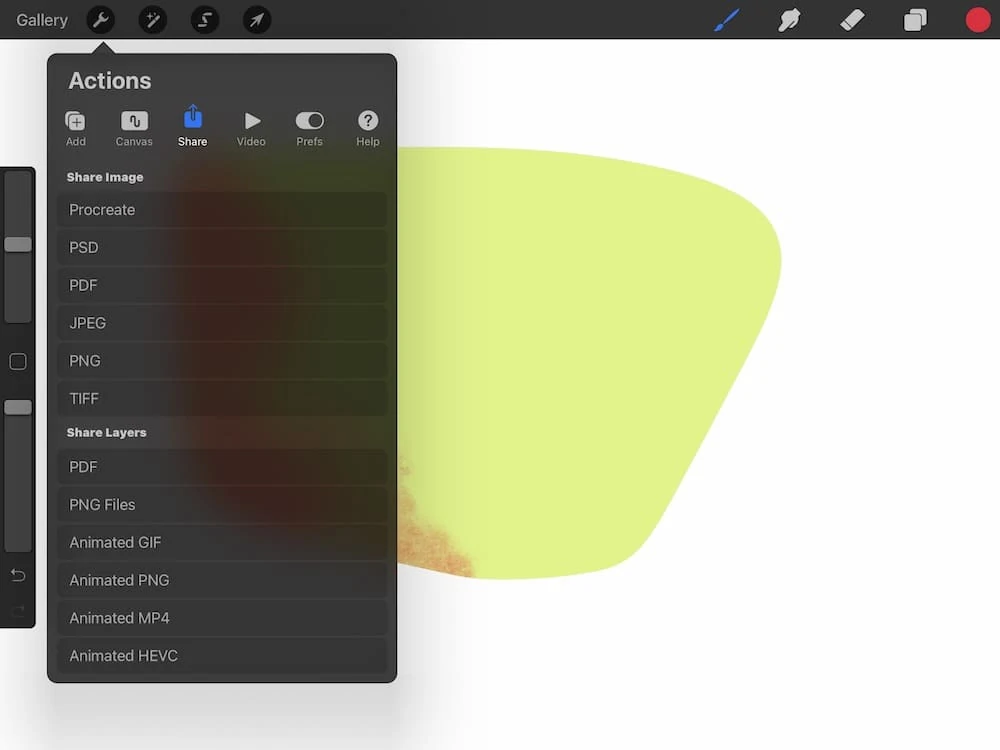
Share Image
You can share the image using the following formats: procreate, PSD, PDF, JPEG, PNG, or TIFF.
From there, you have the option to airdrop, email it, send it through another app, or just save the image. This is also where the option to Print is located.
Share Layers
This option allows you to share the art while preserving the layers. You can save a PDF, PNG files, Animated GIF, Animated PNG, Animated MP4, or an animated HEVC.
If you want to take the art into a program like Adobe Illustrator to image trace it, you can save the image as a PSD file and that also preserves the layers.
Make sure each color is on its own layer and you might want to make every layer black before image tracing. (This also deserves its own post.)
Video
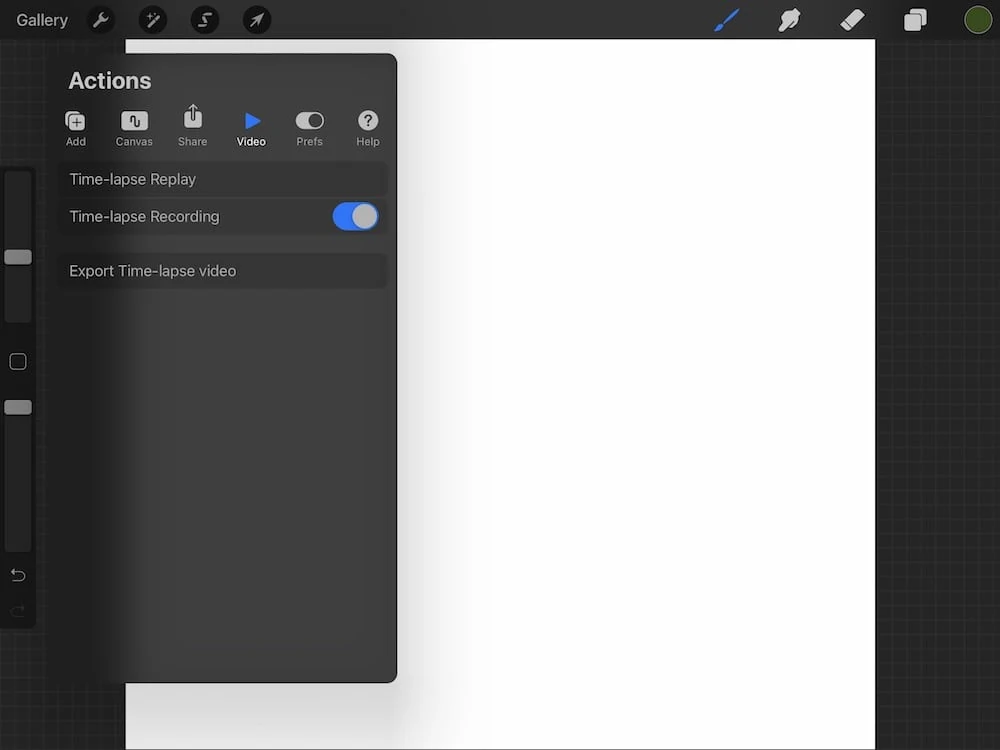
Procreate records your art in a time-lapse.
Time-lapse Replay
This plays the time-lapse of your art.
Time-lapse Recording
Toggle this off to turn the recording off.
Export Time-lapse video
This allows you to export the video. You have the option of a 30-second video or full length.
Unless you draw for hours, you might find these videos to be too short to be useful for much. Screen-capture and speeding it up using iMovie also works well. (If you want a tutorial for this, leave me a comment and let me know.)
Prefs
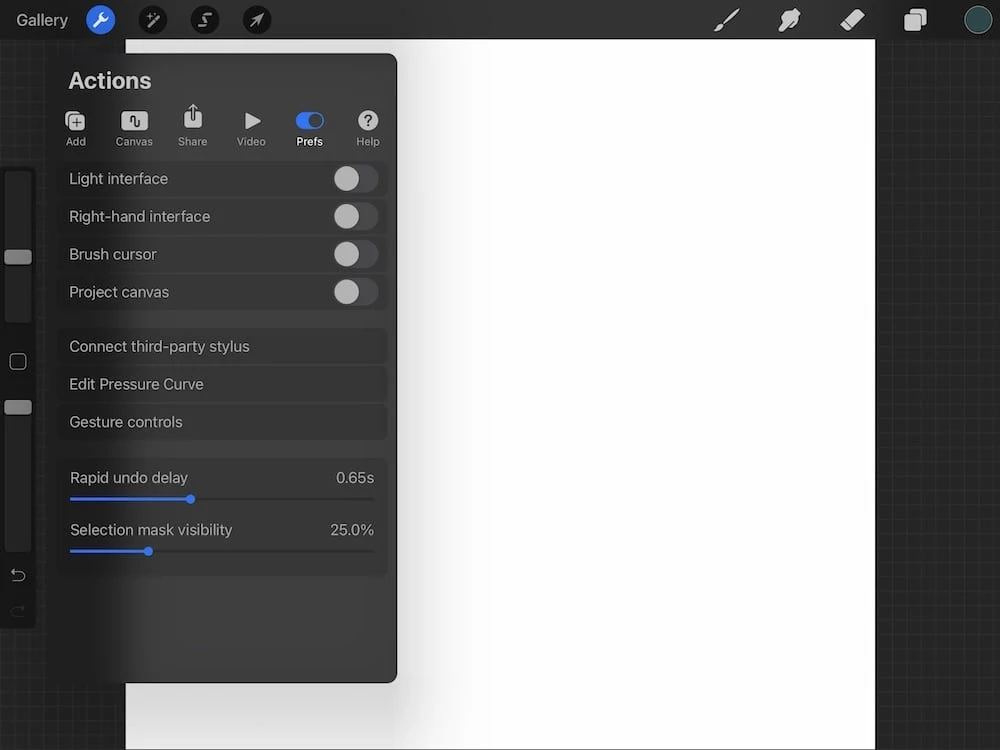
Light interface
Procreate comes with a darker interface by default. This option allows you to change to a light interface. This is a personal preference and may even vary by the art that you’re working on.
Right-hand interface
This moves the brush size and opacity sliders to the right side of the screen.
I’m right-handed, but I still prefer them on the left side of the screen.
Brush cursor
This shows the shape of your brush on the canvas before you use the brush. (I can’t get this feature to work on my iPad.)
Project canvas
This allows you to connect your iPad to another display. It shows only the canvas without the interface.
Connect third-party stylus
This allows you to connect other styluses to Procreate.
Keep in mind that most brushes are created to work with the Apple pencil’s pressure sensitivity, so they will not function 100% properly.
Edit Pressure Curve
This allows you to edit the sensitivity of the Apple pencil depending on how you draw. If your pencil is not reacting how you want, tweak this setting.
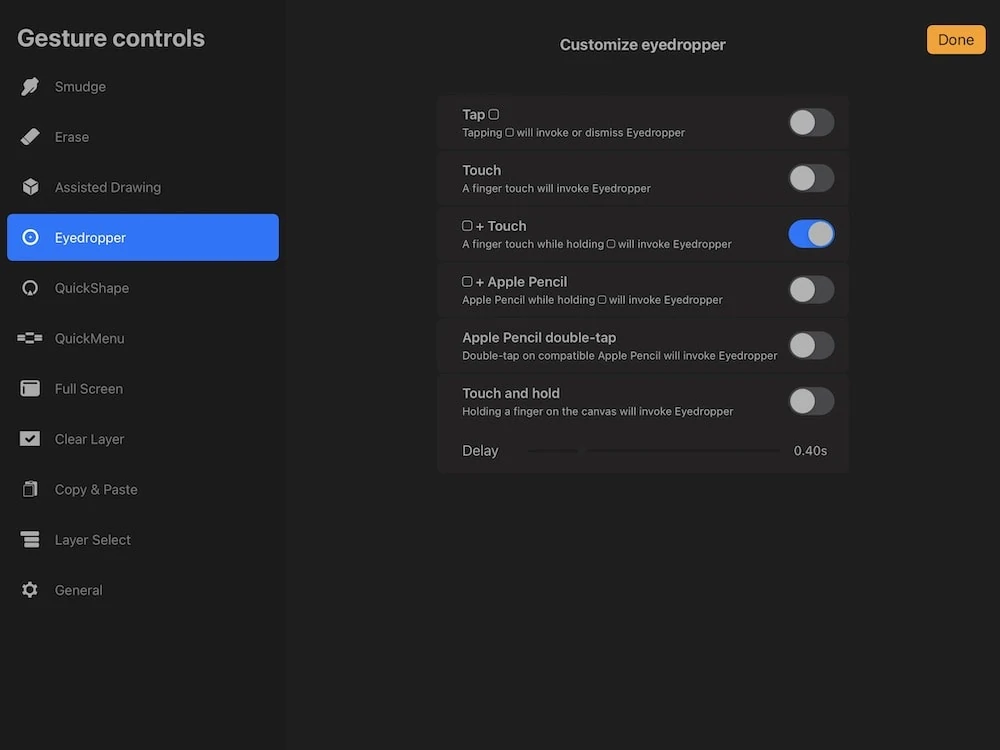
Gesture Controls
You can change your gesture control shortcuts with these settings. I recently changed my center button in the slider to work as the color picker. Check these out and see if there are any that work for you.
Rapid Undo Delay
You can change how fast the undo button works with this feature.
Selection Mask Visibility
This allows you to edit the mask selection. Use it while you have something selected to see how it works.
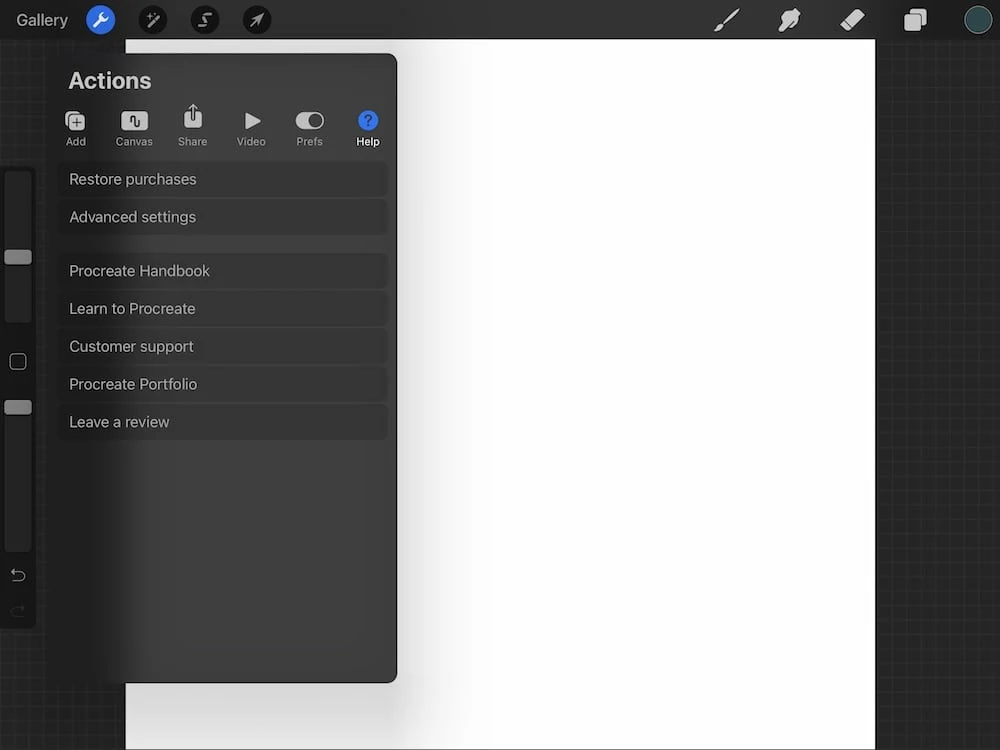
Help
This tab is for getting more help with the Procreate app and includes a link to the Procreate Handbook, which I refer to all the time.
You Might Also Like:
- Draw the Perfect Circle in Procreate
- How to Use Procreate with Illustrator
- How to Make Stickers with Procreate
Pin for Later!