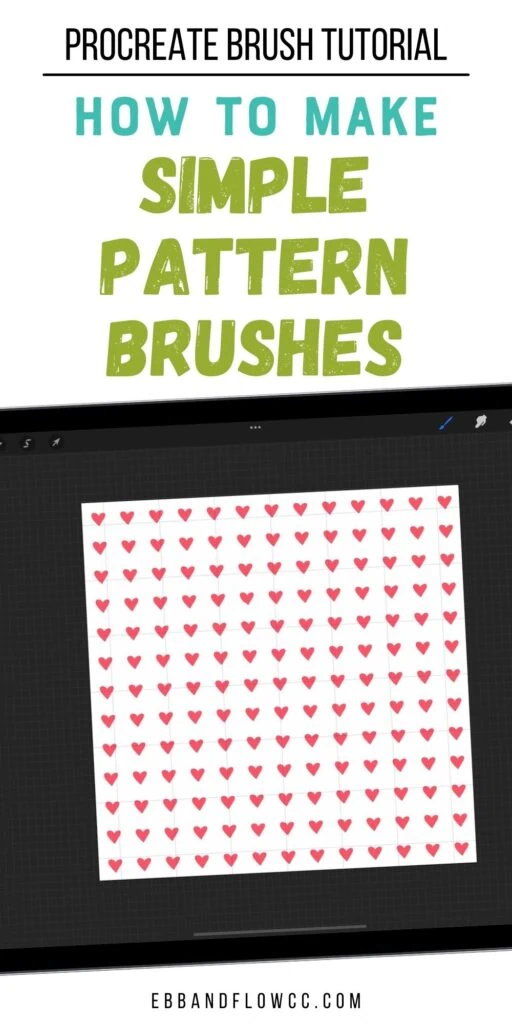
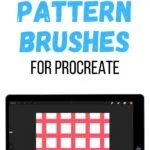
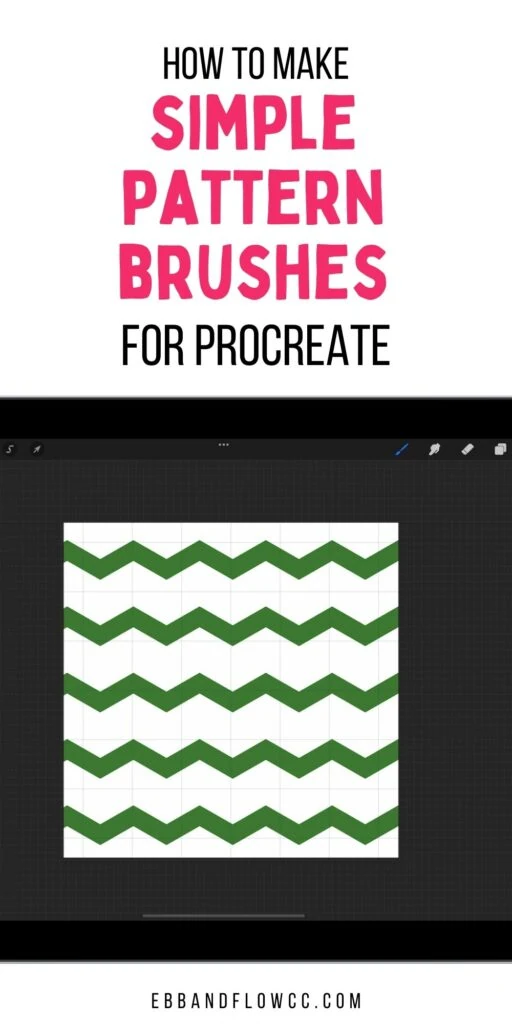
How to Make a Simple Pattern Brush for Procreate

I’m a self-taught artist who loves sharing tips and tutorials for painting with watercolor and gouache, and using the Procreate app on the iPad.
Learn how to make a simple pattern brush for Procreate. Pattern brushes are a great way to add interest to your digital art.
Get easy tips for using pattern brushes, plus get 3 free pattern brushes to use.
You might also like these other Procreate brush tutorials.
This post contains affiliate links. By purchasing an item through an affiliate link, I earn a small commission at no extra cost to you. As an Amazon Associate I earn from qualifying purchases.
This is part 1 of a series for making pattern brushes for Procreate. It’s such a big tutorial that it needs to be split into multiple parts.
Part 2: How to Make Seamless Pattern Brushes is here.
This first part is for making very simple pattern brushes. The next tutorial will be about making seamless patterns in Procreate, which is a bit more complicated. The last part will be about putting it all together to make a complicated pattern brush.
I’ve included a mini brush set of the simple pattern brushes at the bottom of this post.
What Are Pattern Brushes
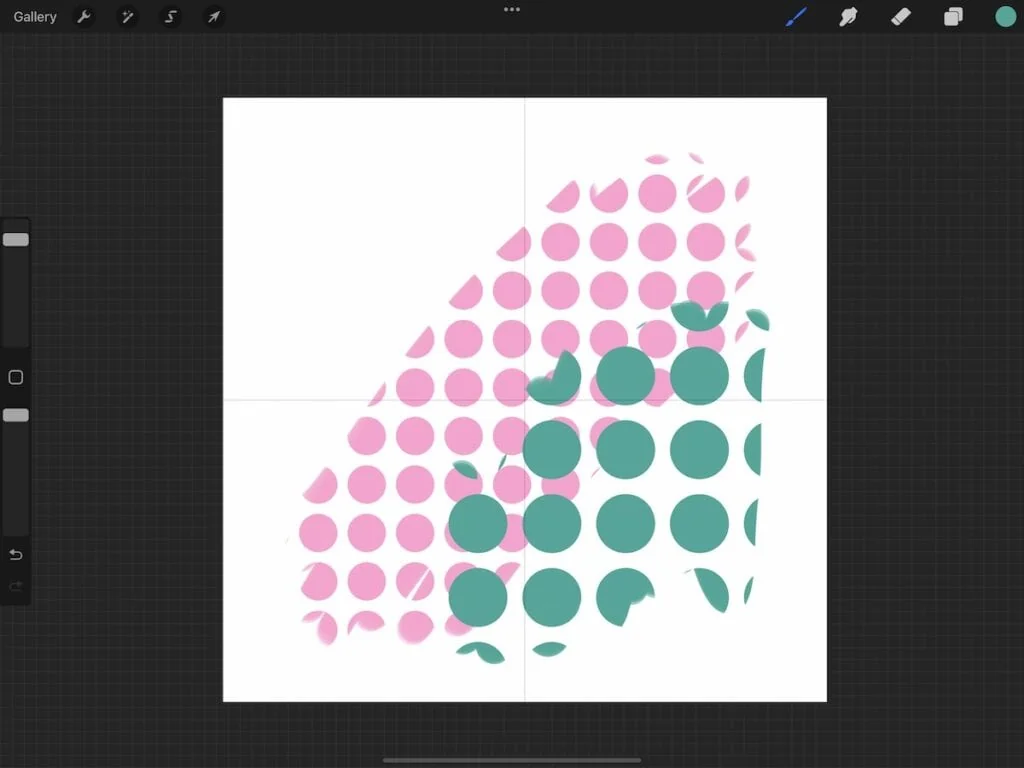
Pattern brushes apply a pattern to the stroke as you draw. So when you draw, you can add polka dots instead of a solid fill.
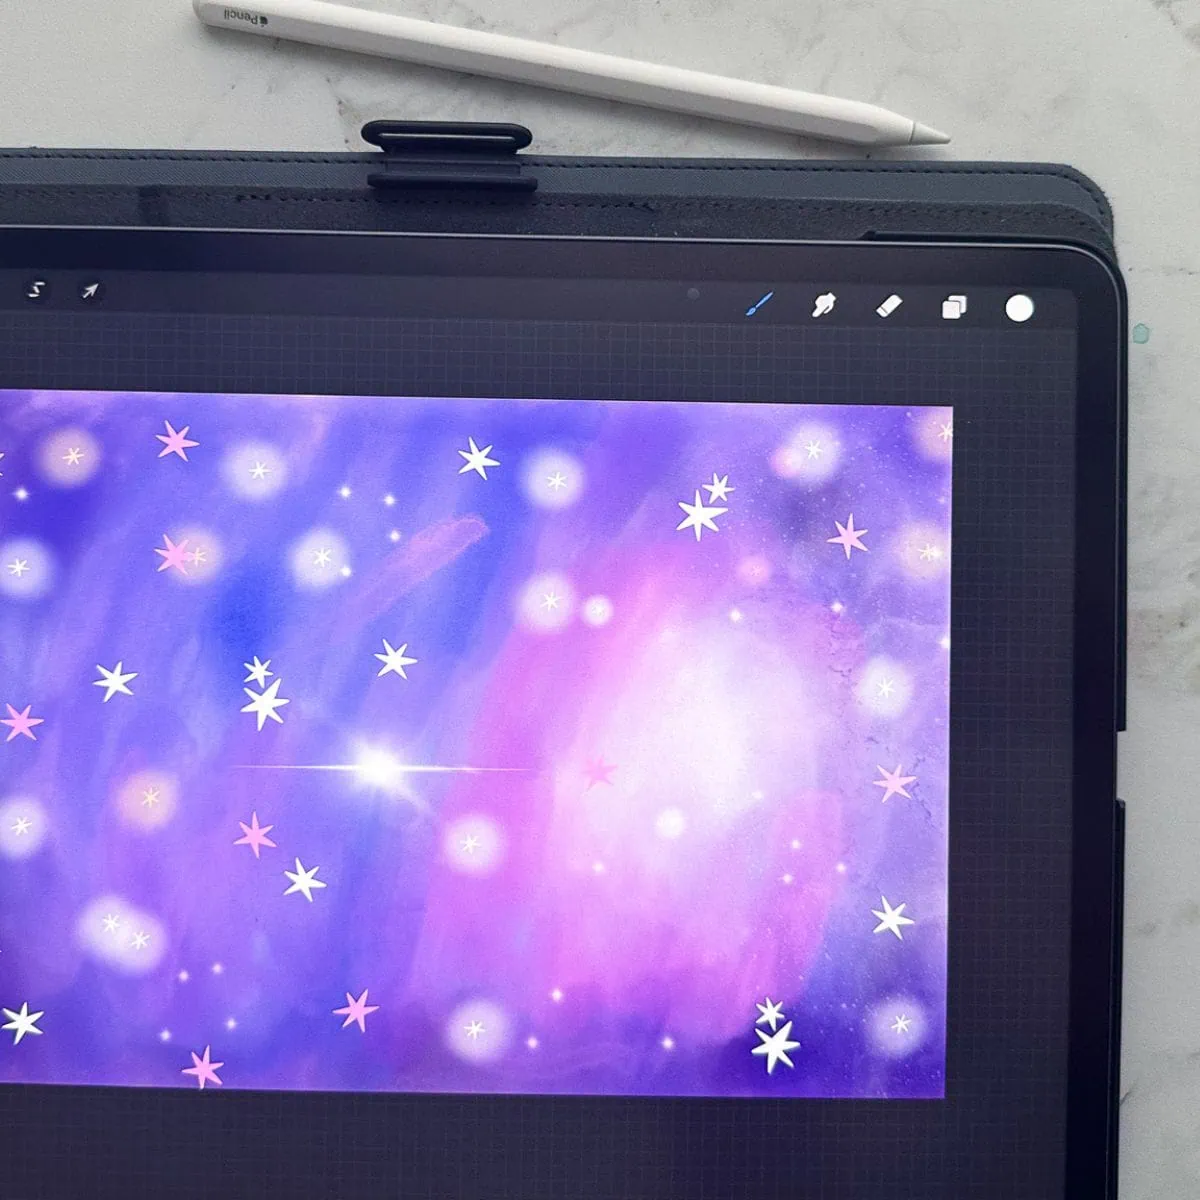
They’re great for adding extra detail to your art, but they can also be used to create texture to an image.
All About Pattern Making
Before we get started, I think it’s important to understand how patterns work. I see a lot of tutorials jump right in without explaining this, so it feels important to talk about.
It can even be confusing if you have previous knowledge from another program. For instance, Adobe Illustrator has a pattern maker that makes this process so much easier and more precise.
The process is a bit different in Procreate.
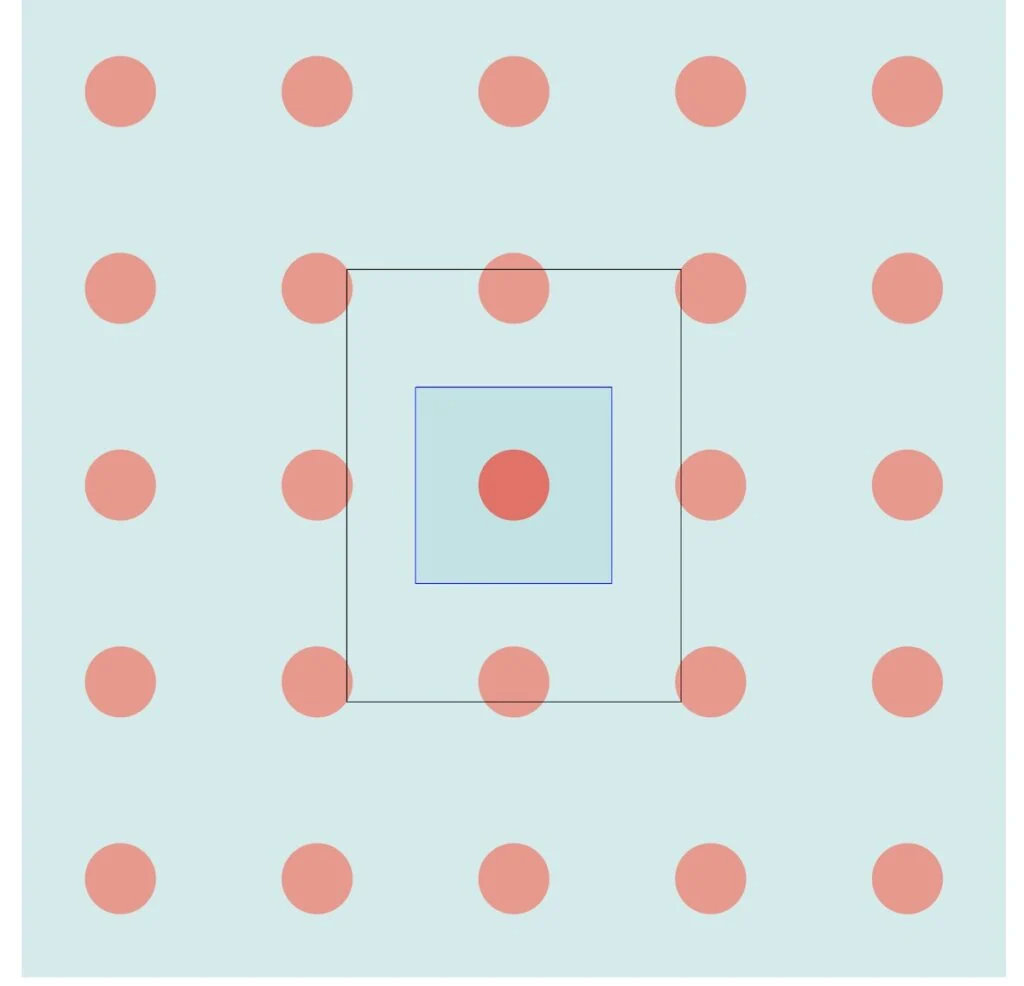
A pattern is a repeating motif. It’s usually created on a square background and as it’s placed next to each other, it creates the pattern. Think of it like tile.
Note: it has to be a square on Procreate.
If something touches one edge, it needs to match the other side or it will either be cut off or look funny.
For this tutorial, we’re only doing simple patterns. The polka dot is the easiest, but this simple stripe pattern is pretty easy as well.

If you want a hand-drawn stripe though, the complicated pattern tutorial will work better for you.
Here’s a tutorial for making repeating patterns in Procreate.
If you’re not familiar with Procreate, be sure to read my Procreate guide first.
How to Make a Simple Pattern Brush for Procreate
Here are a few tips for getting started making pattern brushes.
- The canvas must be square. I recommend using 3000 x 3000 px.
- Procreate brushes are converted to black and white, so it’s best to work in black and white. Gray areas will be translucent in the brush, which is also a cool look.
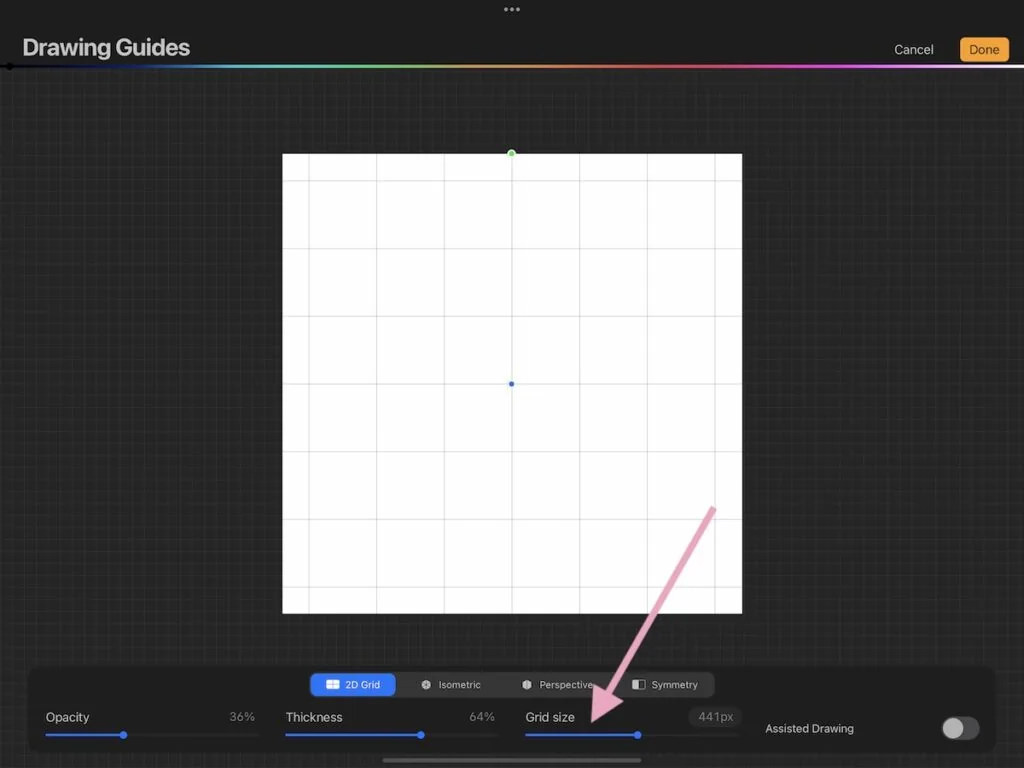
- I highly recommend using the drawing guides with snapping turned on. It will result in a much more precise pattern.
- Test the brush as you make changes. If you find one you like but want to keep making adjustments, duplicate the brush.
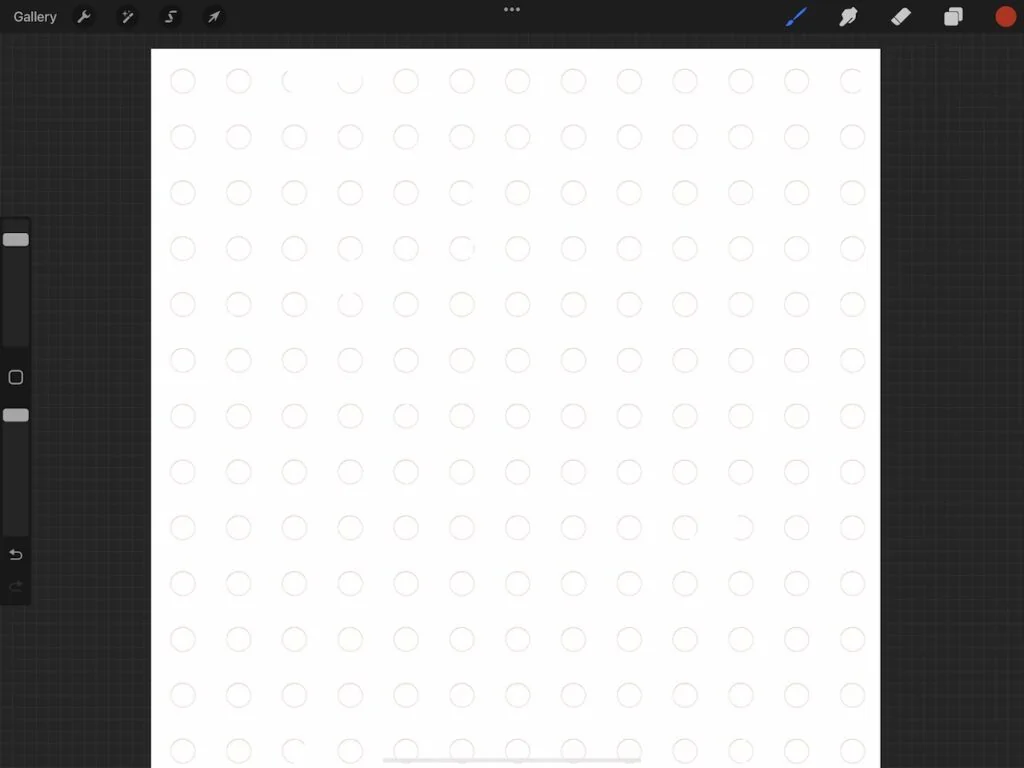
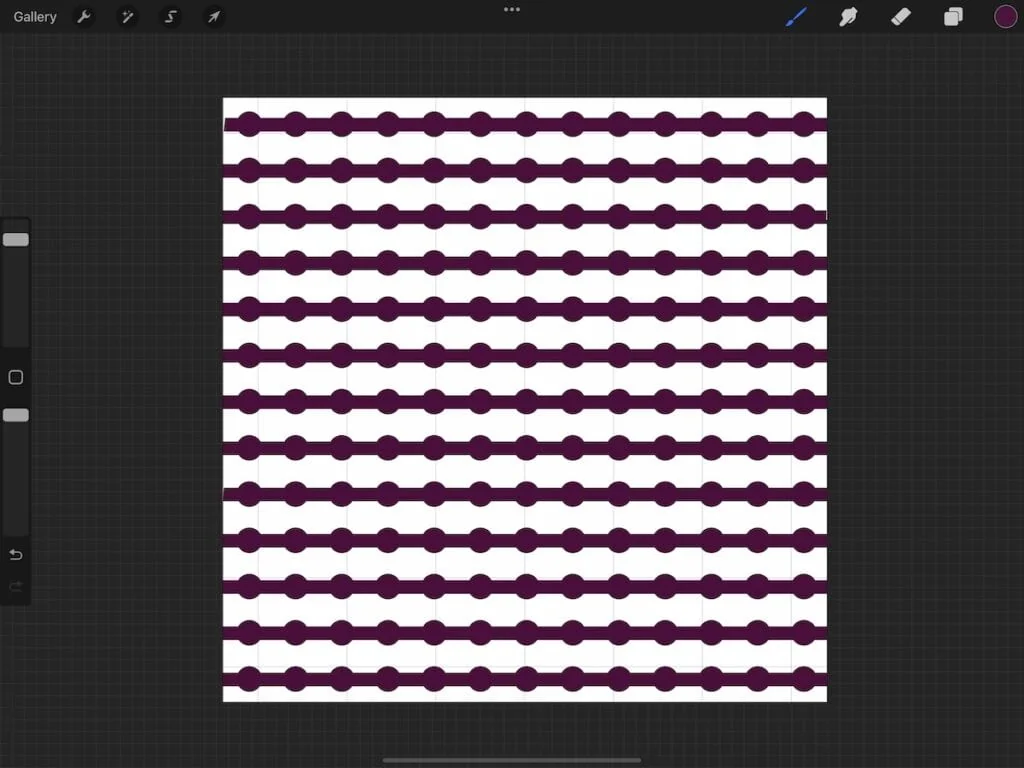
Simple Polka Dot Pattern Brush
This brush is super simple to make. It creates circles in a grid pattern.
Setting Up the Canvas
- Create a square canvas.

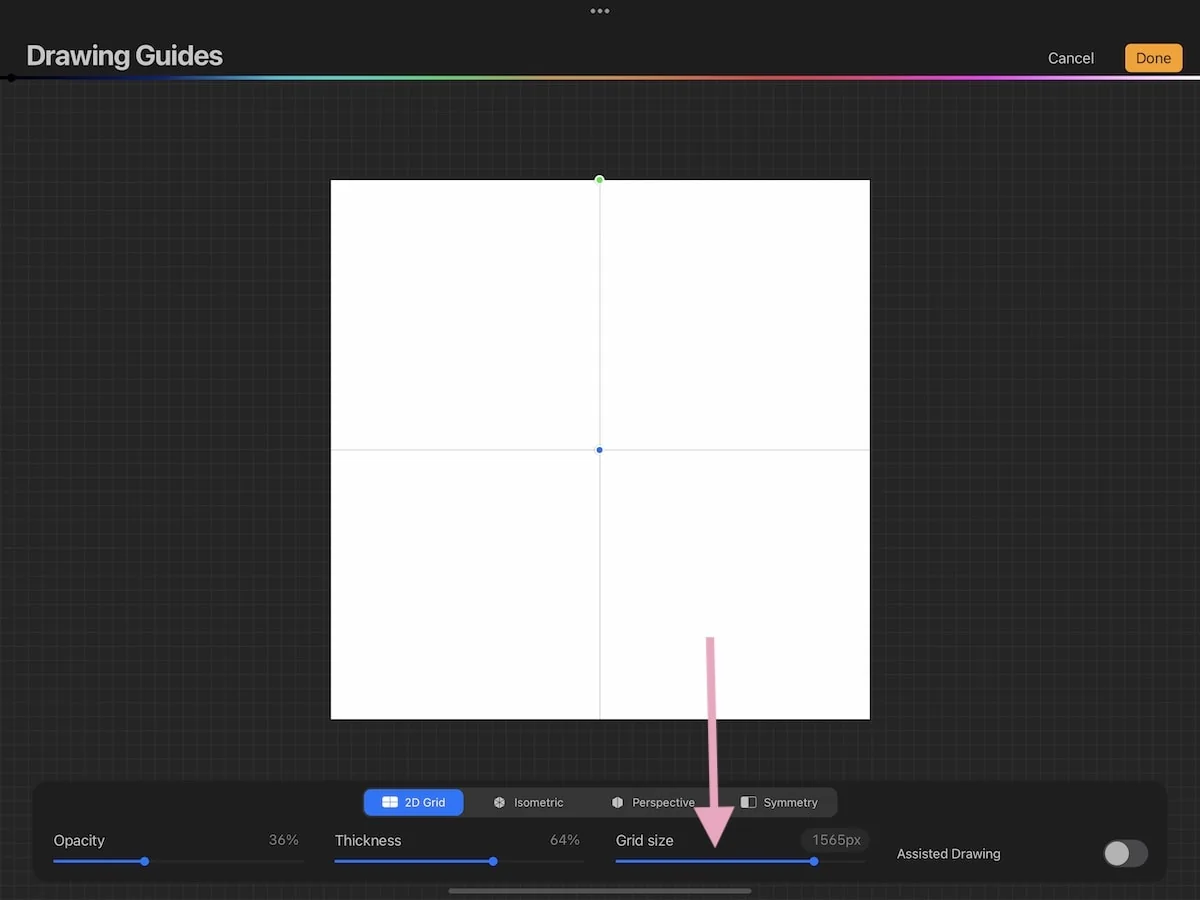
- Turn on the drawing guides.
- Click edit the drawing guides.
- Increase the grid size to where it creates 4 quadrants.
- Click done.
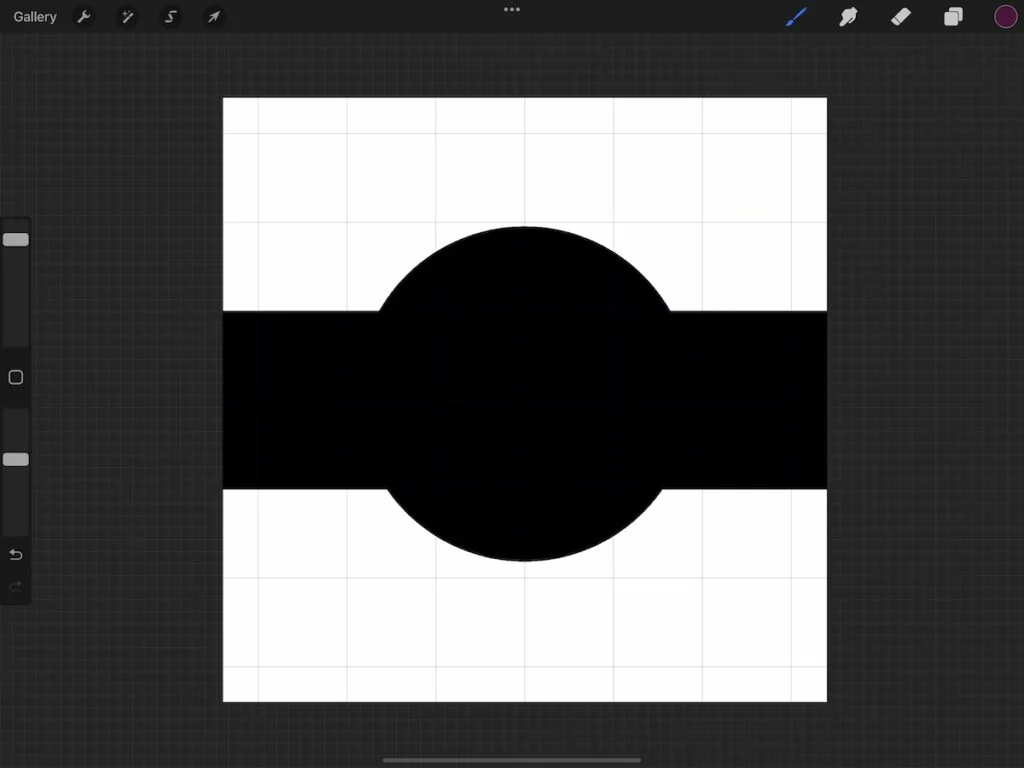
Creating the Pattern
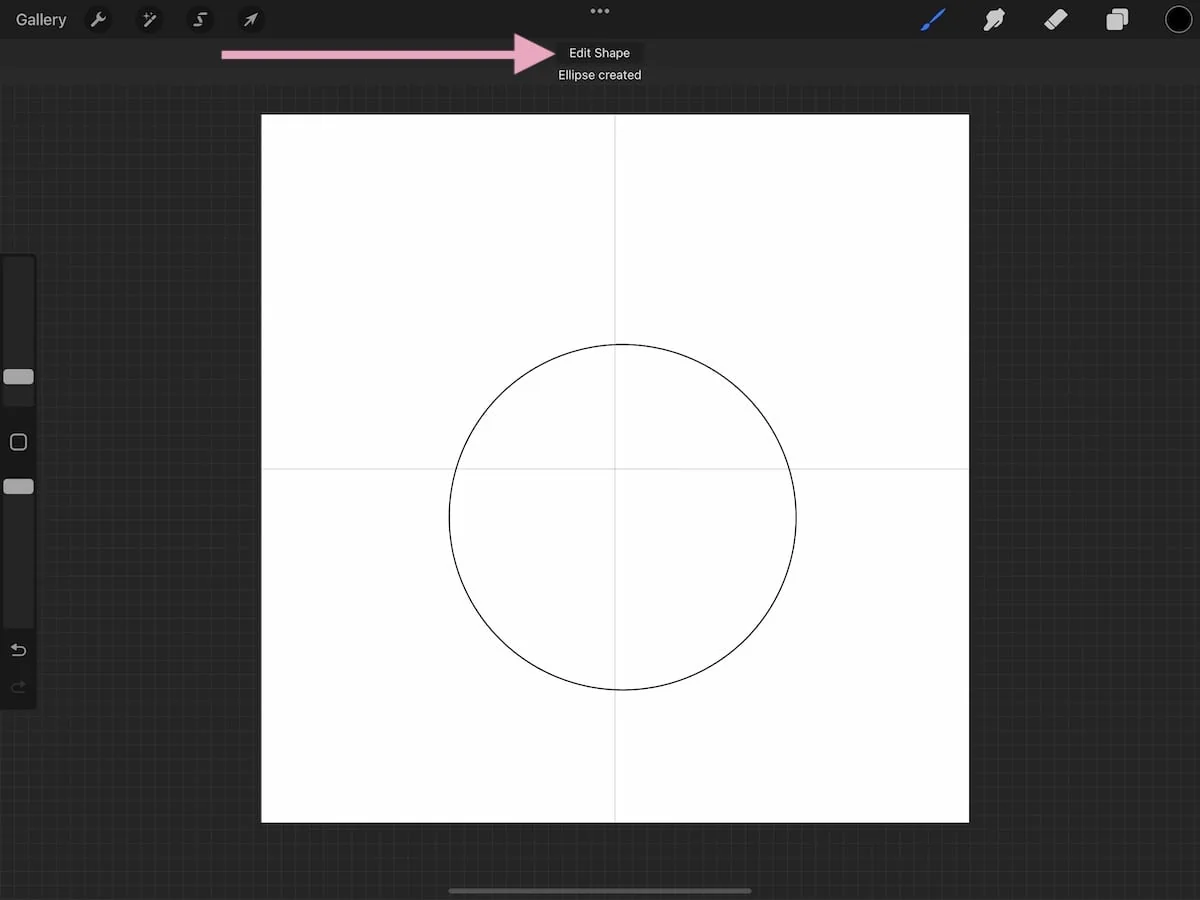
- Create a circle on the canvas. There are a few ways to do this. You can a monoline brush in a large size to create a circle.
- Or you can draw a circle, hold it and edit the shape by clicking “edit shape” and choosing “circle”.
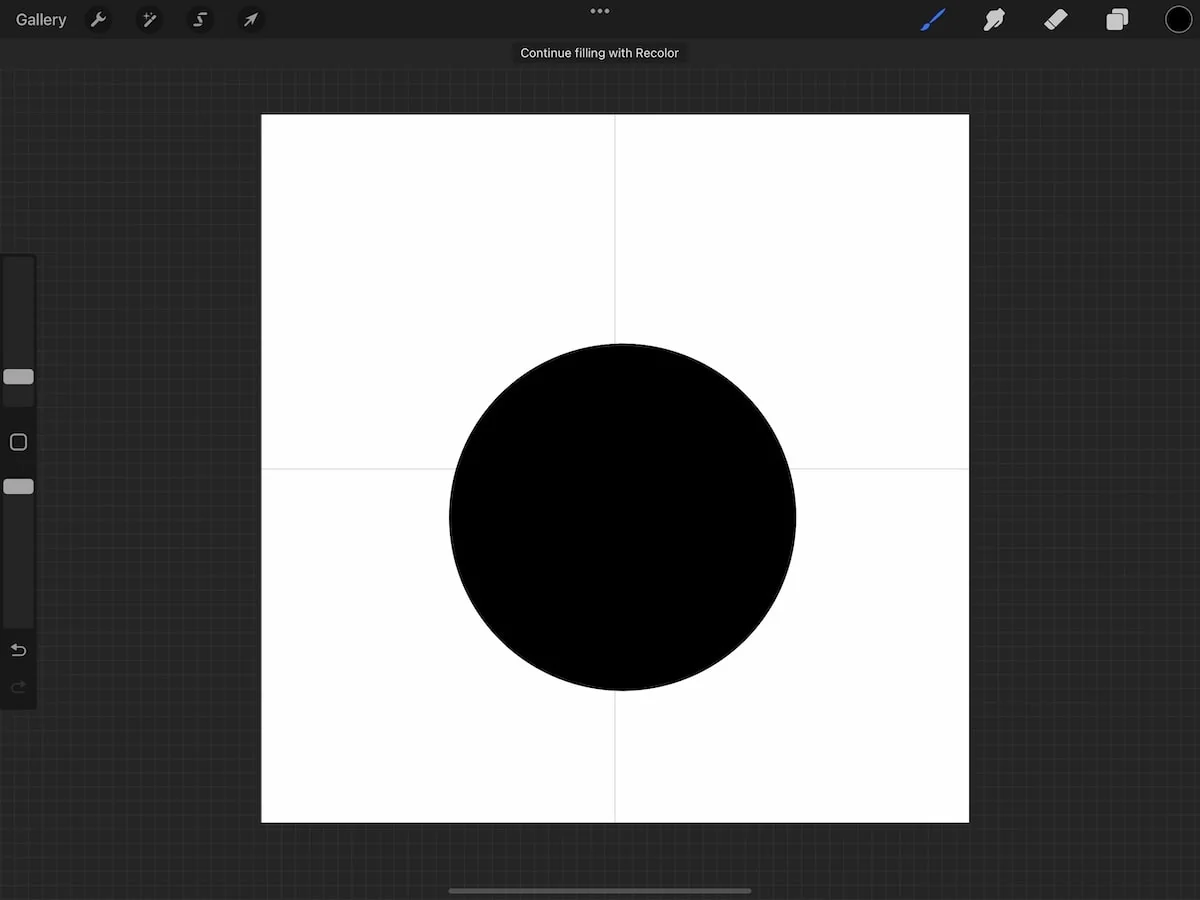
- Fill the shape.
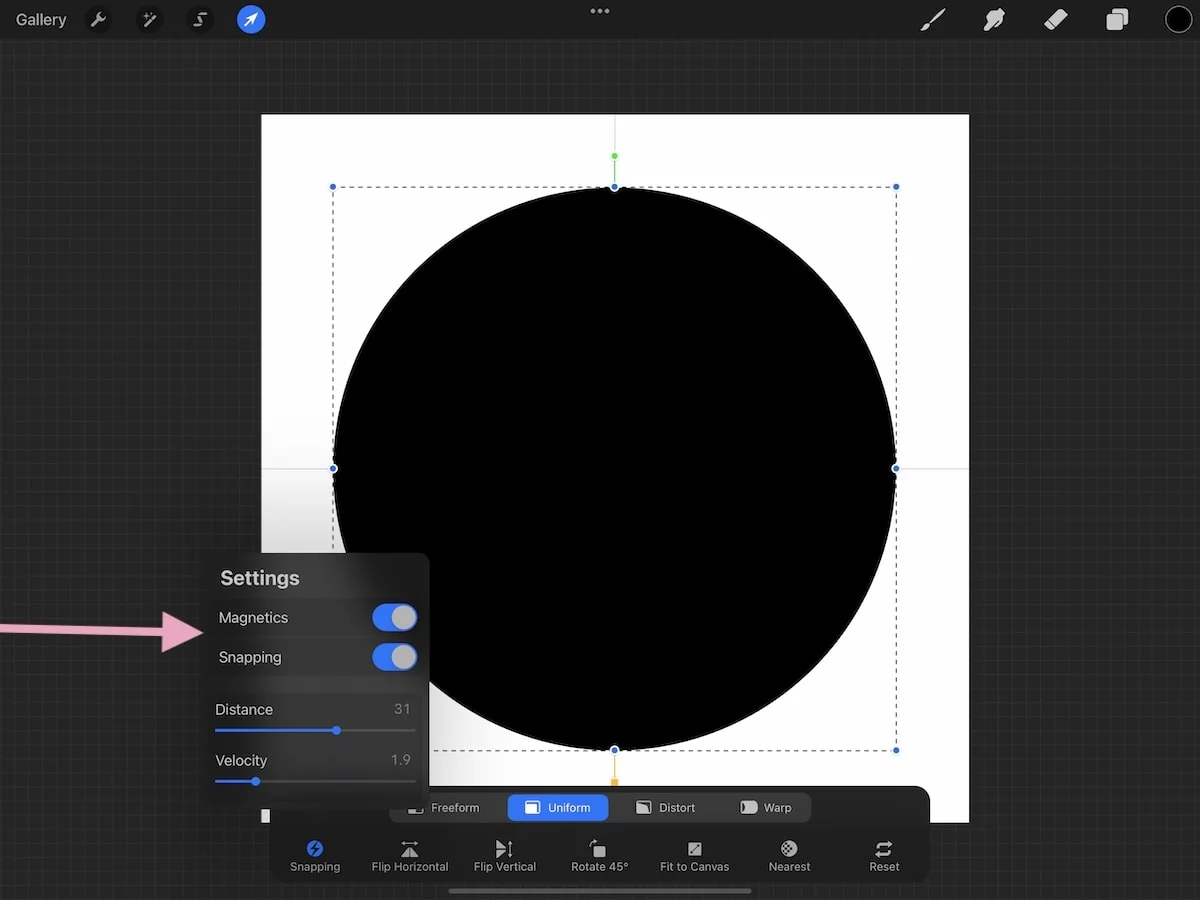
- Click the selection arrow to resize the shape if necessary.
- Click snapping and make sure that it’s turned on, along with magnetics.
- Move the circle until it snaps into the center. (You can look at the blue nodes and see if they’re aligned with the drawing guide in the background.
- A big circle will result in less white space. A smaller circle will result in more white space between the circles.
Creating the Pattern Brush
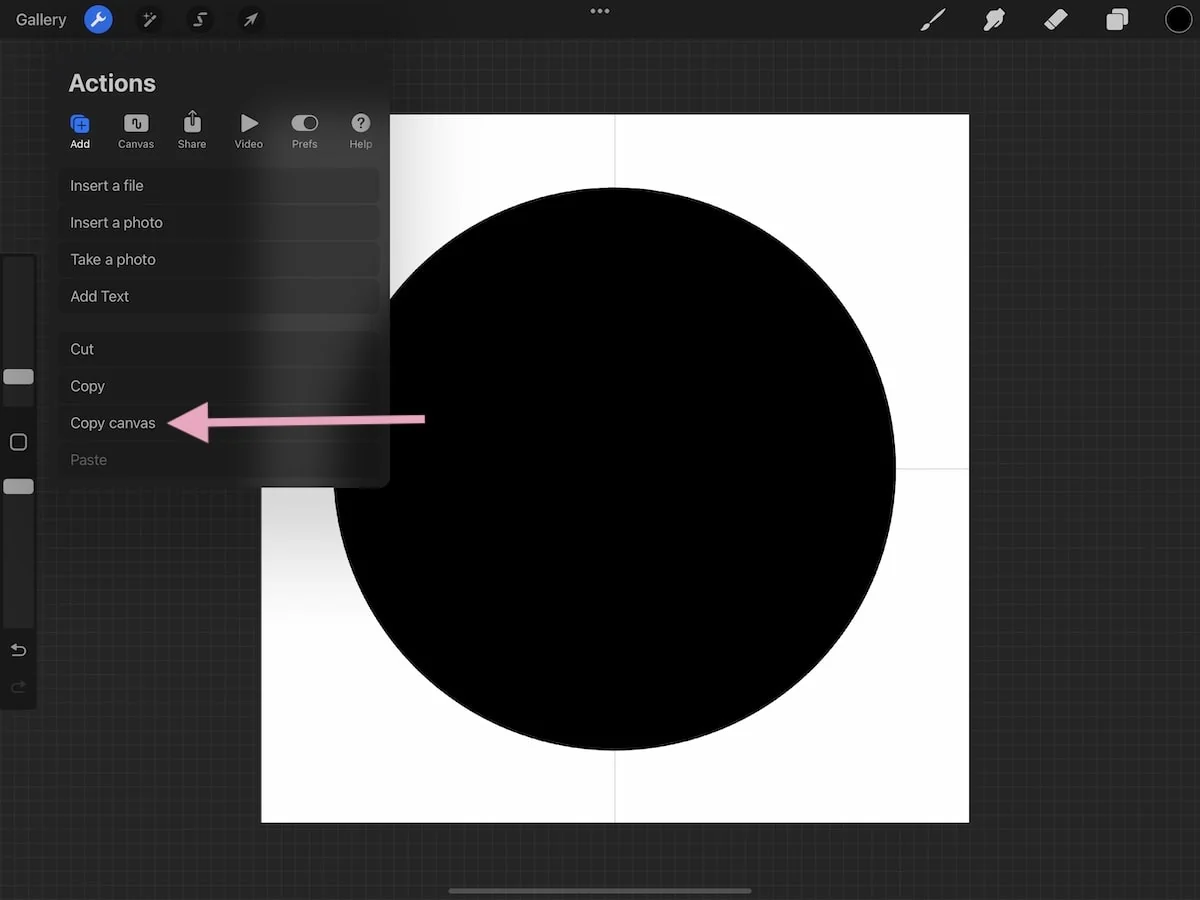
- Copy the canvas.
- Click the plus sign to create a new brush.
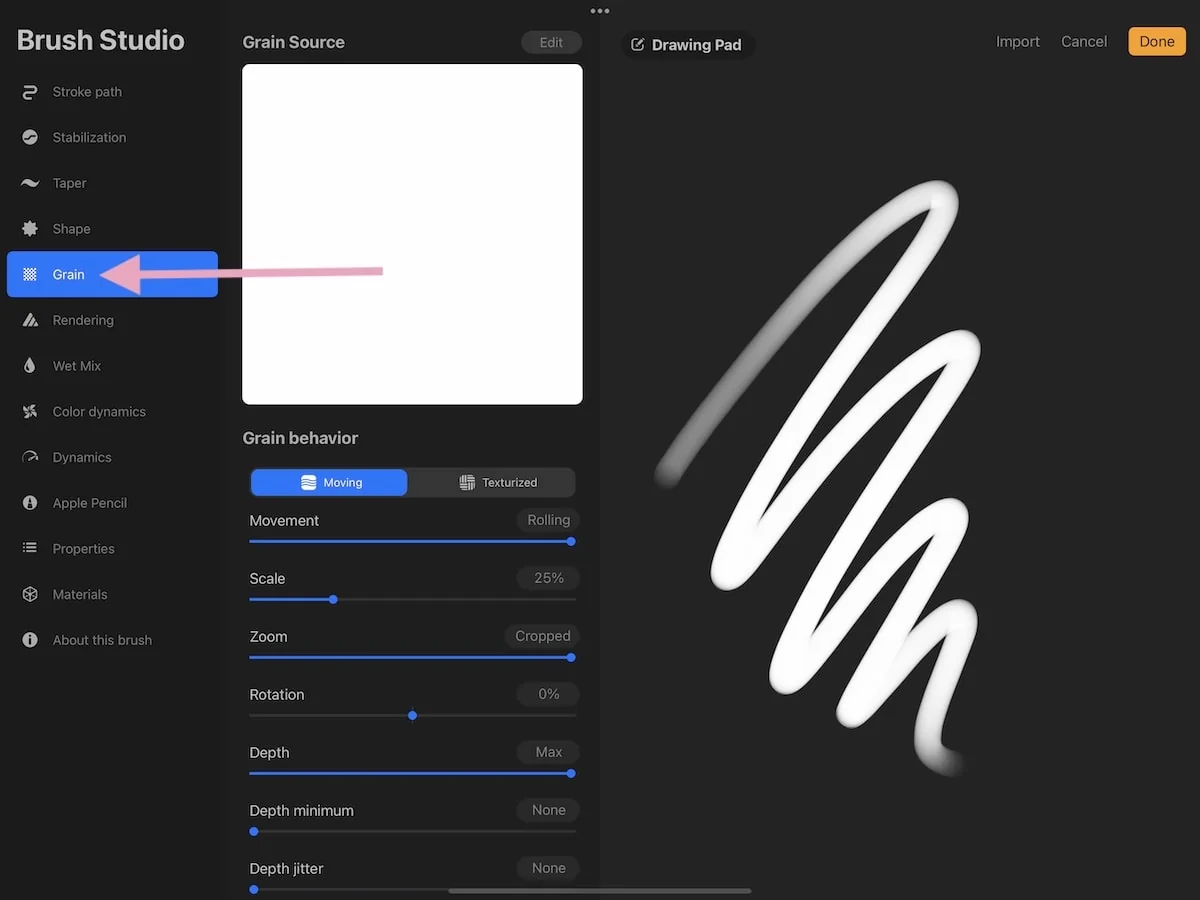
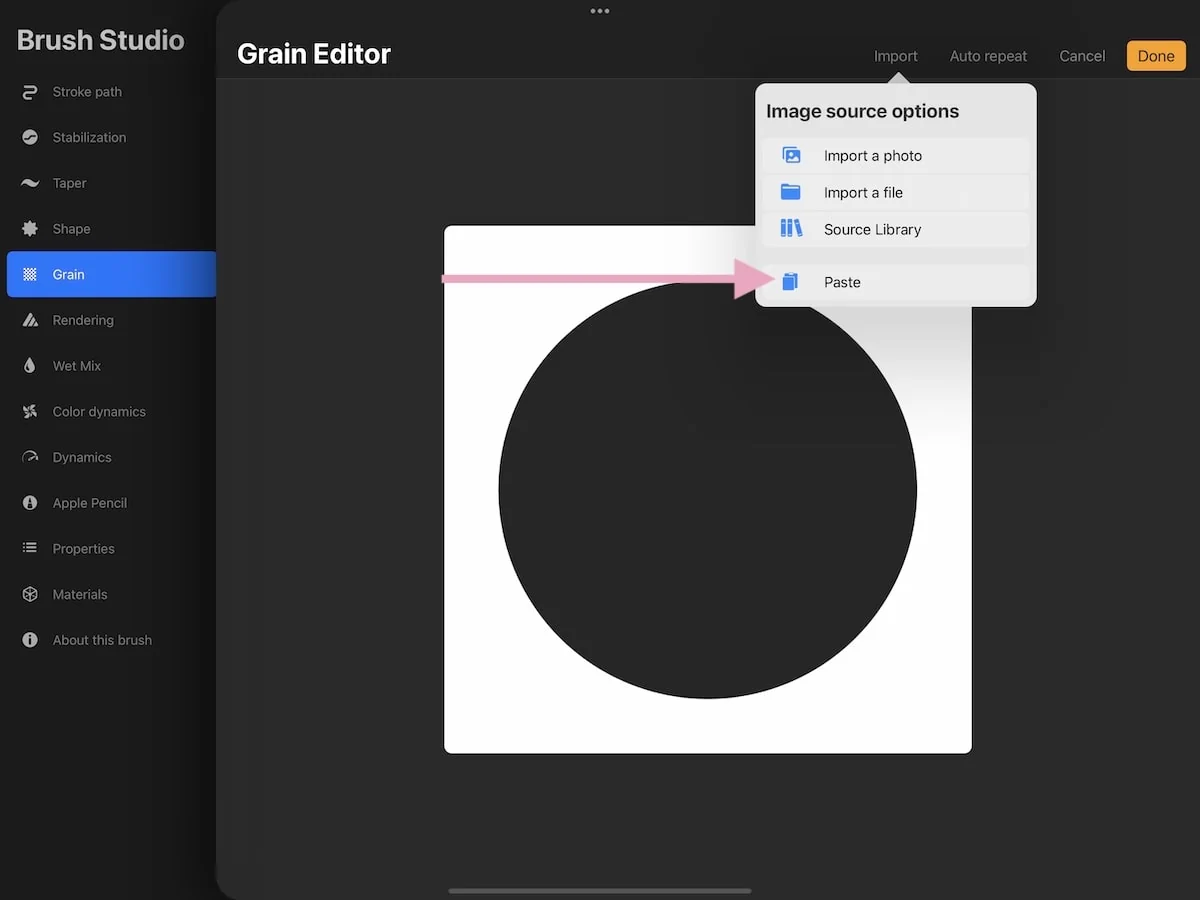
- In the grain menu, click edit.
- Click import.
- Select paste.
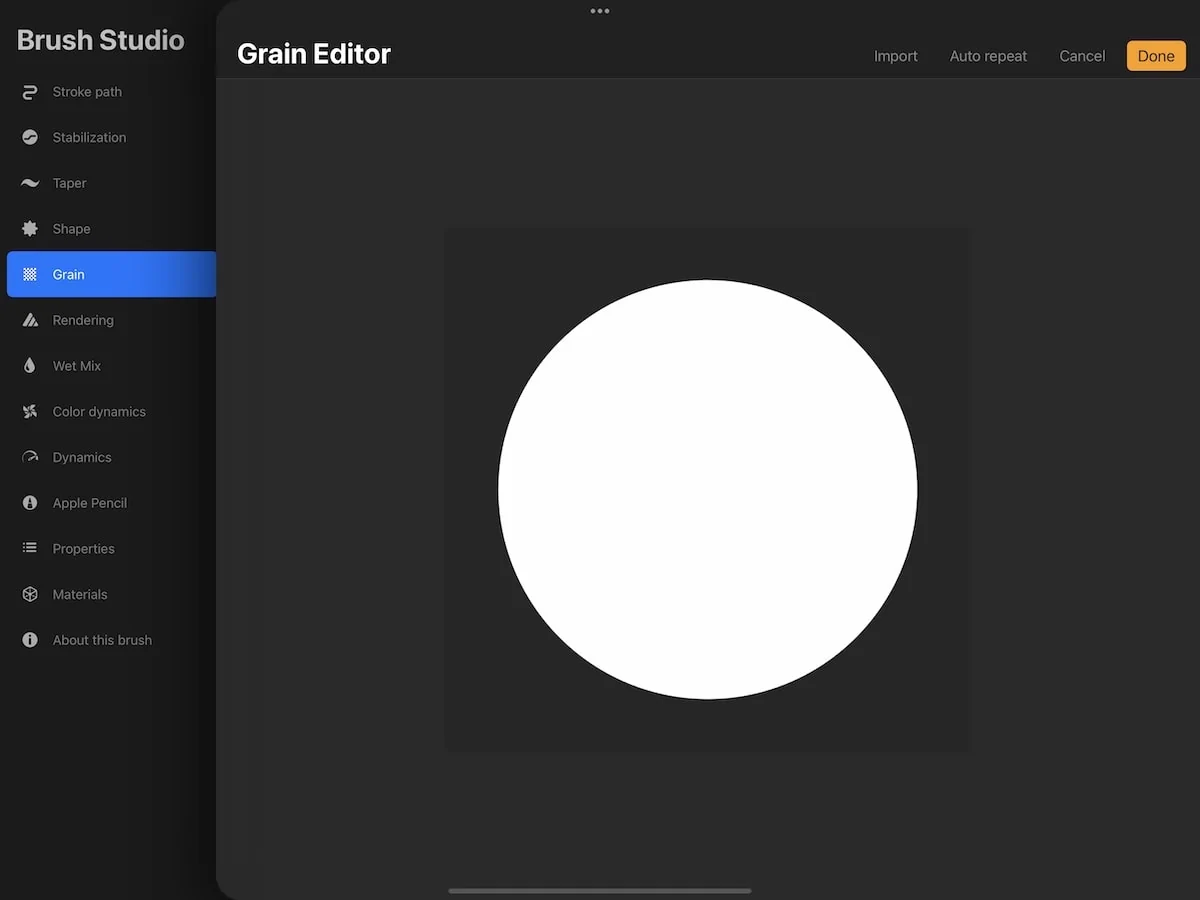
- Use 2 fingers to tap the circle to invert it.
- Click done to accept the changes.
From there you have a few options.
If you want to be able to draw over the pattern and have it layer with the shapes in the same place, choose “Texturized” in the grain menu.
Alternatively, you can let the pattern not line up and leave it set to “moving.” This also changes the size of the pattern, so keep that in mind.
If you want to change the size of the pattern, change the scale (in the Grain menu). Changing the brush size when drawing will not change this.
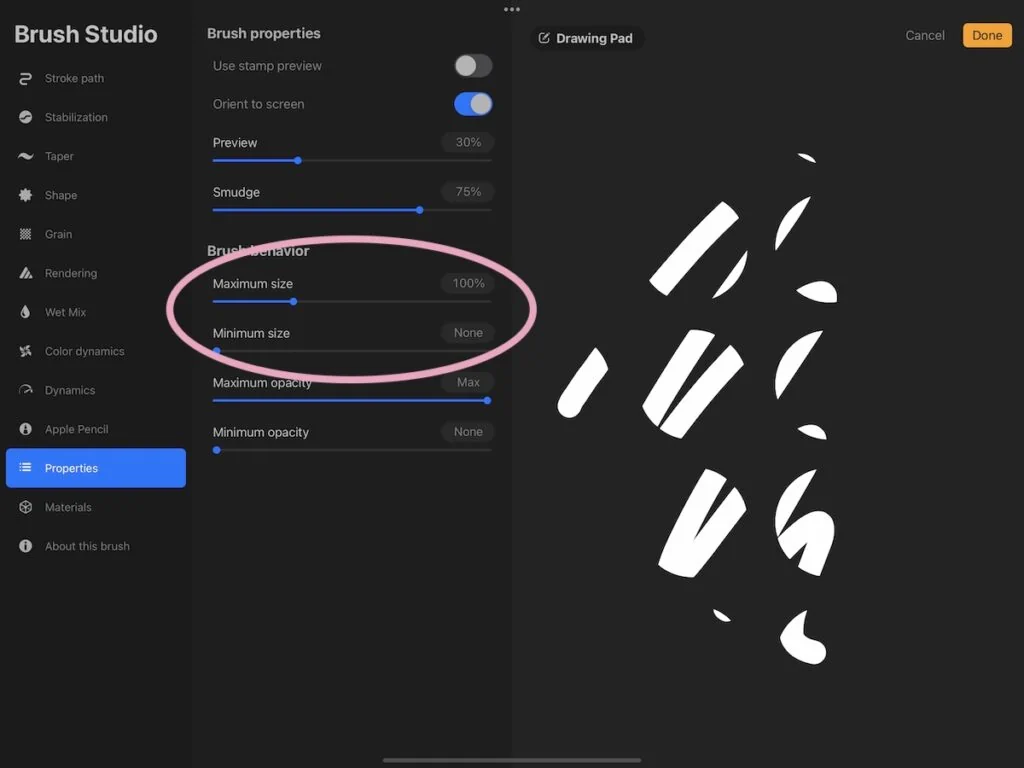
You can change the opacity setting for the Apple pencil. Changing it to none makes it completely opaque when you draw. This is how I prefer to make my brushes.

Under properties, you can change the minimum and maximum sizes. This does not change the pattern size, just how small or big the brush can get when you’re drawing.
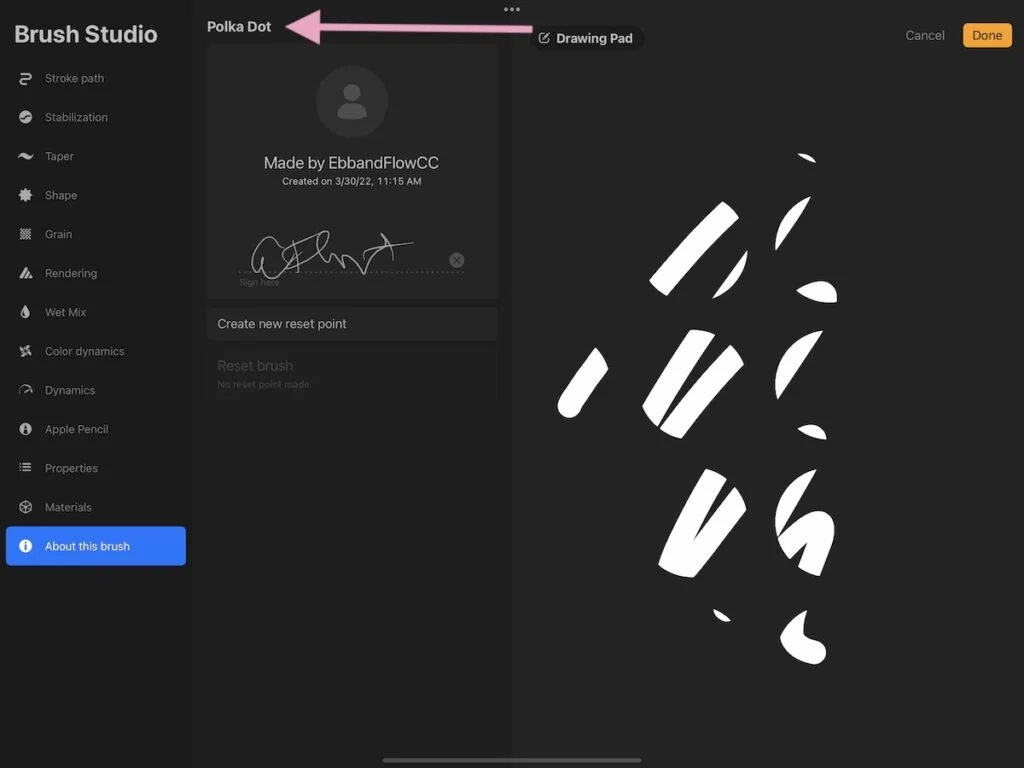
Under about this brush, you can name the brush and set a new reset point.
Pro tip: Once you create a brush that you like, duplicate it and simply paste in the new grain source. This saves so much time!
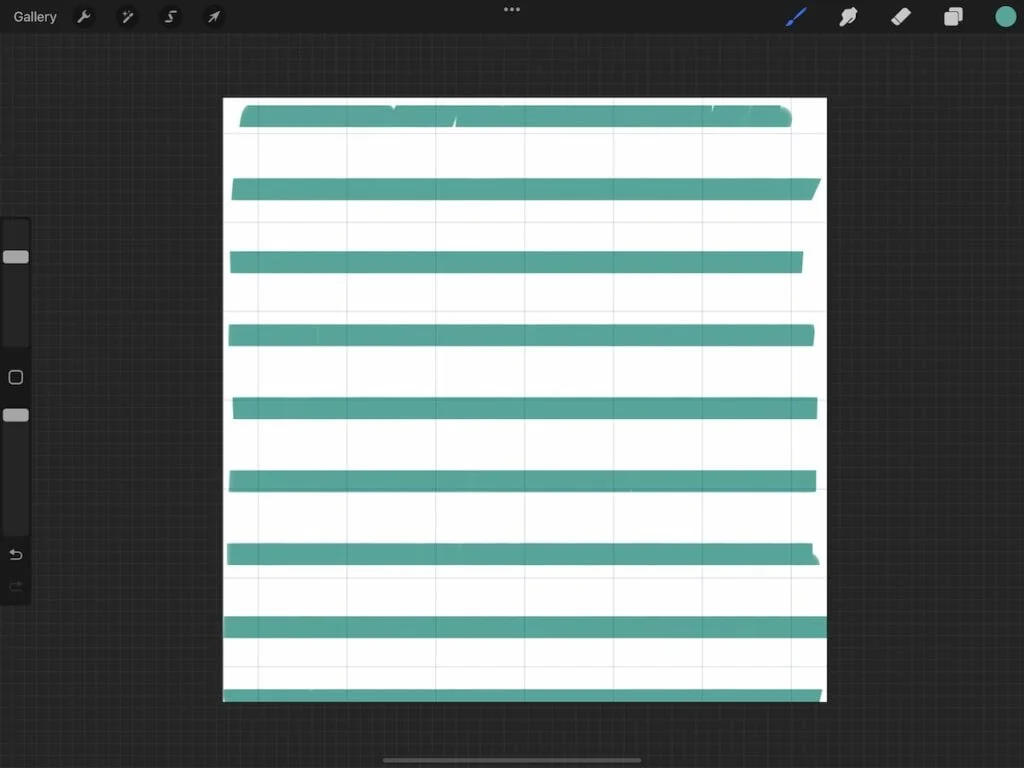
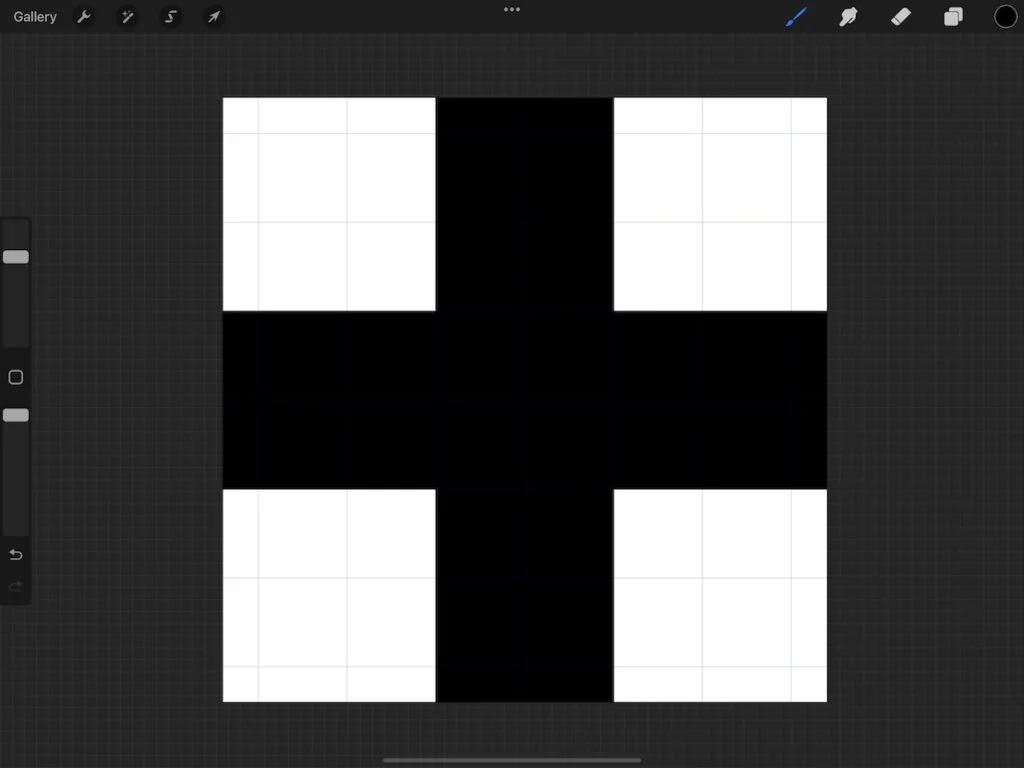
Simple Stripe Pattern Brush
To make a simple stripe brush, you create the canvas in the same way as before. We’re going to be making a horizontal stripe pattern, but this works for a vertical stripe as well.
Alternatively, you can create the horizontal brush and flip the pattern in the brush studio grain source.
You will also want to decrease the drawing guide to fit how thick you want your stripe. I’m making mine about 2 squares thick.
Creating the Stripe Pattern
This is the easiest way to make a precise rectangle.
A stripe is just a rectangle and rectangles are really easy to make.
- Fill the square with black.
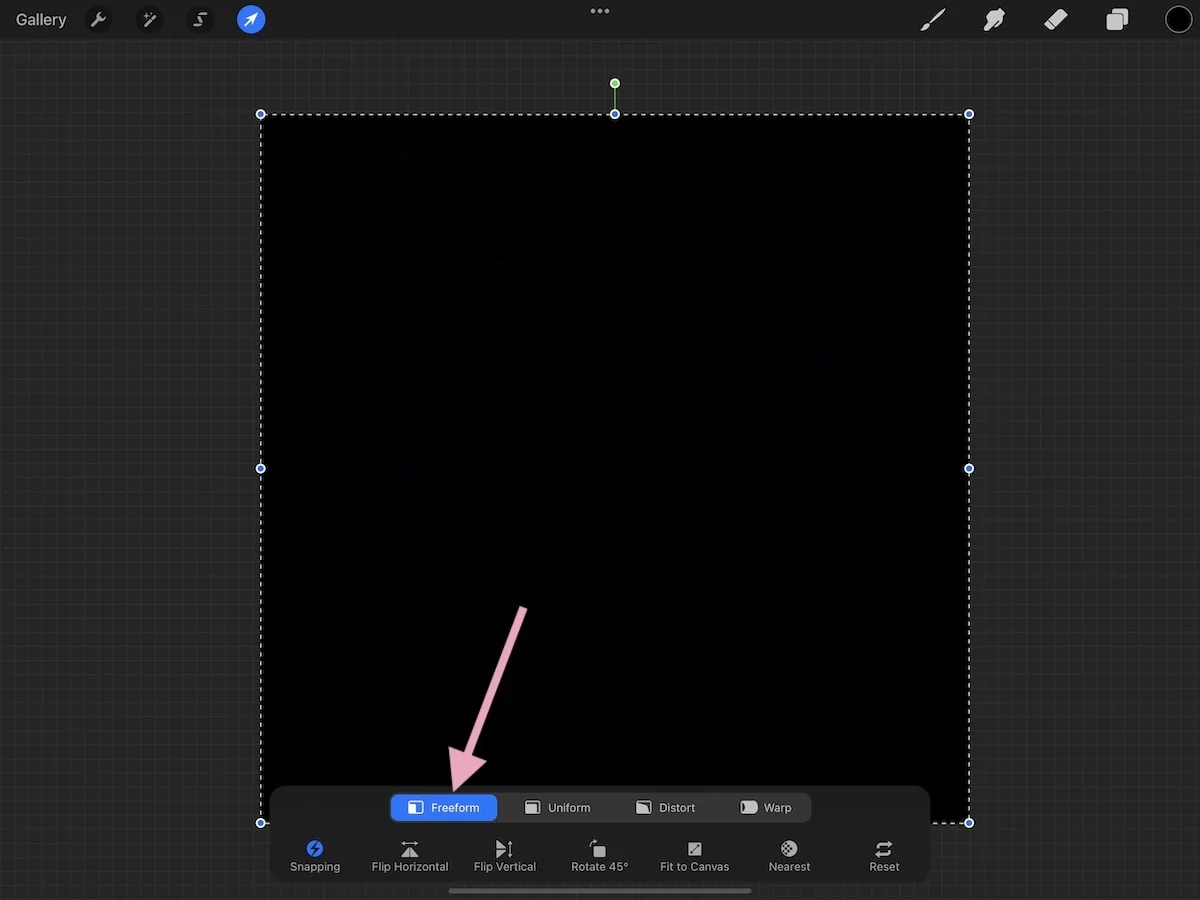
- Click the select arrow to select the entire shape.
- Select freeform.
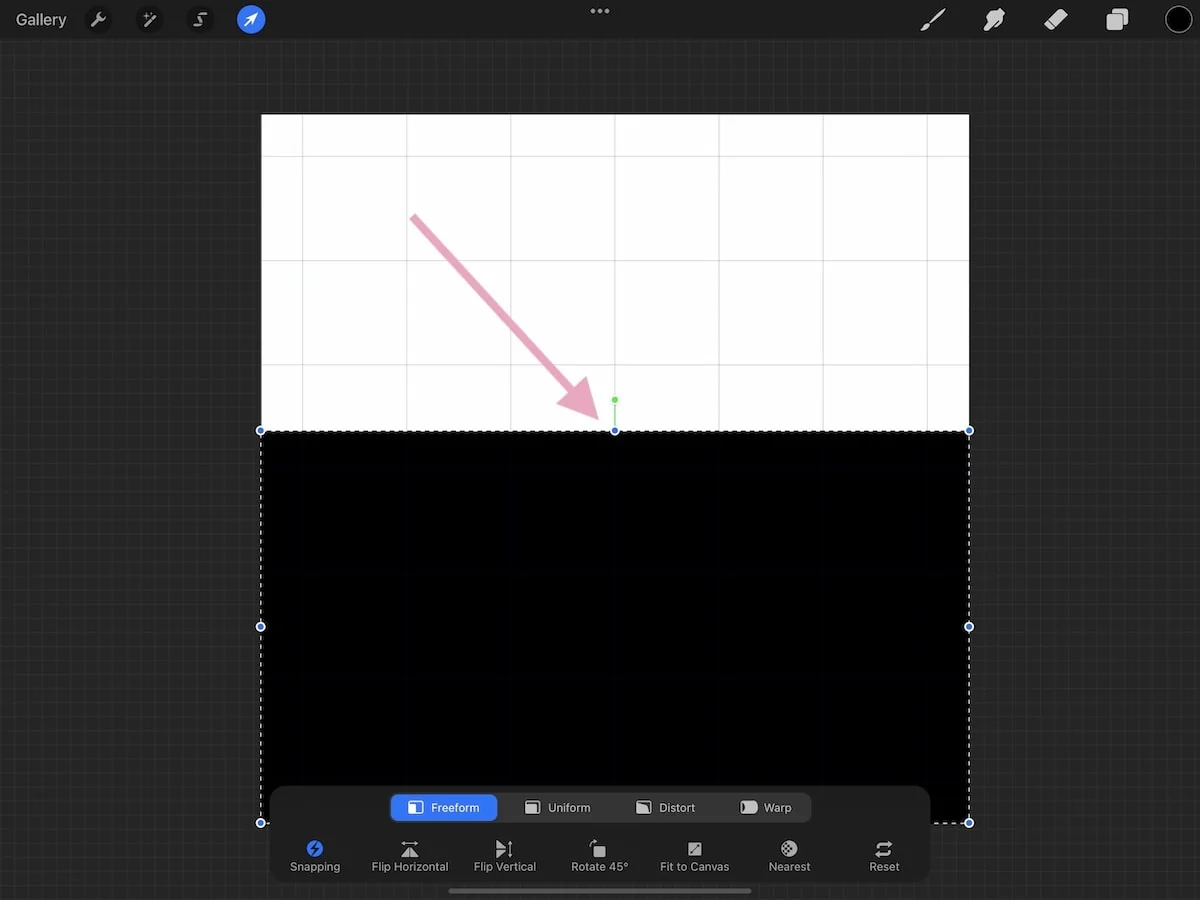
- Pull the top blue node down to make the shape shorter until your rectangle is the size you want.
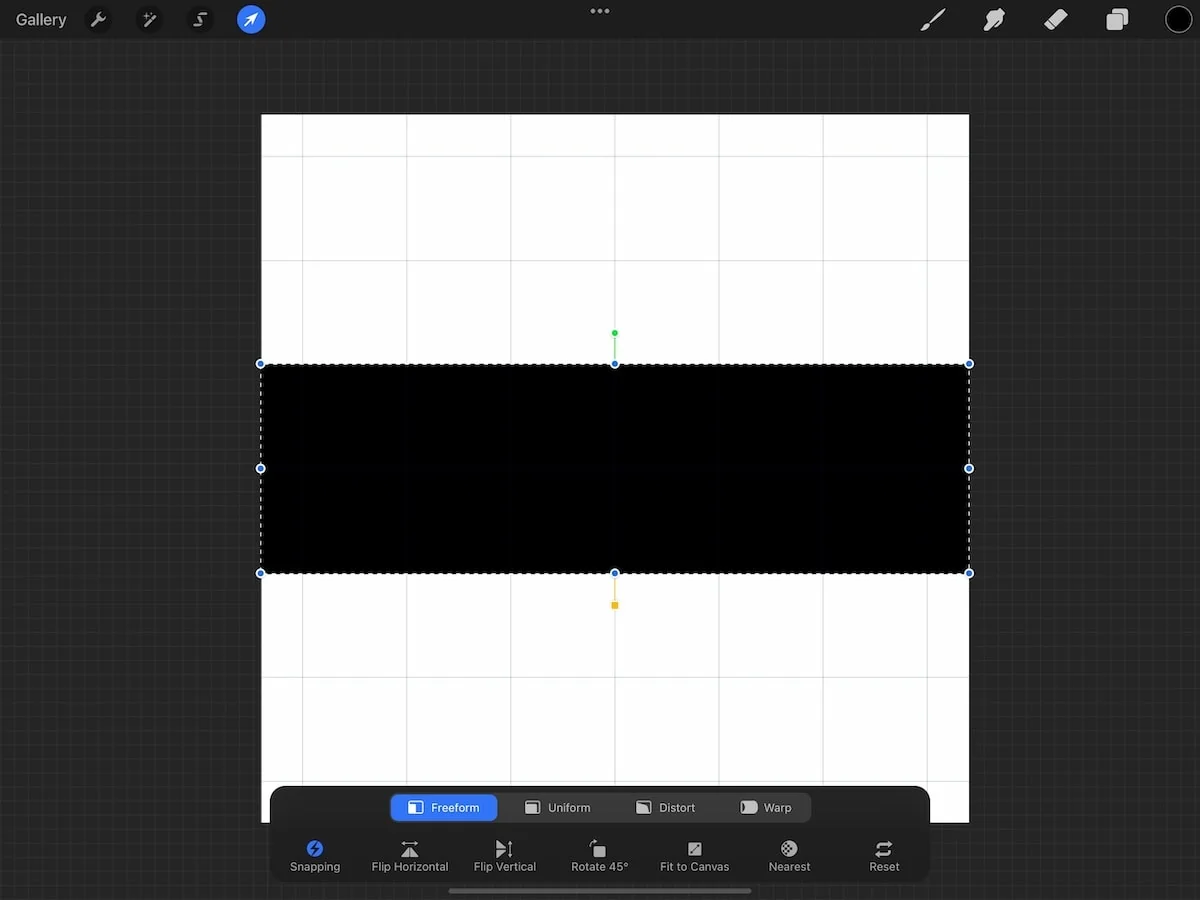
- Make sure that snapping and magnetics is on to move it to the middle.
- A thicker rectangle will result in less white space and a thinner rectangle will result in more white space.
- Create the brush as you did before.
- Test your brush and make adjustments as needed.
Keep in mind that patterns can only be one color. If you want more than one color, color on top in a different color.
Variations for Simple Pattern Brushes
These patterns aren’t that great on their own, but there are ways to make them more interesting.
I used my own brush sets for drawing these shapes. Most of the shapes use the monoline brush, but the hand-drawn shapes use my pencil brush.
Hand Drawn Circle
Drawing

Brush Pattern
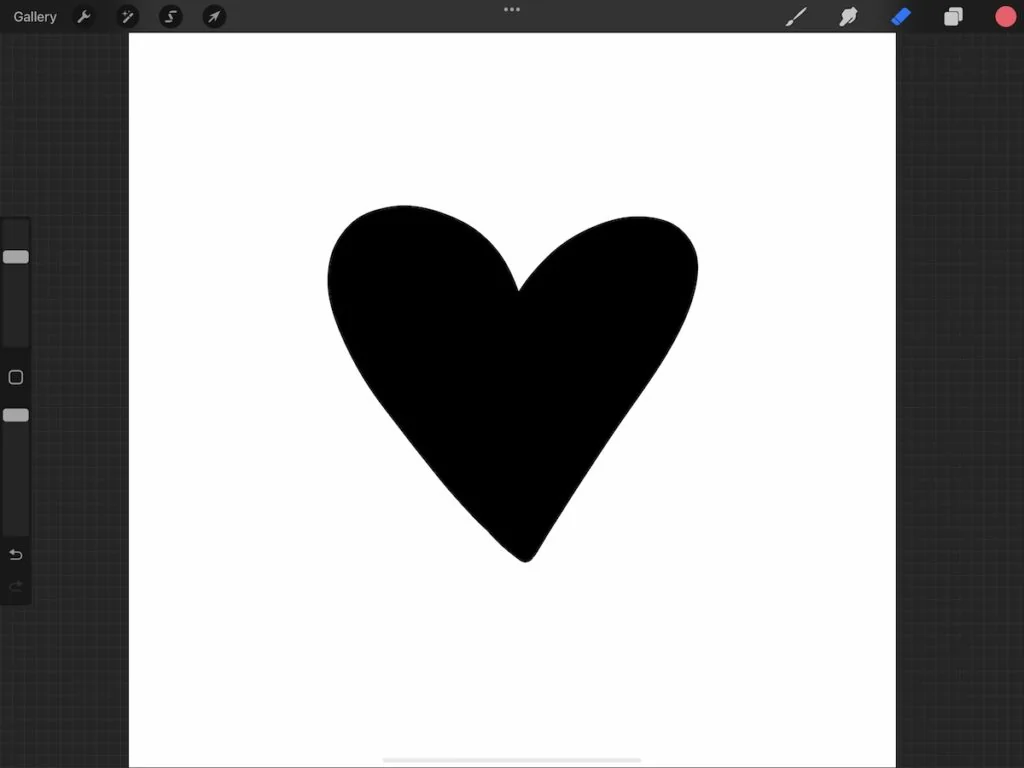
Using Other Shapes in the Center (Similar to Polka Dot)
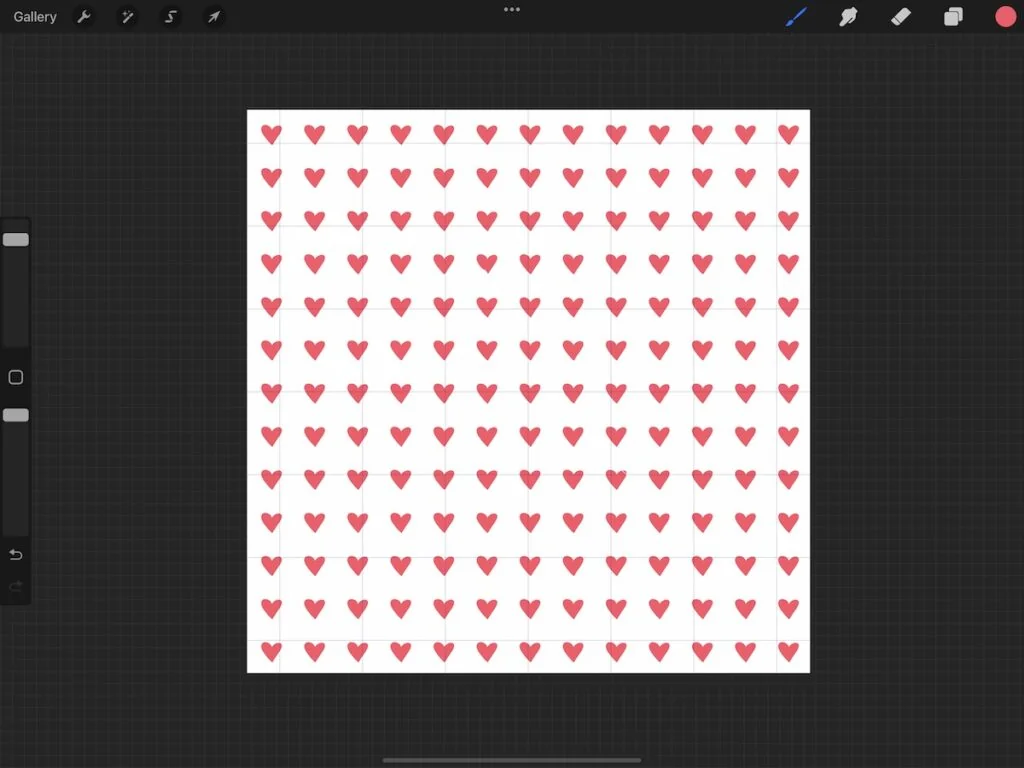
Heart Drawing
Brush Pattern
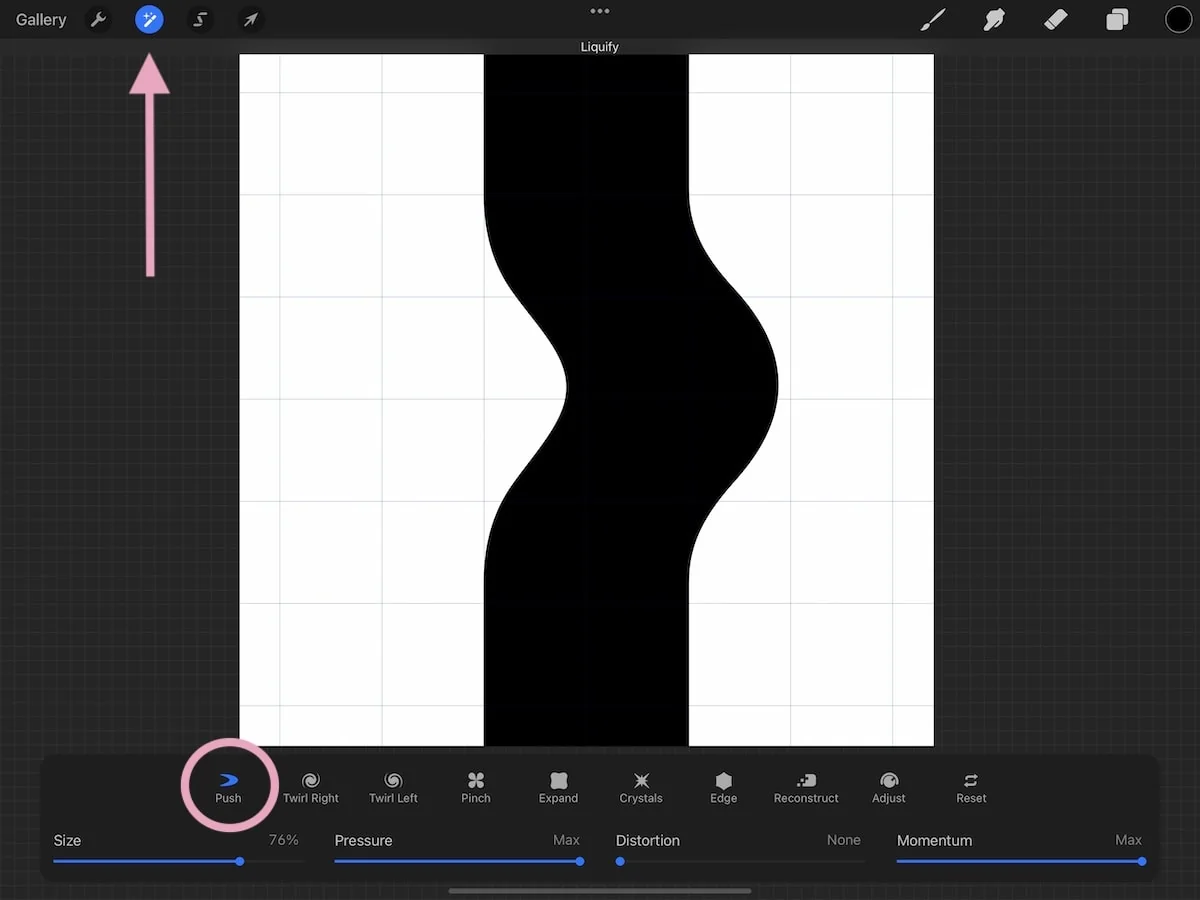
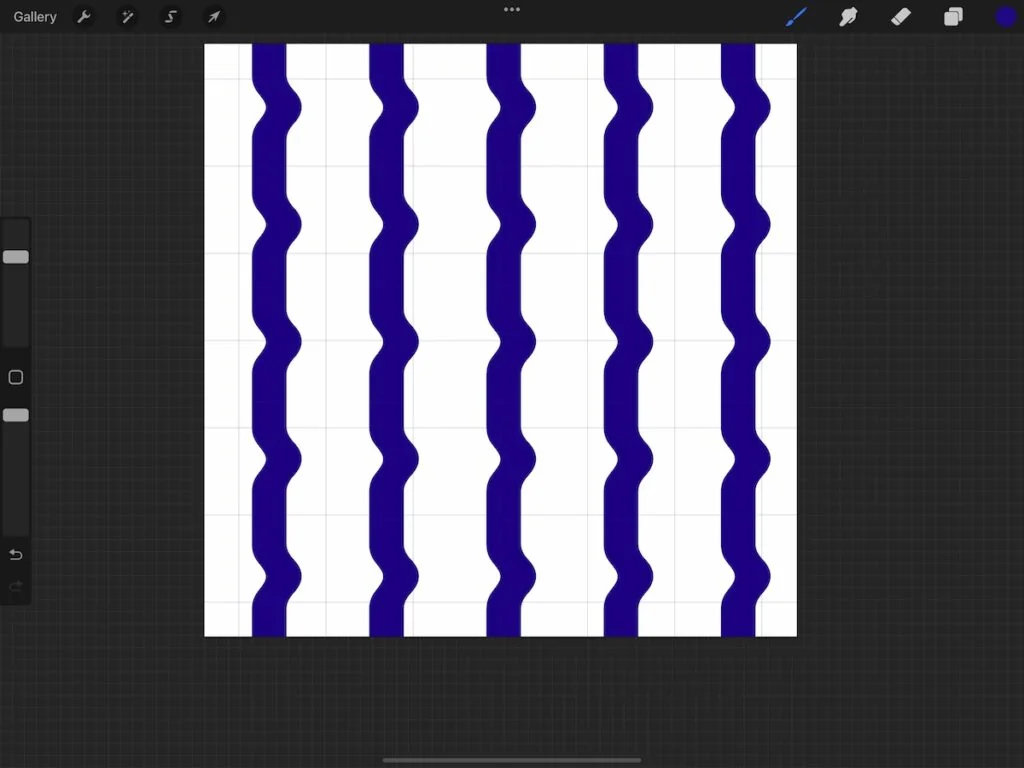
Using the Liquify Tool
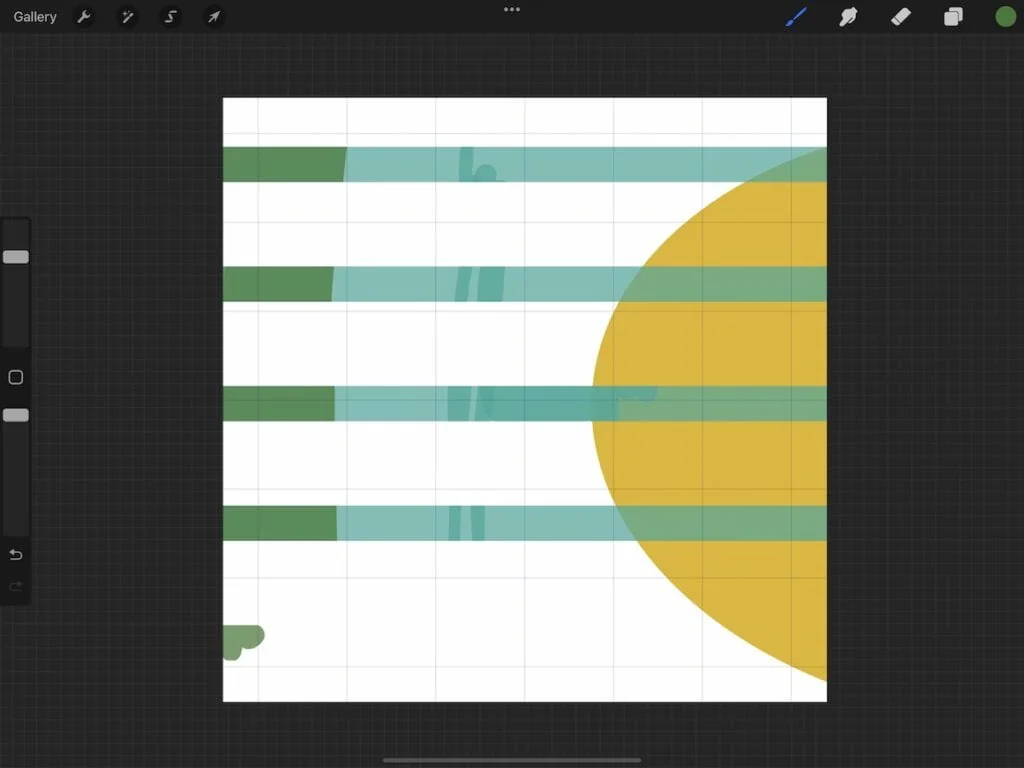
Wavy Stripe Pattern
This pattern starts with a vertical stripe.
- In the adjustments menu, choose liquify.
- Use the push tool to draw a line across the center of the line.
- Make sure that it doesn’t affect the lines at the top and bottom or touch the sides.
- Make the brush as usual.
Brush Pattern
Transparent Shape
Transparent Stripe
Fill the rectangle with gray.
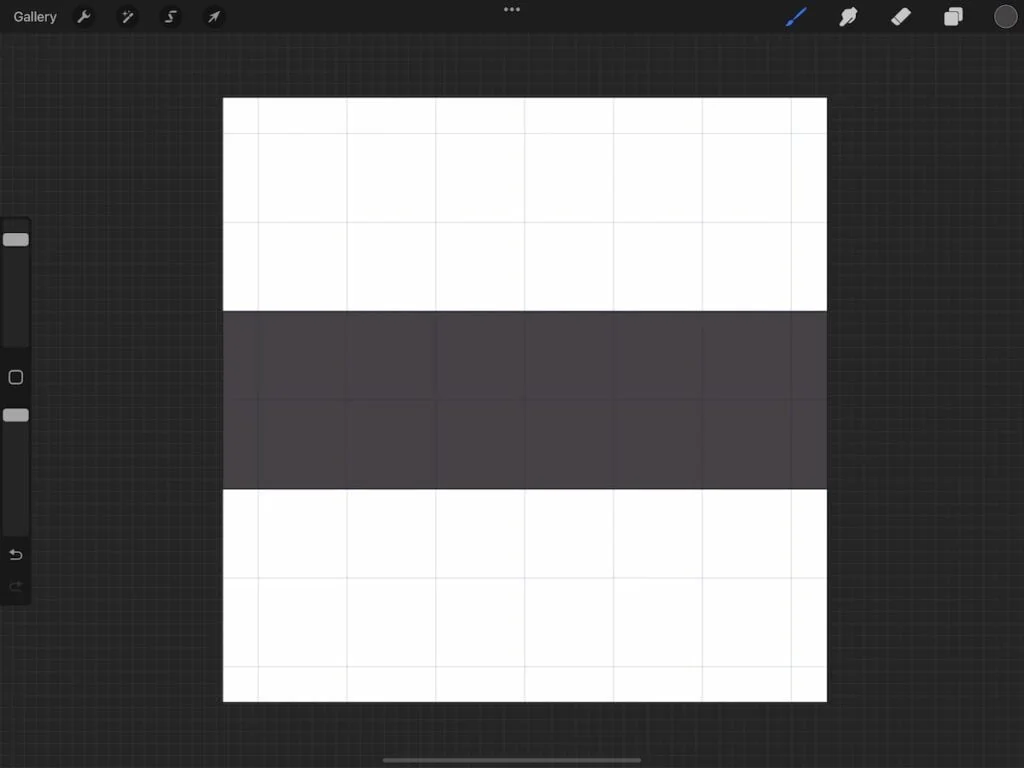
Brush Pattern
If you draw over a transparent pattern, you can see the new brush strokes.
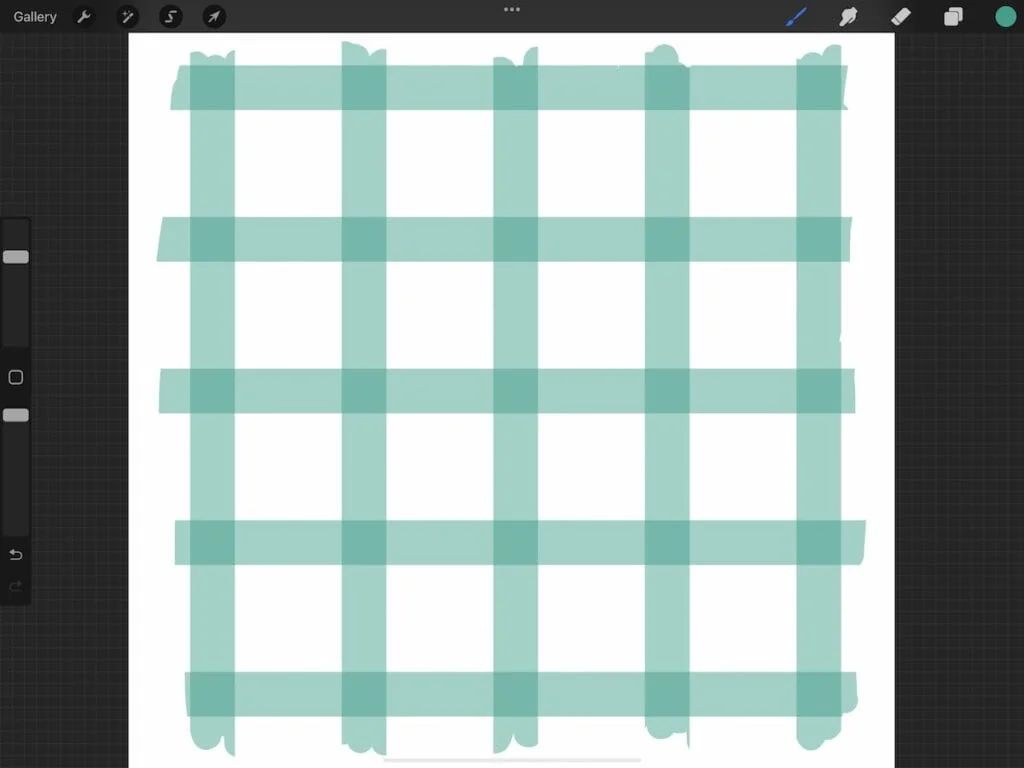
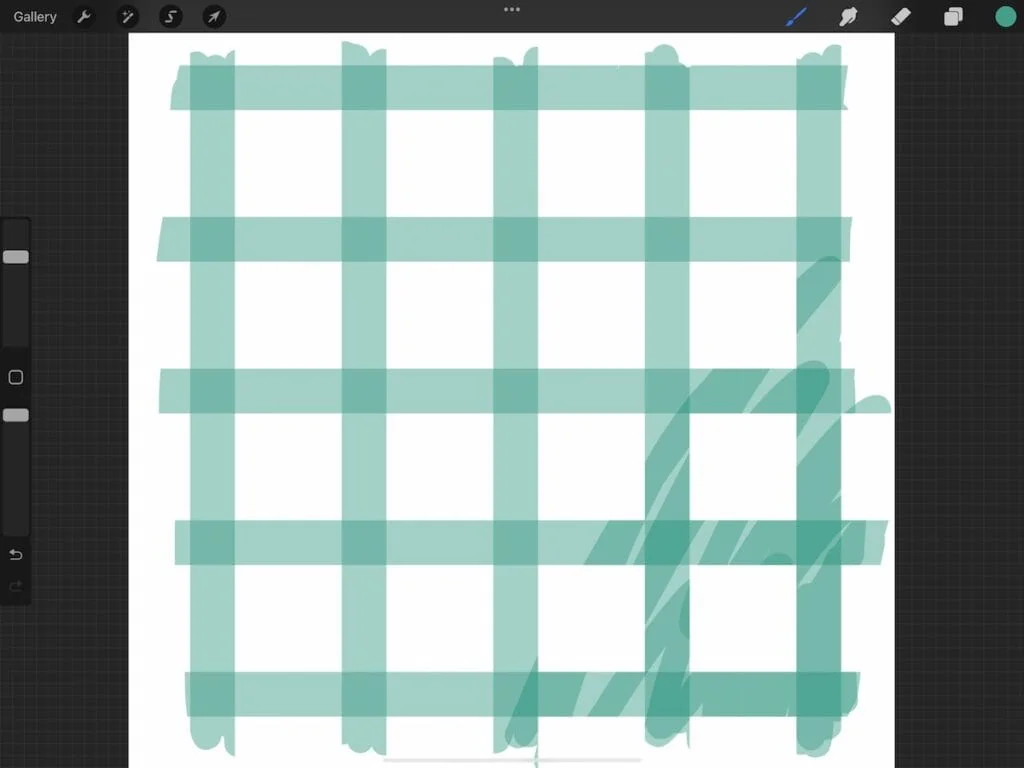
Combining Stripes to Make a Grid Pattern
Plaid Pattern
This pattern also uses stripes, one vertical and one horizontal.
Simply duplicate the stripe and rotate it.
Brush Pattern
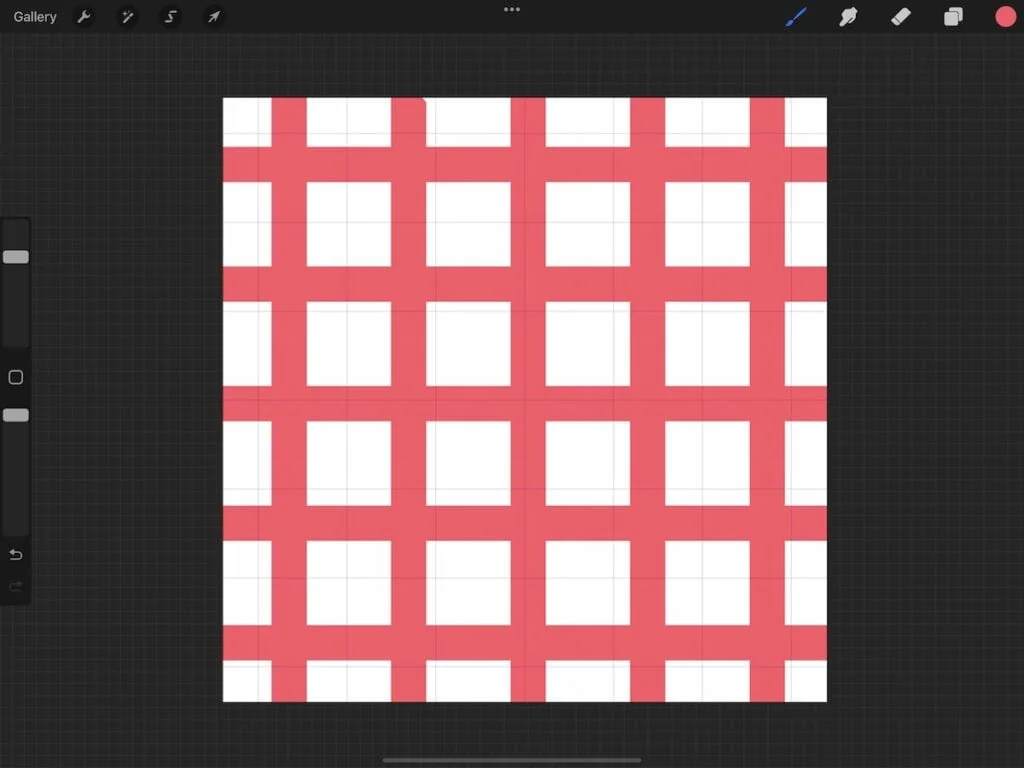
You can also play with this pattern to make a simple buffalo check.
Keep the rectangles in their own layers. Lower the opacity of each rectangle to 50%. Where the lines meet in the middle will create a darker spot.
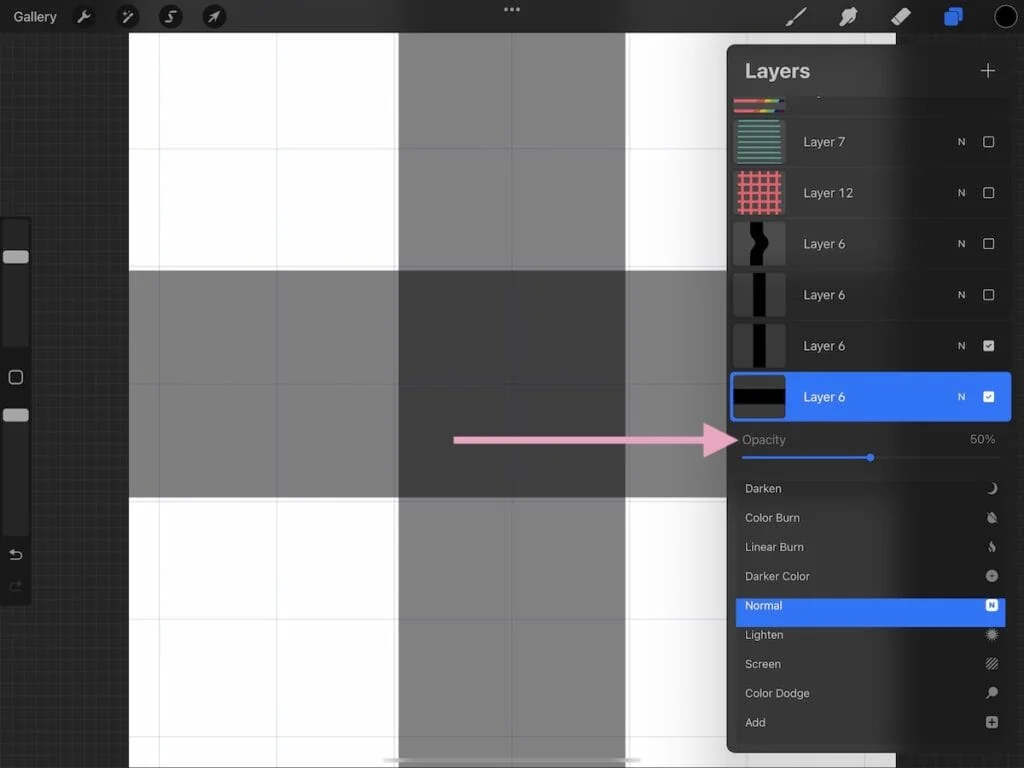
However, keep in mind that transparent brushes need to be used in one stroke or the pattern will layer and you will be able to see where the new strokes begin.
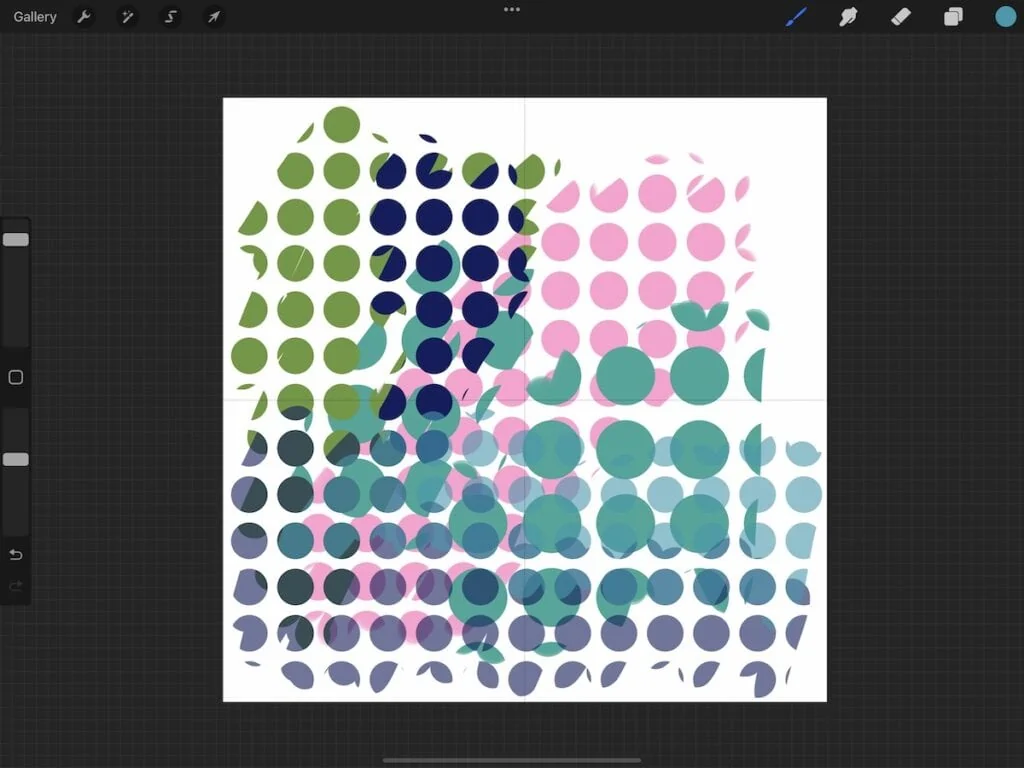
Combining Shapes
Turn on the layers for both the stripe and the circle to create this pattern.
Blobby Line
Brush Pattern
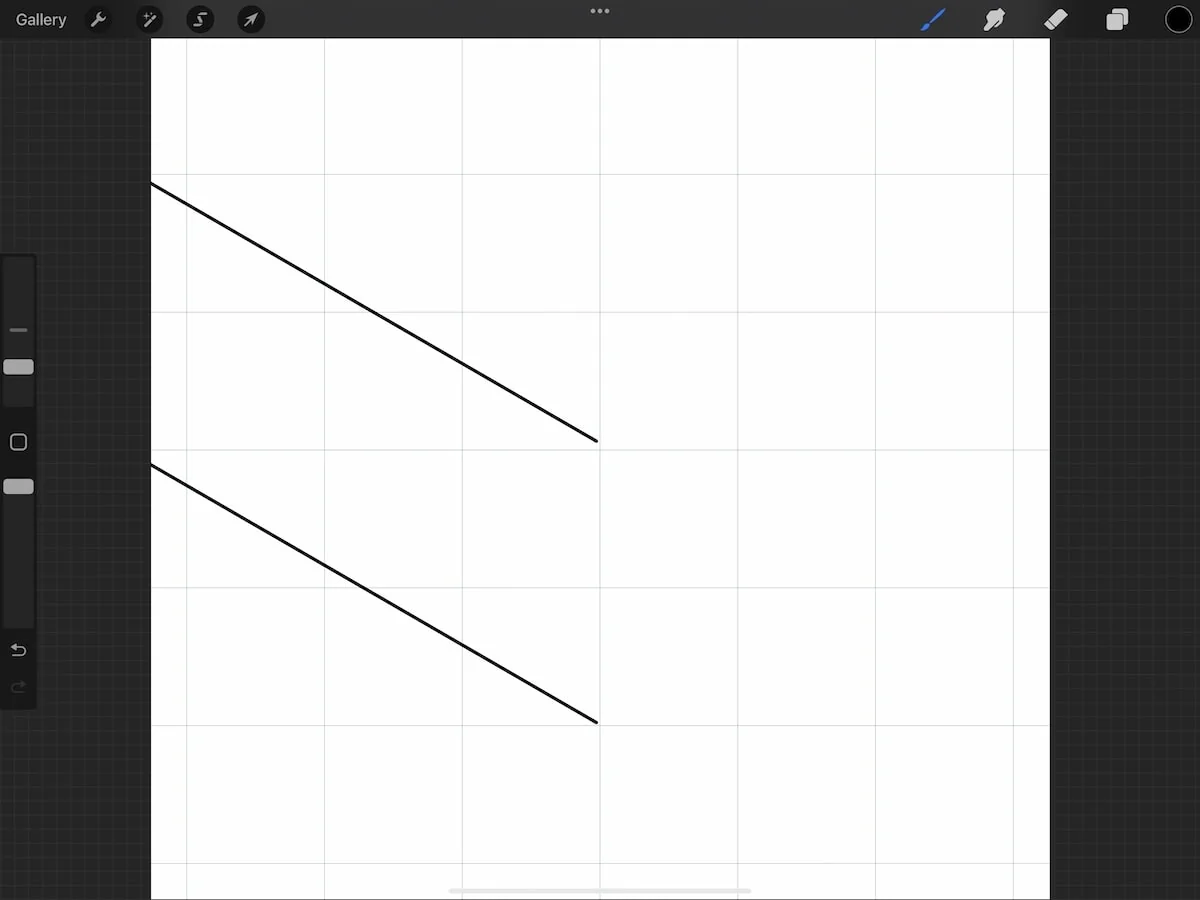
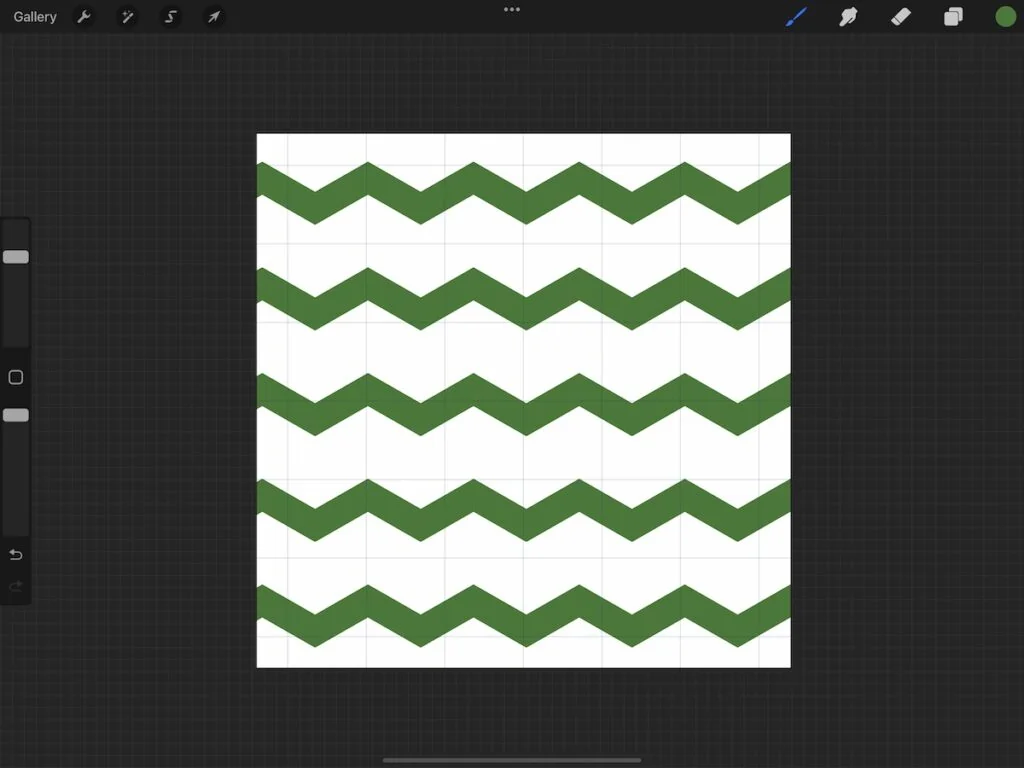
Zig-Zag Pattern
This one is a bit more complicated. Be sure to use the grid to make sure the pattern lines up on the sides.
- Turn on the drawing guide and adjust the grid size to fit your zig-zag pattern.
- Draw a diagonal line from one drawing guide line to the center of the screen.
- Edit the line if you need to.
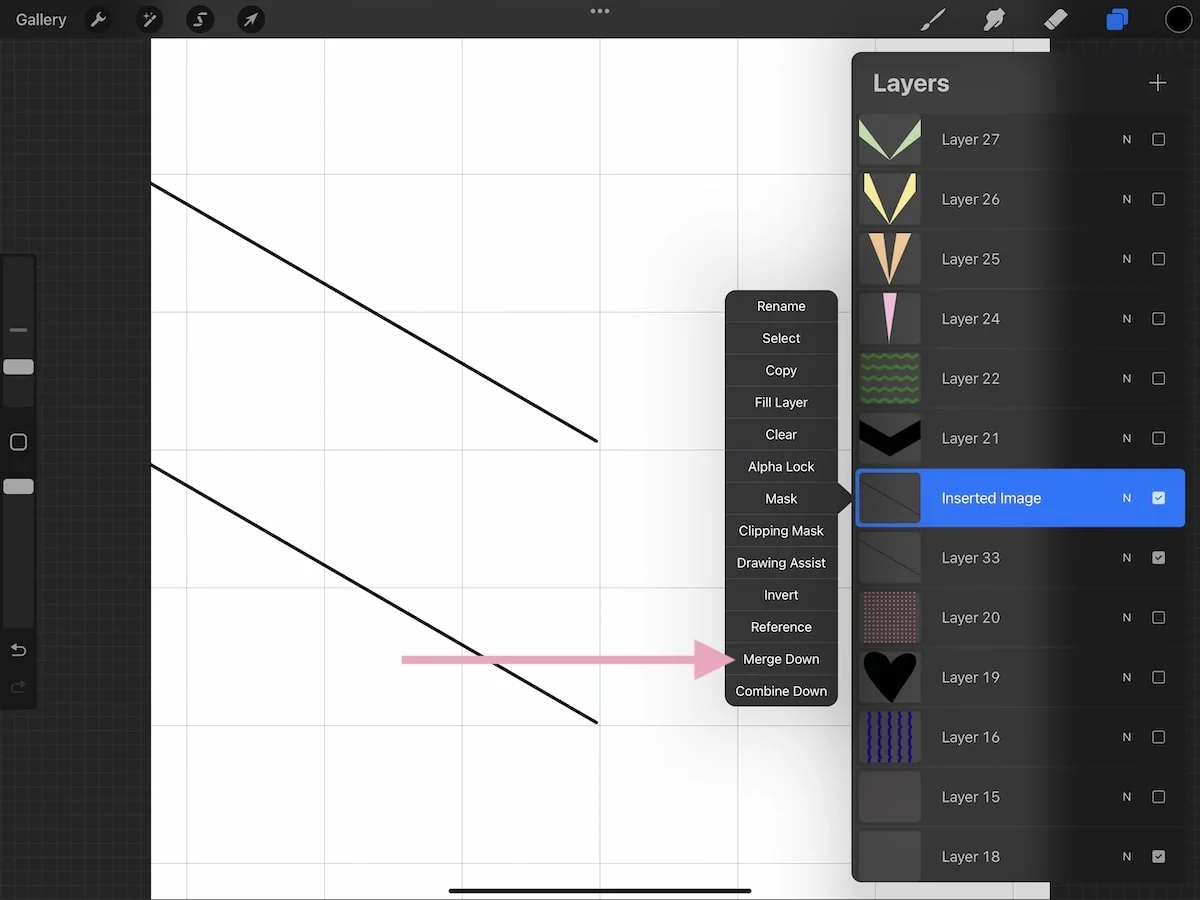
- Duplicate that line and move it 2 squares below the first line.
- Merge the layer down.
- Duplicate this layer.
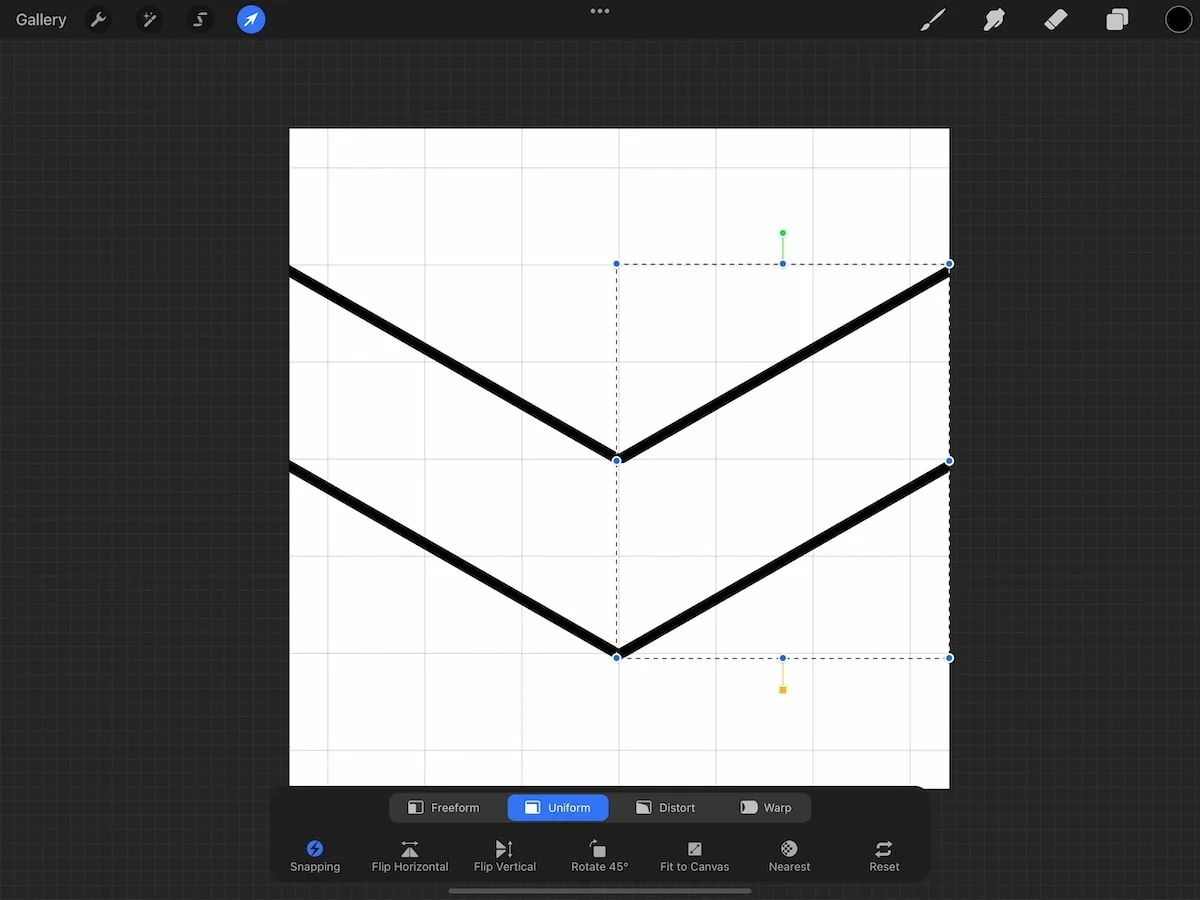
- Select it and use the flip horizontal tool to flip it.
- While it’s still selected, move it over.
- Merge the layer down.
- Fill the shape.
- Make sure that this new shape is centered.
- Fix any flaws where the center lines meet.
- Make the brush as usual.
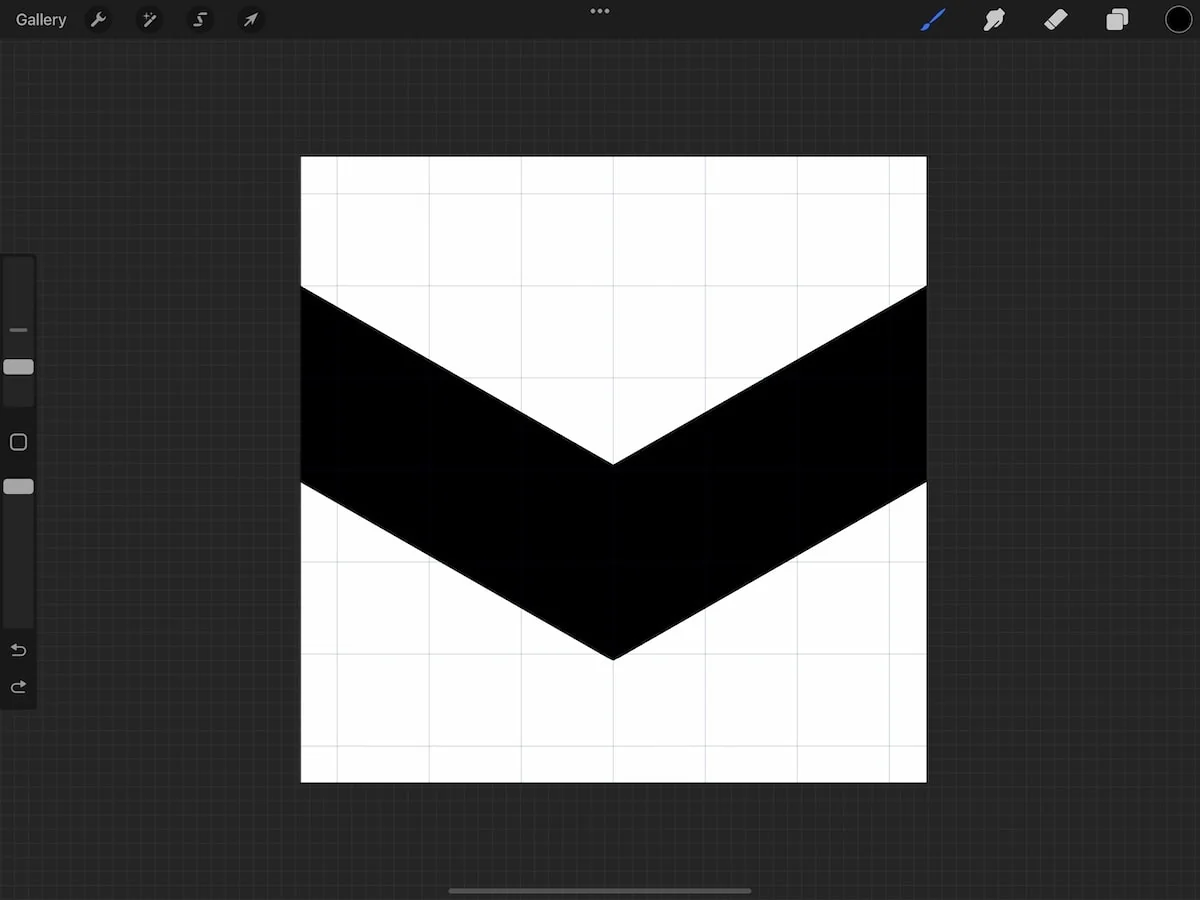
Brush Pattern
How to Use Pattern Brushes
Pattern brushes can only be used with one color at a time. However, you can create a gradient by creating brushes in gray so that they’re translucent. As you use the brush, change colors to color on top of the first.
Alternatively, you can lower the opacity of the brush.
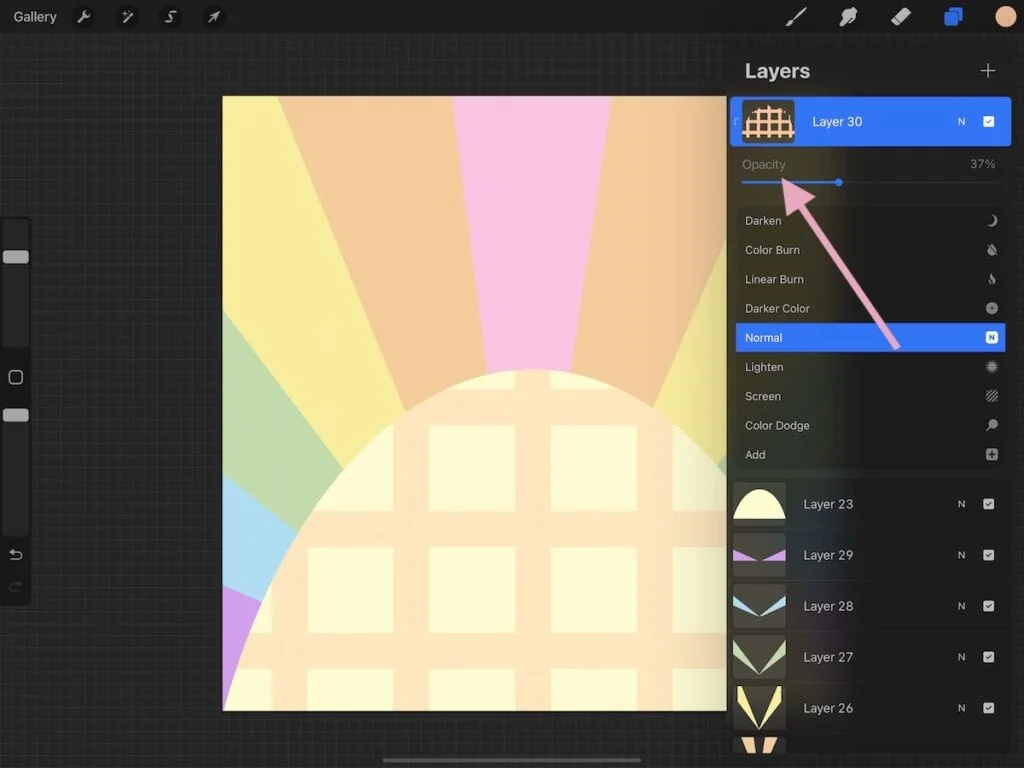
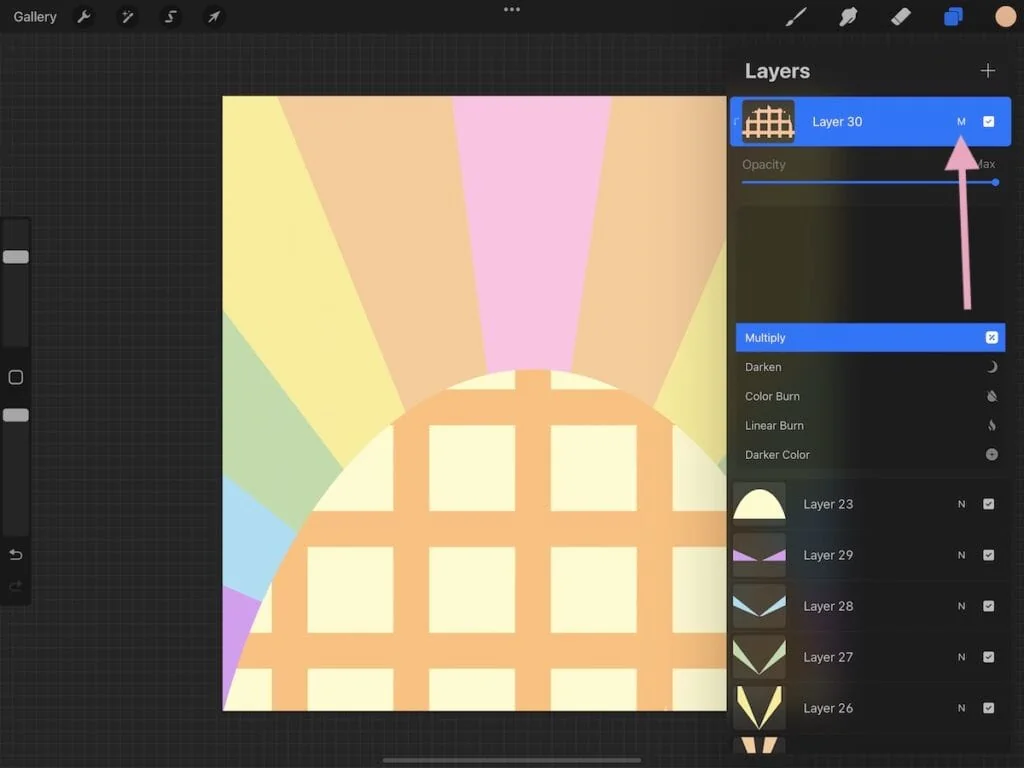
You can also play with blend modes as you work. Multiply is fun to work with.
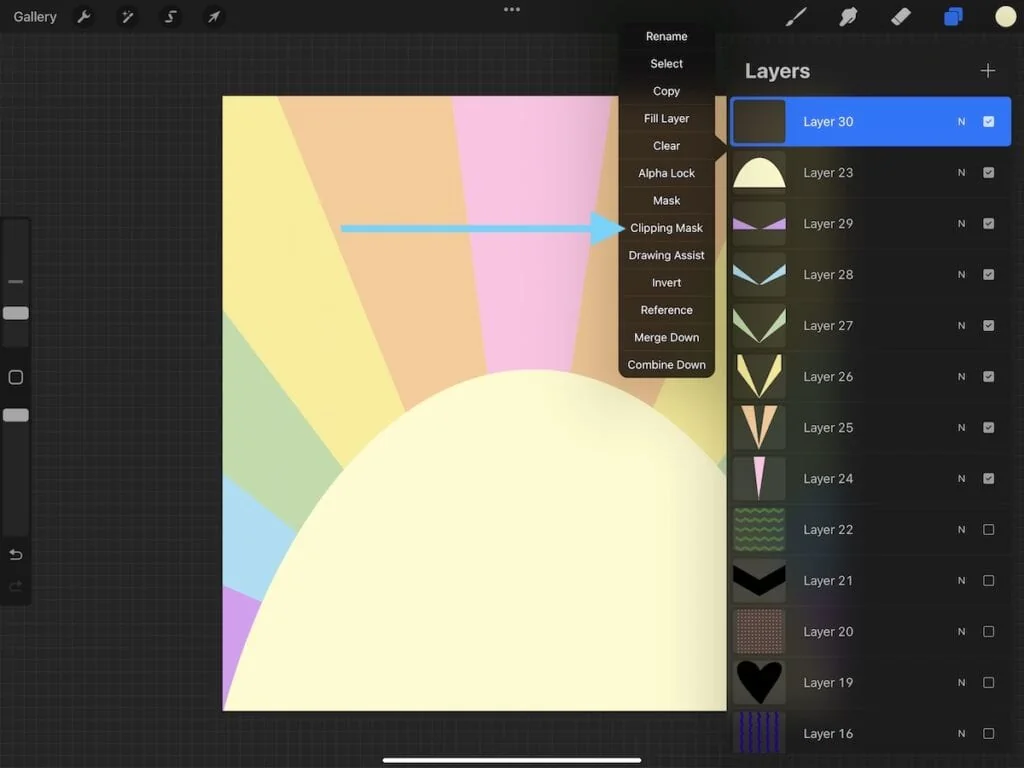
I prefer using clipping masks when working. Create a new layer, turn on the clipping mask option and draw over the area where you want the pattern.
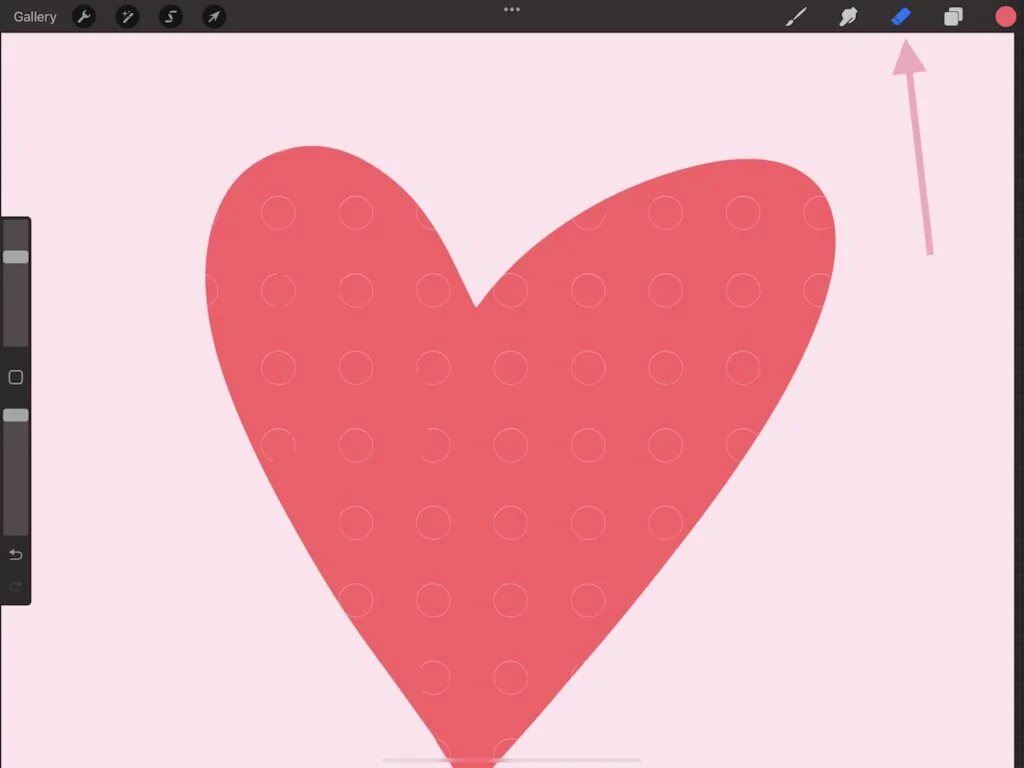
Another fun way to work with pattern brushes is to use them as erasers. This allows the background color to show through, and it almost creates a texture effect, depending on the pattern.
You Might Also Like:
- How to Make Inking Brushes for Procreate
- DIY Procreate Watercolor Brushes
- Square Monoline Brushes for Procreate
Get the Entire Set of Pattern Brushes for Just $4
Want all of these fun pattern brushes? They’re for sale in my Etsy shop.
Download Free Simple Pattern Brushes
Get a free mini set of pattern brushes. This set includes the polka dots, the stripes, and the grid pattern.
You can alter these brushes by changing the scale (in the grain menu) or rotating the stripe grain source.
These downloads are for personal use only. Please do not redistribute or sell.
Dear teachers and students: this download will not work if you try to access it when logged into your school email account. Try a personal email account instead.
Download the Pattern Brush Mini Set
Here’s how to install Procreate brushes.
Pin for Later!